Doc:2.6/Manual/Modeling/Objects/Duplication/DupliFaces
DupliFaces
Mode: Object mode
Panel: Object → Duplication
Duplication Faces or DupliFaces is the capability to replicate an object on each face of a parent object. One of the best ways to explain this is through an example illustration.
Example .blend file
Download the .blend file used for the examples on this page here
|
Basic usage
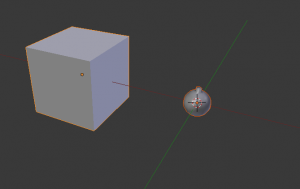
In this example we will use a UV sphere with an extruded "north pole" as our base object and cube as our parent mesh. To parent the sphere to the cube, in Object mode, first RMB ![]() select the sphere, then ⇧ ShiftRMB
select the sphere, then ⇧ ShiftRMB ![]() select the cube (order is very important here), and finally CtrlP to parent.
select the cube (order is very important here), and finally CtrlP to parent.
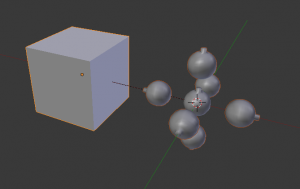
Next, in the Object context's Duplication panel, enable Faces. The sphere is duplicated one for each face of the cube.
Inherited properties
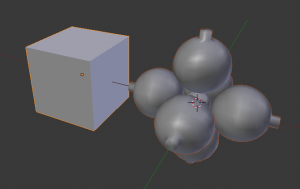
The location, orientation, and scale of the duplicated child(ren) matches that of the faces of the parent. So, if several objects are parented to the cube, they will all be duplicated once for each face on the cube. If the cube is subdivided (in Edit Mode W), every child will be duplicated for each face on the cube.
|
Both the parent object and original are displayed as editable "templates" in 3D view, but neither is rendered.
Scale
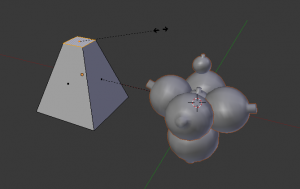
By enabling Scale for the parent object, the scale of the child objects will be adapted to the size of each face in the parent object.
Thus, by rescaling the face of the parent object, the size of the duplicated object will change accordingly.
Limitations / Considerations
The positioning of the duplicated geometry relative to the face is dependent upon the position of the child objects relative to the duplicator's origin. This can lead to some visual artifacts in the editor as the geometry of the original objects overlaps or intersects with the duplicates. One workaround is to move the origin of the duplicator mesh off of the plane of the faces.
If the geometry of the children is not symmetrical then the orientation of the face (as determined by the order of its vertices) could matter. As of 2.70 blender does not have tools which allow you to adjust the ordering of the vertices on a face.
However, there is a workflow that lets you control for this. Make a single square and enable the Duplication / Faces so you can see the duplicated geometry in your editor window. If the orientation is not what you want, rotate the face until it is how you want. Typically you want to do the rotation in Edit mode, not Object mode, but this is not a hard rule.
Once you have the orientation correct, Duplicate the face and move the duplicate where you want it. Repeat this process until you have enough faces. Since it is common for these faces to butt up against one another, your geometry will have lots of duplicate vertices. Use the Remove Doubles button in the Tools panel.
A short video illustrating this workflow.


