Doc:2.6/Manual/Animation/Basics/Markers
目次
[非表示]Markers
Markers are used to denote frames at which something significant happens – it could be that a character’s animation starts, the camera changes position, or a door opens, for example. Markers can be given names to make them more meaningful at a quick glance. They are available in many of Blender’s windows, under different forms. Unlike the keyframes, markers are always placed at a whole frame number, you cannot e.g. set a marker at “frame 2.5”.
Markers can be created and edited in all of the following editors (including their different modes):
- The Timeline.
- The Graph Editor.
- The The Dope Sheet.
- The NLA Editor.
- The Video Sequence Editor.
A marker created in one of these windows will also appear in all others that support them, including:
- The 3D View window.
There are Timeline Markers and Pose Markers in Blender.
Timeline Markers
Timeline markers are used to:
- Switching multiple cameras.
- Synchronization timing keyframes with markers.
Pose markers
Pose markers is another type of markers, that are specific to the armatures and are used to denote poses in the Action Editor mode of Dope Sheet editor.
Click the Action Editor menu Marker > Show Pose Markers to see pose markers.
With this enabled, creating markers will add only pose markers in the Action Editor!
With Show Pose Markers disabled, you may select and edit only timeline markers in the Action Editor.
Pose markers are related to the pose libraries, and are discussed in detail here.
Timeline markers is possible to convert to the Pose markers with Marker > Make Markers Local. Note that the original Timeline marker will be gone. If you want to keep it, make a duplicate before you convert.
Visualization
Standard
Most of the window types visualize markers the same way: as small triangles at their bottom, white if unselected or yellow if selected.
If they have a name, this is shown to their right, in white when the marker is selected. See (Timeline markers: small but useful).
3D View
The 3D View windows do not allow you to create/edit/remove markers, they just show their name between <> at there bottom left corner, near the active object’s name, when you are at their frame (see Marker in a 3D view).
Pose Markers
Pose markers show a diamond-shaped icon in Action Editor mode of Dope Sheet editor. See (Pose markers in the Action Editor mode of the Dope Sheet editor).
Creating and Editing Markers
Pose markers are created automatically at the moment adding new pose in Pose Library. Methods of the editing are same for both Timeline and Pose markers.
Creating Timeline Markers
Mode: all modes
Hotkey: M
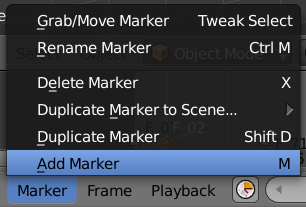
Menu: Marker » Add Marker
The simplest way to add a marker is to move to the frame where you would like it to appear, and press M.
Alternatively, you can press AltA (or the “playback” button of the Timeline window) to make the animation play, and then hit M at the appropriate points. This can be especially useful to mark the beats in some music.
Selecting Markers
Click RMB ![]() on the marker’s triangle to select it. Use ⇧ ShiftRMB
on the marker’s triangle to select it. Use ⇧ ShiftRMB ![]() to (de)select multiple markers.
to (de)select multiple markers.
To (de)select all markers use A. There are using border (de)select them with B.
The corresponding options are found in the Select menus of the editors, where the markes are using.
Naming Markers
Mode: all modes
Hotkey: CtrlM
Menu: Marker » Rename Marker
Having dozens of markers scattered throughout your scene’s time won’t help you much unless you know what they stand for. You can name a marker by selecting it, pressing CtrlM, typing the name, and pressing the OK button.
Moving Markers
Mode: all modes
Hotkey: G
Menu: Marker » Grab/Move Marker
Once you have one or more markers selected, hit G to move them, and confirm the move with LMB ![]() or ↵ Enter (as usual, cancel the move with RMB
or ↵ Enter (as usual, cancel the move with RMB ![]() , or Esc).
, or Esc).
By default, you grab the markers in one-frame steps, but if you hold Ctrl, the markers will move in steps corresponding (defined by Frame Rate option in Dimensions panel of Render context) to one second – so if you have set your scene to 25 fps, the markers will move in twenty-five-frames steps.
Duplicating Markers
Mode: all modes
Hotkey: ⇧ ShiftD
Menu: Marker » Duplicate Marker
You can duplicate the selected markers by hitting ⇧ ShiftD. Once duplicated, the new ones are automatically placed in grab mode, so you can move them where (or rather when) you want.
Deleting Markers
Mode: all modes
Hotkey: X
Menu: Marker » Delete Marker
To delete the selected marker(s) simply press X and confirm the pop-up message with LMB ![]() .
.
Using Timeline Markers for switching Multiple Cameras
To change cameras mid-animation, you need to use markers.
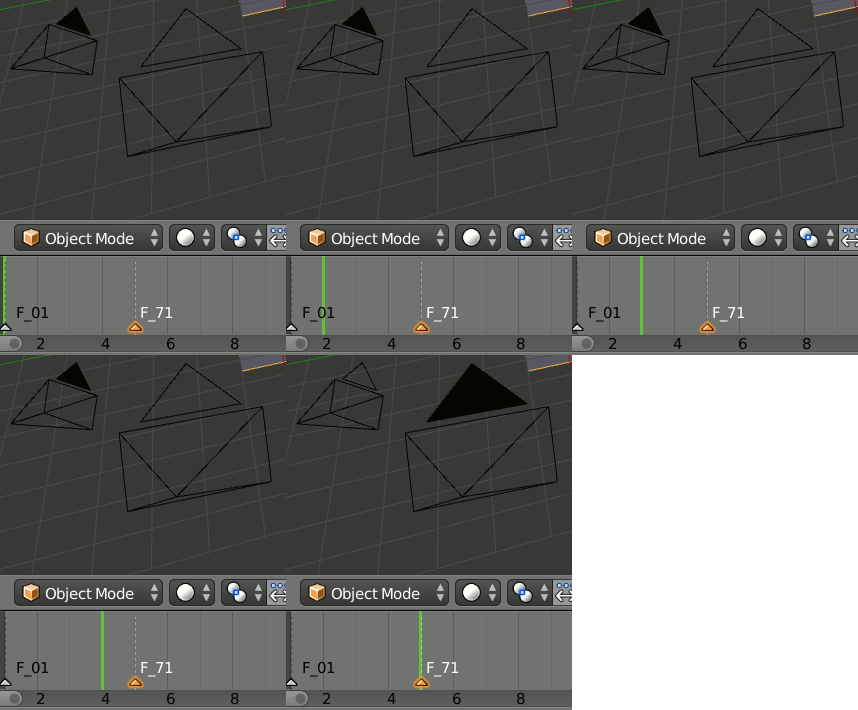
Note that markers behave like keyframes, so you will need at least two markers with two cameras bound to them to have any camera switching.
For quickly "bind camera to marker" by following the step-by-step below:
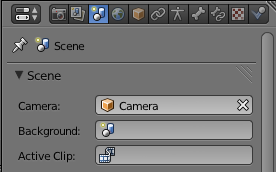
- Select your camera (to be binded to timeline) in the 3D view with RMB
 -click or with Object Data context for camera in Properties window.
- Hover over the timeline (make sure mouse is within Timeline panel), jump to a specific frame, create a marker there by hitting M on the keyboard or select corresponding item - Marker » Add Marker.
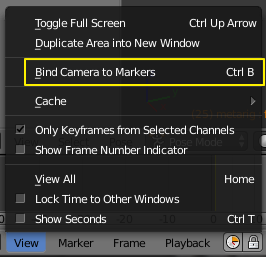
- Now, while still hovering on the timeline, press CtrlB to Bind Camera to Markers or select corresponding item - View » Bind Camera to Markers.
- Continue with next camera.
- Now, if you jump to inside camera (by hitting numpad Zero), it will switch camera specified by marker as you scrub along the timeline.
Synchronization timing keyframes with markers
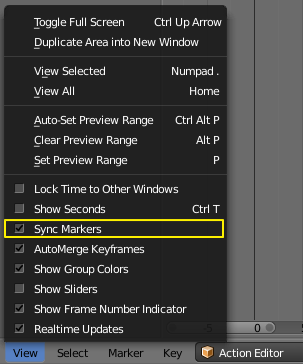
Anothe the usage Timeline markers is synchronization timing keyframes with markers in the Dope Sheet and Video Sequence Editor (the option Sync Markers in View menu). This allows to tape editing or final cut yours actions, sequences, scenes, movie and audio clips.


