Doc:2.6/Manual/Extensions/Python/Console
The Console Editor Type
The interactive console in Blender 2.5 has been improved. Auto Complete, Python Reporting & more features have been added. Testing one-liners in the console is a good way to learn the Python API.
Accessing Built-in Python Console
Launching the Console using mouse.
By pressing ⇧ ShiftF4 in any Blender Editor Type (3D View, Timeline etc.,) you can change it to a Console Editor.
From the screen shot above, you will notice that apart from the usual hot keys that are used to navigate, by pressing CtrlSpace you can enable Auto-complete feature.
Since Blender 2.5 uses Python 3.x, the interpreter is loaded and is ready to accept commands at the prompt >>>
First look at the Console Environment
To check what is loaded into the interpreter environment, type dir() at the prompt and execute it.
Following is a quick overview of the output
- 'C'
- Quick access to bpy.context
- 'D'
- Quick access to bpy.data
- '__builtins__'
- Python Built-ins (Classes, functions, variables)
- 'bpy'
- Top level Blender Python API module.
Auto Completion at work
Now, type bpy. and then press CtrlSpace and you will see the Console auto-complete feature in action.
You will notice that a list of sub-modules inside of bpy appear. These modules encapsulate all that we can do with Blender Python API and are very powerful tools.
Lets list all the contents of bpy.app module.
Notice the green output above the prompt where you enabled auto-completion. What you see is the result of auto completion listing. In the above listing all are module attribute names, but if you see any name end with '(', then that is a function.
We will make use of this a lot to help our learning the API faster. Now that you got a hang of this, lets proceed to investigate some of modules in bpy.
Before tinkering with the modules..
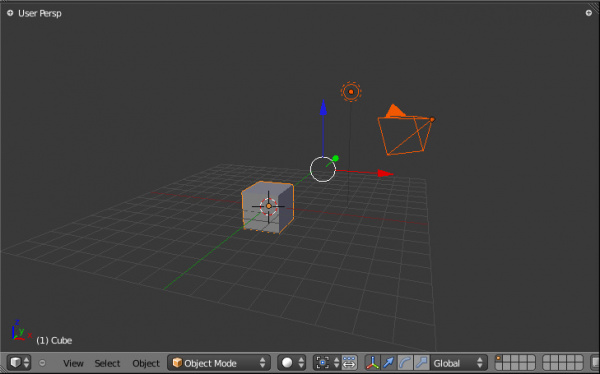
If you look at the 3D Viewport in the default Blender scene, you will notice 3 objects: Cube, Lamp and Camera.
- All objects exist in a context and there can be various modes under which they are operated upon.
- At any instance, only one object is active and there can be more than one selected objects.
- All objects are data in the Blender file.
- There are operators/functions that create and modify these objects.
For all the scenarios listed above (not all were listed, mind you..) the bpy module provides functionality to access and modify data.
Examples
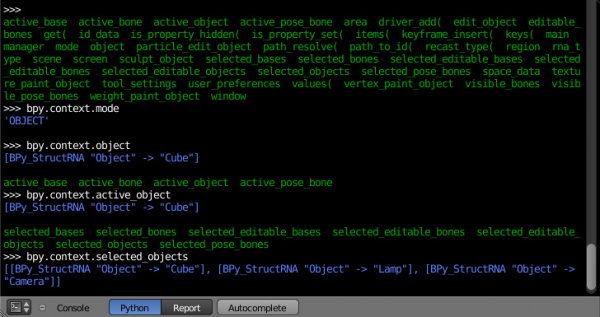
bpy.context
- Note
- For the commands below to show the proper output, make sure you have selected object(s) in the 3D view.
Try it out!
- bpy.context.mode
- Will print the current 3D View mode (Object, Edit, Sculpt etc.,)
- bpy.context.object or bpy.context.active_object
- Will give access to the active object in the 3D View
>>> bpy.context.object.location.x = 1
Change x location to a value of 1
>>> bpy.context.object.location.x += 0.5
Move object from previous x location by 0.5 unit
>>> bpy.context.object.location = [1, 2, 3]
Changes x, y, z location
>>> bpy.context.object.location.xyz = [1, 2, 3]
Same as above
>>> type(bpy.context.object.location)
Data type of objects location
>>> dir(bpy.context.object.location)
Now that is a lot of data that you have access to
- bpy.context.selected_objects
- Will give access to a list of all selected objects.
 >>> bpy.context.selected_objects then press {{Shortcut|Ctrl|Space}}

 >>> bpy.context.selected_objects[0]
Prints out name of first object in the list
>>> [object for object in bpy.context.selected_objects if object != bpy.context.object]
Complex one.. But this prints a list of objects not including the active object
bpy.data
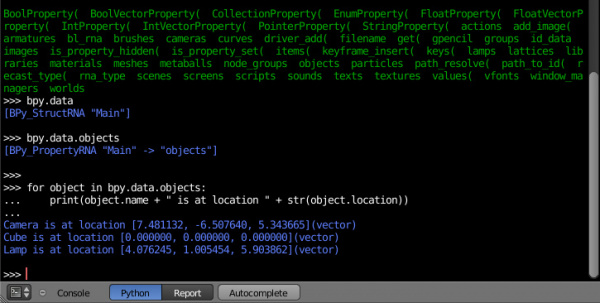
bpy.data has a bunch of functions and variables that give you access to all the data in the Blender file.
You can access following data in the current Blender file:
objects, meshes, materials, textures, scenes, screens, sounds, scripts, texts,
cameras, curves, lamps, brushes, armatures, images, lattices, libraries, worlds,
groups, metaballs, particles, node_groups
That's a lot of data.
Try it out!
Exercise
>>> for object in bpy.data.scenes['Scene'].objects: print(object.name)
↵ Enter twice
Prints the names of all objects belonging to the Blender scene with name "Scene"
>>> bpy.data.scenes['Scene'].objects.unlink(bpy.context.active_object)
Unlink the active object from the Blender scene named 'Scene'
 >>> bpy.data.materials['Material'].shadows

 >>> bpy.data.materials['Material'].shadows = False
bpy.ops
The tool/action system in Blender 2.5 is built around the concept of operators. These operators can be called directly from console or can be executed by click of a button or packaged in a python script. Very powerful they are..
For a list of various operator categories, click here
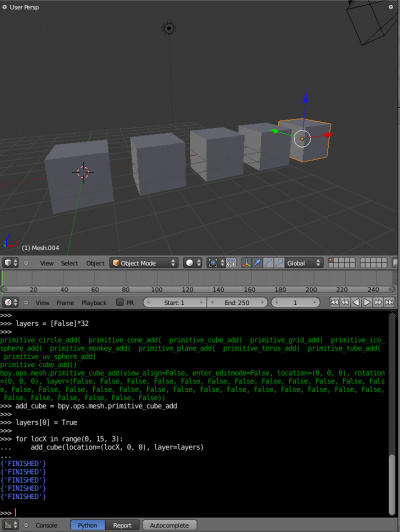
Lets create a set of five Cubes in the 3D Viewport. First, delete the existing Cube object by selecting it and pressing X
Try it out!
The following commands are used to specify that the objects are created in layer 1. So first we define an array variable for later reference:
 >>> mylayers = [False]*20
 >>> mylayers[0] = True
We create a reference to the operator that is used for creating a cube mesh primitive
>>> add_cube = bpy.ops.mesh.primitive_cube_add
Now in a for loop, we create the five objects like this (In the screenshot above, I used another method) Press ENTER-KEY twice after entering the command at the shell prompt.
 >>> for index in range(0, 5):
 ...     add_cube(location=(index*3, 0, 0), layers=mylayers)


