Doc:2.6/Manual/Game Engine/Logic/States
States
In the BGE, an object can have different "states". At any time while the game is playing, the current state of the object defines its behavior. For instance, a character in your game may have states representing awake, sleeping or dead. At any moment their behaviour in response to a loud bang will be dependant on their current state; they may crouch down (awake); wake up (asleep) or do nothing (dead).
How States Operate
States are set up and used through controllers: note that only controllers, not actuators and sensors, are directly controlled by the state system. Each object has a number of states (up to 30; default = 1), and can only be in one state at any particular time. A controller must always specify the state for which it will operate - it will only give an output pulse if a) its logic conditions are met, and b) the object is currently in the specified State. States are set up and edited in the object's Controller settings (for details see below).
|
|
| {{{2}}} |
One of the actuators, the State actuator, can set or unset the object's State bits, and so allow the object's reaction to a sensor signal to depend on its current state. So, in the above example, the actor will have a number of controllers connected to the “loud bang” sensor, for each of the “awake”, “asleep” or “dead” states. These will operate different actuators depending on the current state of the actor, and some of these actuators may switch the actor's state under appropriate conditions.
Editing States
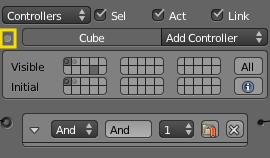
- States are set up and edited using the Controller (center) column of the Game Logic Panel. To see the State panel, click on the State Panel Button shown. The panel shows two areas for each of the 30 available states; these show Visible states, and Initial states (see below|). Setting up the State system for a game is performed by choosing the appropriate state for each controller in the object's logic.
The display of an object's state logic, and other housekeeping, is carried out using the State Panel for the object, which is switched on and off using the button shown. The panel is divided into two halves, Visible and Initial.
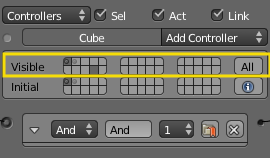
- Visible States
In the Visible area, each of the 30 available states is represented by a light-gray square. This panel shows what logic is visible for the logic brick displayed for the object. At the right is the All button; if clicked, then all the object's logic bricks are displayed (this is a toggle), and all State Panel squares are light-gray. Otherwise, individual states can be clicked to make their logic visible. (Note that you can click more than one square). Clicking the square again unselects the state.
States for the object that are in use (i.e. the object has controllers which operate in that state) have dots in them, and squares are dark-gray if these controllers are shown in the Game Logic display. The display of their connected sensors and actuators can also be controlled if the State buttons at the head of their columns are ticked.
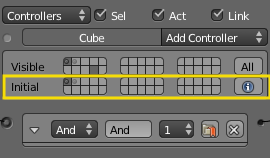
- Initial State
In the Initial area, each of the 30 available states is again represented by a light-gray square. One of these states may be clicked as the state in which the object starts when the game is run.
At the right is the I (Information) button; if clicked, and the (Game) Show Debug Properties menu entry is clicked, the current state of the object is shown in the top left-hand corner of the display while the game is running.


