Doc:2.6/Manual/Introduction/Installing Blender/Linux/Debian Ubuntu
Debian based systems
Installing Blender on Debian based systems and its derivatives (Ubuntu, Mint and others), is very easy and straightforward. Most Debian distributions come with the apt-get package manager, which is powerful and solves dependencies for the packages that may need to be installed automatically.
The default install on these systems doesn't come with the libraries Blender needs to work. This is because Linux systems are planned in such a way as to only install libraries when needed, for the software that is currently installed on a system. Downloading Blender and unzipping it in the default install of most systems is not enough; The required libraries need to be installed also, copying just the Blender binary will not install the required libraries.
On this page, we explain the easiest way to install Blender for a Debian based Linux system using the default install system, which is easy and fast.
Screenshot Install
There are many different distributions based on Debian based Linux systems available to the users, and some of them use different Window managers and ways of installing software such as Blender, we can't add all of the different ways to this page. The most common way to install Blender on Debian based systems is below in text format. For the majority of users the instructions above should suffice, with little or no changes in the steps required to install Blender.
| You must have administrative rights to install packages on your system | |
| You have to be the root/admin user of your system, or have yourself in the sudoers list, or contact the system administrator to ask for administrative rights and a proper system password to install Blender and it's package dependencies, or follow the procedures on this page. |
Ubuntu (step by step)
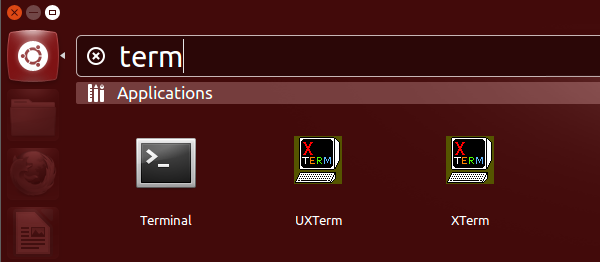
- Clicking in the Ubuntu dash, search for the terminal typing the search word terminal
- Clicking in the Terminal icon, type the command sudo apt-get update in the prompt.
- Type the password when asked and press ↵ Enter.
- After the update completion, type sudo apt-get upgrade in the prompt.
- Type the password if asked and press ↵ Enter
- Reboot your system, even if not asked.
- When the system is ready, open the terminal again.
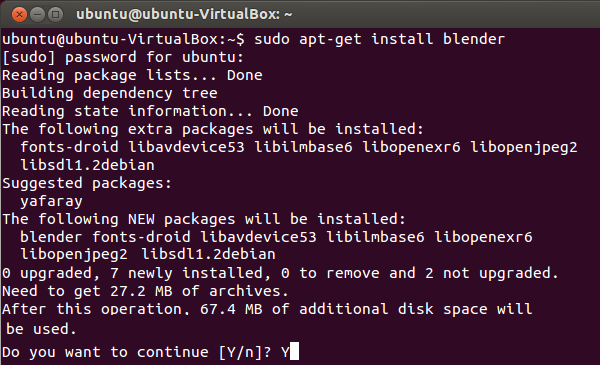
- Type in the terminal sudo apt-get install blender,
- Type the password when asked and press ↵ Enter
- The system will ask your permission to make changes,
- You will have to accept typing Y and ↵ Enter
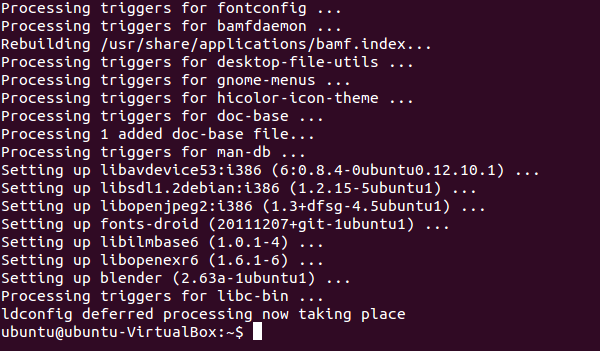
- Blender and Blender libraries will be installed automatically.
- The apt-get package manager will do everything that is needed to install Blender and its dependencies.
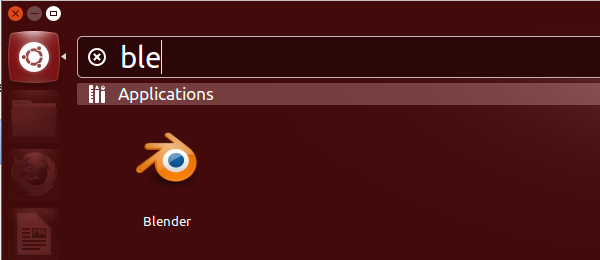
- Now, you can search for Blender using the Ubuntu dash and typing the search word blender.
- Click in Blender,
- If Blender is working, now you can download the newest pre-compiled Blender version.
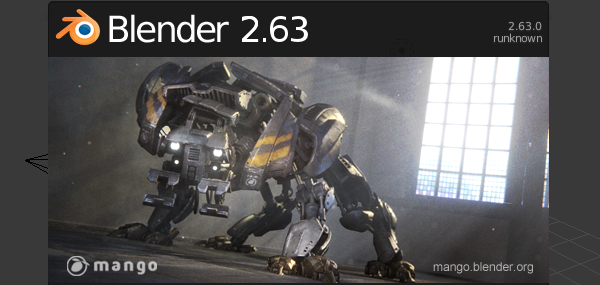
- Blender 2.63 is the pre-compiled version used in Ubuntu 12.10.
- Now, we have to use the uname - a command in the terminal and see if the system is a 32 or 64 bit.
- If the command prints i686, your system is using a 32 bit Linux version.
- If the command prints x86_64, your system is using a 64 bit Linux version.
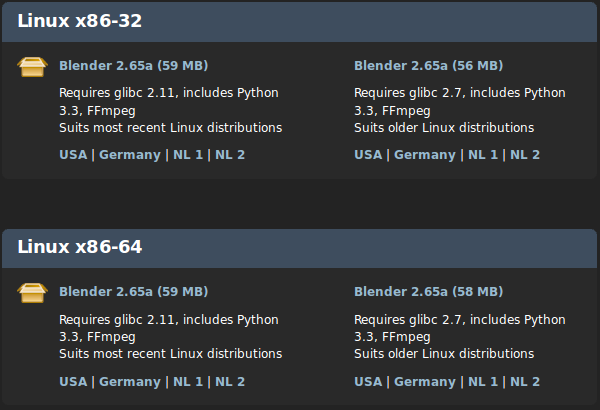
- Opening blender.org's website, you will see the pre-compiled versions for your Linux system.
- Download the newest Blender version, clicking on the suits most recent linux versions column
- Choose the appropriate version for your system (32 or 64 bits)
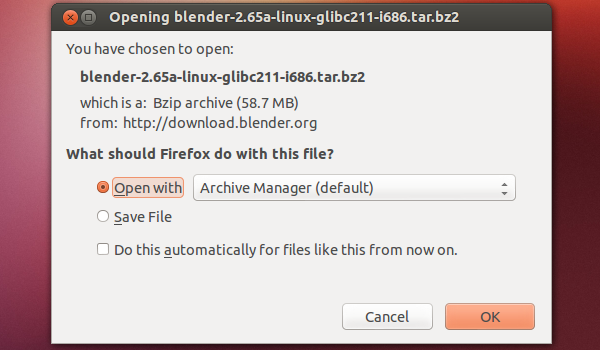
- Your browser will ask you what to do with the zipped file.
- Choose Open with - Archive manager (default)
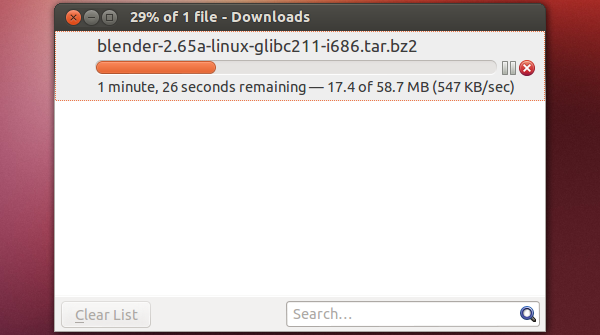
- Wait for Blender to download.
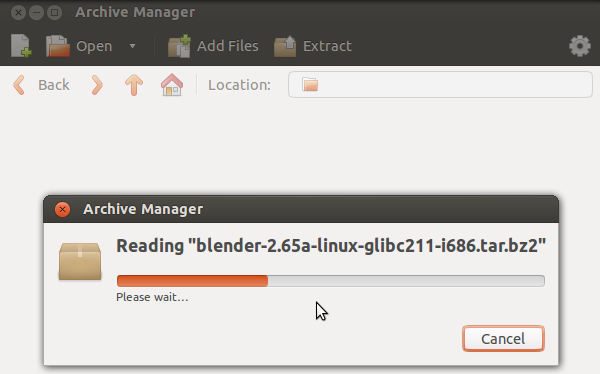
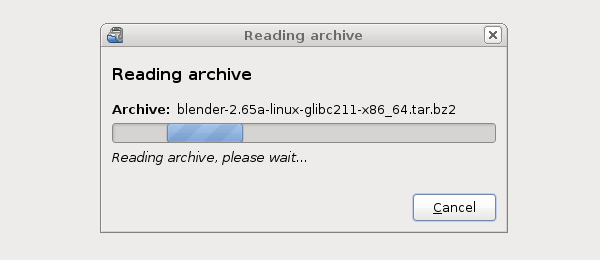
- The zipped Blender archive will be read by your archive manager automatically.
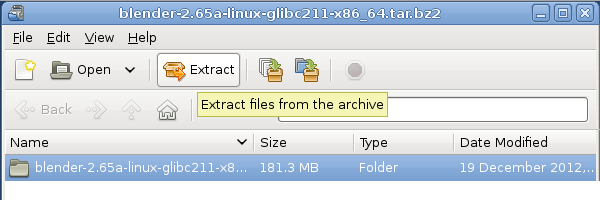
- After the proccess completion, you will be presented with a folder.
- Click to select and click in the extract button.
- The default is to extract to the user home folder.
- After the extraction, you can close the Ubuntu archive manager if it's not closed automatically.
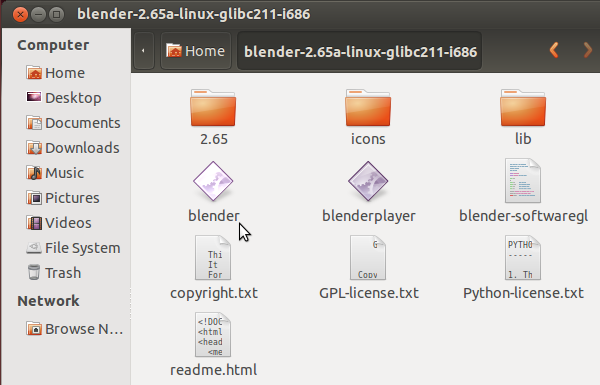
- Go to your Home folder and you will see a new folder extracted with blender...* name.
- Click on this folder to open.
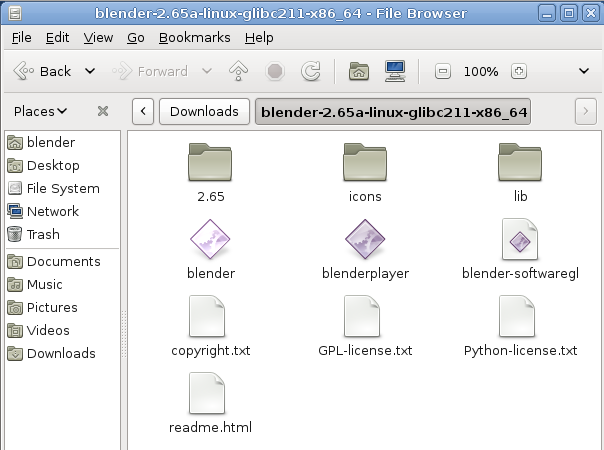
- Now you can see the extracted contents of the Blender package in the folder.
- Click on Blender and you will have the newest Blender version working.
- At the time we made this page, the newest Blender version was 2.65a.
Debian (step by step)
| You must have administrative rights to install packages on your system | |
| You have to be the root/admin user of your system, or have yourself in the sudoers list, or contact the system administrator to ask for administrative rights and a proper system password to install Blender and it's package dependencies, or follow the procedures on this page. |
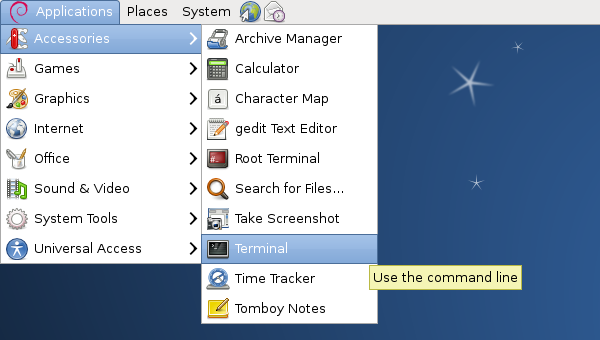
- Clicking in the applications menu, search for the Terminal in the Acessories entry.
- Clicking in the Terminal icon, type the command sudo apt-get update in the prompt.
- Type the password when asked and press ↵ Enter.
- After the update completion, type sudo apt-get upgrade in the prompt.
- Type the password if asked and press ↵ Enter
- Reboot your system, even if not asked.
- When the system is ready, open the terminal again.
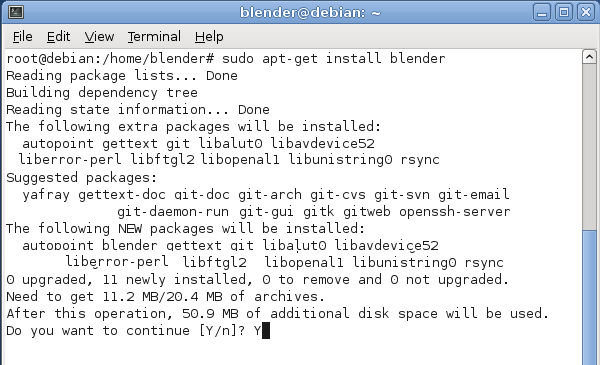
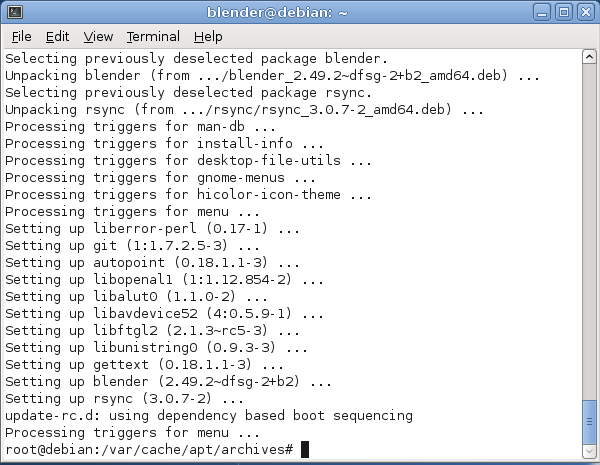
- Type in the terminal sudo apt-get install blender,
- Type the password when asked and press ↵ Enter
- The system will ask your permission to make changes,
- You will have to accept typing Y and ↵ Enter
- Depending on your install method and package repository, you system mays ask you an install CD/DVD.
- Insert your CD/DVD disc and press ↵ Enter
- Blender and Blender libraries will be installed automatically.
- The apt-get package manager will do everything that is needed to install Blender and its dependencies.
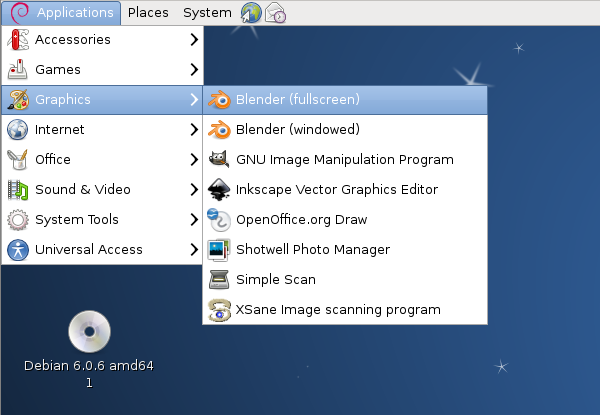
- Now, you can search for Blender in the applications menu, in the Graphics entry .
- Click on Blender,
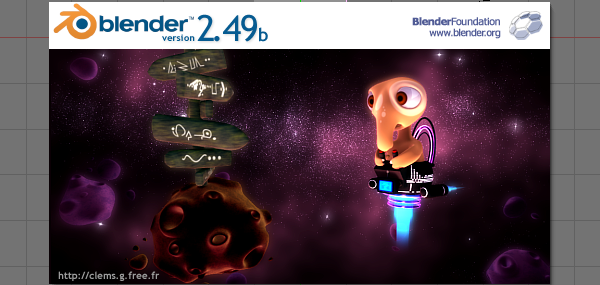
- If Blender is working, now you can download the newest pre-compiled Blender version.
- Blender 2.49b is the pre-compiled version used in Debian 6.06.
- Now, we have to use the uname - a command in the terminal and see if the system is a 32 or 64 bit.
- If the command prints i686, your system is using a 32 bit Linux version.
- If the command prints x86_64, your system is using a 64 bit Linux version.
- Opening blender.org's website, you will see the pre-compiled versions for your Linux system.
- Download the newest Blender version, clicking on the suits most recent linux versions column
- Choose the appropriate version for your system (32 or 64 bits)
- Your browser will ask you what to do with the zipped file.
- Choose Open with - Archive manager (default) or...
- If no actions are asked, click on the Blender file when the download is complete.
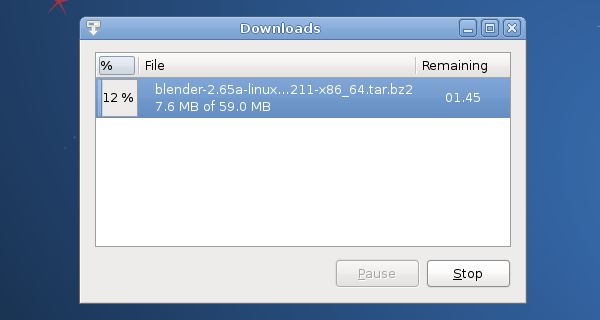
- Wait for Blender to download.
- The zipped Blender archive will be read by your archive manager automatically
- After the proccess completion, you will be presented with a folder.
- Click to select and click in the extract button.
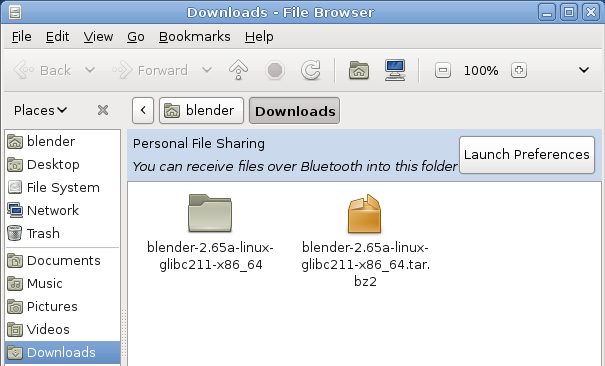
- The default is to extract to the user Download folder, located at the user's home folder.
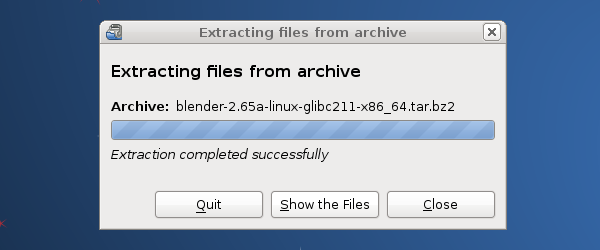
- Debian archive manager will extract Blender
- When the extraction proccess is complete with success, click in the Quit button
- After the extraction, you can close the Debian archive manager if it's not closed automatically.
- Go to your Home folder and you will see a new folder extracted with blender...* name.
- Click on this folder to open.
- Now you can see the extracted contents of the Blender package in the folder.
- Click on Blender and you will have the newest Blender version working.
- At the time we made this page, the newest Blender version was 2.65a.
General Instructions (text)
| You must have administrative rights to install packages on your system | |
| You have to be the root/admin user of your system, or have yourself in the sudoers list, or contact the system administrator to ask for administrative rights and a proper system password to install Blender and it's package dependencies, or follow the procedures on this page. |
- Those instructions were tested for Blender 2.65 using Debian 6.0, Ubuntu 12.04 and 12.10.
- In some Debian based systems, you don't have the sudo command enabled by default, so you will have to type su, and type the system password to be logged as root first and type apt-get update after, then you can continue by entering the following the commands:
- With the default install, open your terminal by clicking the terminal icon for your Linux terminal or console of your system.
- Type in the terminal:
sudo apt-get update
- The system will require the root/admin password. Type your password and press ↵ Enter and wait for the system to update the file list of the apt package manager.
- After the update, type in the terminal:
sudo apt-get upgrade
- Press ↵ Enter
- Depending on the amount of time the update took, your system may require your password again. Type your password, press ↵ Enter and wait for the apt-get package manager, to download and update all installed packages on your system (system update).
- Your system may ask to reboot, even if the system doesn't ask you to reboot, it's better to do so, because the most recent kernel and new libraries will be used after the reboot.
- After the reboot, again open your Linux Terminal or console.
- Type in the terminal:
sudo apt-get install blender
- Press ↵ Enter
- The apt-get package manager will then install the current pre-compiled version of Blender for your Debian based system. It will automatically install all the required libraries and/or dependencies as well.
- Now you will probably have a working Blender version installed and its dependencies. You can search for the newly installed Blender version in your system menus, or by using your system's search feature, or by using the command line. You should test to see if it will run correctly. If Blender is running correctly (even if it's an outdated version), then you're ready to download the latest Blender version.
- Blender is provided in 2 different formats, a 32bit version of Blender and 64bit version of Blender. Prior to downloading a particular version of Blender, you need to know which version of Blender you need. To find out type the following command in your Linux terminal:
uname -a
- If your system prints a message on the console screen showing i686, you have a 32 bit system, if your system prints a message on the console screen showing x86_64, then you have a 64 bit system. Now, you can download an appropriate Blender version for your system. If your system is 32 bit you must download the 32 bit version of Blender. If your system is 64 bit, then you can download the 64 bit version of Blender. Also note that 64 bit platforms can also run 32 bit versions of Blender but this will mean you will not be able to access any memory in your system above 4 gigabytes, and 32 bit version of Blender will perform more slowly on 64 bit platforms.
- Go to the blender.org download website and download the correct Blender Linux version for your system. To Download Blender there is a column on the website marked with Suits most recent Linux distributions on Blender.org's website.
- The Blender pre-compiled packages from blender.org for Debian/Linux based systems come packaged in a zip file. You can choose to download and unzip to a folder after the download, or open it with your Archive Manager (default) when asked by your internet browser.
- After the download, unzip the file that is shown in your archive manager into another folder. After successfully unzipping the file, open the location where you have unzipped Blender using your file manager.
- Locate and click twice on blender or blender.bin and you should see latest working version of Blender start to execute and display the Blender Splash Screen!
Hints
- Installing newest Blender version into
/optor/usr/local
You can also install Blender into /opt or /usr/local by moving the Blender directory into one of those locations.
If you want to be able to run the newest Blender from any directory you will also need to update your PATH variable.
Consult your operating system documentation for the recommended method of setting your PATH.
- You can use the contents of the Blender archive and copy over you old Blender install.
You can use the extracted contents of the downloaded Blender archive (newest), and copy the contents over
your distribution install, using your admin/root credentials, for example in the /usr/bin/ folder, but
be aware that you will have to cleanup the old blender folders everytime you update.
Drivers for 3D Graphic Cards
To run 3D software packages such as Blender, your system will need several specialized software libraries which interpret 3D drawing commands from Blender into drawing commands for your computer screen and graphics card.
Blender uses OpenGL which is free graphics language library that works on multiple platforms. The OpenGL drivers can be implemented in 2 different ways in Linux:
- Via Software - You have software such as MesaGL which is a software library that uses your CPU to interpret OpenGL commands and convert those commands into pixels that get displayed on your screen. Those commands will use your CPU to processes the OpenGL 3D drawing commands, which will then be drawn upon your screen. Interpreting the OpenGL 3D Drawing commands with your CPU is much slower and less efficient and so will result in slower 3D drawing display performance in software such as Blender. This results in for example your 3D Viewport not displaying models as quickly or smoothly updating when doing modeling for very vertex heavy models.
- Via Hardware - When OpenGL drawing commands are processed in hardware, the drawing commands are sent directly to your 3D graphics card hardware. The CPU is bypassed for the most part and this results in a much greater performance level when displaying 3D data such as mesh models in Blender's 3D Viewport. 3D display command processing is also called 3D Graphics Hardware Acceleration.
Most modern Linux distributions, including Debian, come with MesaGL or other OpenGL libraries bundled so you can run 3D package software such as Blender, without having specialized hardware accelerated graphics card to calculate screen drawing commands. Most modern computers nowadays come with specialized hardware which you can use to speed up the display or your 3D graphics data.
For graphic card accelerators, you have two choices to enable their full potential, use open sourced drivers or proprietary ones.
Open Sourced drivers are detected automatically for Linux based systems if your graphics card is supported by the Linux community. Some graphics card manufactures make available graphic card api's and source code, allowing the Linux community to write graphics card drivers for those cards, allowing Linux to communicate reliably and efficiently with those graphics cards. This mean that those cards perform very well on Linux.
Proprietary drivers needs the user to install third party software, which aren't Open Source (meaning no source code is released). These drivers are released by the manufacture in binary only format and they are in control of what features the driver supports for a particular graphic card. These binary only software drivers can't be read by the Linux community as a whole and problems/instabilities can't be fixed by Linux programmers/engineers. So, there are advantages and disadvantages when using proprietary drivers. The advantage is that you will be able to use your graphic card to speed up your work flow, the disadvantages are related to software updates, fixes, and general support.
When using Debian based systems, some distributions such as Ubuntu facilitate the proprietary driver installation using systems such as Ubuntu proprietary drivers (available to the majority of *buntu variants), while others will need the user to compile the manufacturers card drivers to be able to use the hardware graphic accelerated features of a particular graphic card.
Consult your Linux documentation and your card manufacturer documentation to know how to install proprietary drivers. If you find problems when using proprietary drivers, contact your card manufacturer, they are the only ones enabled to make fixes and give users support for their closed source drivers and cards.
- Proprietary drivers are an exception rather than the rule in the Linux world.
SoftwareGL Mode
| Hardware or Software OpenGL Mode | |
| There are 2 different ways of starting Blender. The first way is in Hardware Accelerated OpenGL mode, in this mode if your graphics card has Hardware support for OpenGL drawing commands Blender will use it. Blender will perform much more quickly when it is run in Hardware Accelerated OpenGL Mode. To start Blender in Hardware Accelerated OpenGL Mode type the following command at the terminal:
./blender
./blender-softwaregl
|
Cycles Rendering
Cycles is the new rendering engine in development for Blender, at first, it was a project for realtime visualization, but now its being developed as a substitute to the Blender Internal renderer.
Linux based systems and Blender fully support the use of multiple cpu's/gpu to spread render tasks in Cycles. Appropriate drivers are all that is required for the particular hardware to shared between multiple devices.
Cycles can use system CPUs (including multithreaded CPUs) or use an array of processors present in some graphic cards (GPUS) or specific processing cards to improve rendering speed, so you can choose, depending on your system and drivers, to render your images using the CPU processors or those present in your GPUS or processing cards, but you will need specific cards which are manufactured with capable processors and use appropriate drivers. Currently CUDA based hardware acceleration (as used by NVIDIA graphics cards) has the most support in Blender. Hopefully OpenCL based hardware acceleration support will develop from its current state of instability.
Blender will automatically detect your array of processor devices for Cycles if you have a capable graphics card or processing card and appropriate drivers.
As a General rule, if you have installed appropriate drivers and your graphics card or processing card is capable of using an array of processors to speed rendering with Cycles, you will be able to enable them by opening Blender User preferences Window with shortcut CtrlAltU. In the System tab, you will find the Compute Device buttons. These buttons are enabled automatically if you have a graphics card or a processing card and appropriate drivers.
For now, the only graphic card and processor card brand that works well with Cycles rendering is Nvidia, and the only available API (Aplication Programmable Interface) available to Blender is Cuda. If the Cuda button (for Nvidia Graphic cards) is enabled, then you have a capable graphic card or array of processors card and appropriate drivers from Nvidia installed in your Linux based system.
- For now, there are no free drivers available to Linux customers to use with cards manufactured with arrays of processors.
- CUDA is Nvidia proprietary, and there are no free drivers available to customers for now, so, the only way to enable CUDA is to have a Nvidia card and proprietary drivers installed on your Linux based system.
- There are other GPU card manufacturers with processor arrays that are capable for Cycles rendering, but their drivers and/or API are outdated and buggy for Linux based systems, including Debian.
Solving problems
Most Linux distributions when installed properly, works flawlessly with Blender. Minor problems are found depending on the distribution and its configuration. If Blender doesn't work, you may have to see your specific Linux distribution documentation and/or ask your system administrator to help you.
The most common cause of problems are shown here with possible solutions:
Shortcut Conflicts
Many Linux distributions default to AltLMB ![]() for moving windows.
Since Blender uses Alt+Click it's normally easier to disable this feature or change the key to Super key (In most keyboards, printed as Windows Key)
for moving windows.
Since Blender uses Alt+Click it's normally easier to disable this feature or change the key to Super key (In most keyboards, printed as Windows Key)
- Ubuntu 11.04: Settings > Window Manger Tweak > Accessibility > Change Window Key to Super
- Ubuntu 12.04 (Unity/Gnome): command line (effective at next login): gsettings set org.gnome.desktop.wm.preferences mouse-button-modifier 'none'
- Debian 7 "Wheezy" (Gnome): you need to have dconf-editor installed and go to org → gnome → desktop → wm → preferences and change "mouse-button-modifier" to 'none'. The above command line doesn't work in all situations.
Desktop Effects
Sometimes, effects and composition such as compiz , metacity, clutter, depending on your system, are resource hungry and heavy to use in conjunction with 3D package software.
Some Debian based distributions like Ubuntu, enables desktop effects out of the box, while others, uses a lightweight window manager which uses less resources from your system and graphic card.
If you're experiencing problems, flickering during window transitions, window fades shown at a frame by frame rate and others, you may have to disable your desktop effects prior to use 3D software or use another window manager without desktop effects enabled.
| Desktop effects and 3D Packages | |
| As a general rule, the best usage scenario for Blender (as with any other production 3D package software), is to have all possible system resources free, available and ready for use, and it means you will have the best possible experience using your system without desktop effects. |
- Ubuntu:
There is no easy way out of the box to disable the desktop effects that comes with Ubuntu default install, because there is no shortcut, icon or preferences tab available to disable desktop effects for the users.
The easiest way to improve 3D package software experiences when using Ubuntu with Unity (default), is to follow the instructions below.
- Find the Terminal or console in your system and type:
sudo apt-get install compizconfig-settings-manager
- Once installed, go to Ubuntu Unity Plugin → Experimental (Tab)
- From there you can set Launch Animation, Urgent Animation and Dash Blur to 'None'.
- Set the Hide Animation to Slide only.
- If you want, you can change the panel and dash transparency to be full opaque (recommended).
External link (askubuntu.com) :
Disabling Ubuntu Desktop animations
You can also use another *buntu distribution (Like Xubuntu or Lubuntu), that uses another lightweight window manager, like the Xubuntu variant or install another Window manager in conjunction with your default Ubuntu install.
Consult the Ubuntu documentation, or ask your system administrator on how to install another Window manager with no desktop effects to improve your 3D package experience.
- For other Debian based systems:
In general, if you don't have a composite window manager installed using desktop effects in conjunction with your window manager, you don't have to worry about it.
If you have the Compiz or Metacity, Clutter composite manager installed, consult the documentation of your composite manager to know how to disable desktop effects through shortcuts. This will improve your 3D package software experience.
Consult your system documentation or internet resources to know how to disable desktop effects for your Debian based system and make all of the available resources ready for your production 3D package.
Intel Graphic Cards
Intel is currently the largest supplier of Integrated 3D Graphics chips in the world that go inside Laptop machines and Server boards.
Unfortunately they are not very good performance graphics hardware. Not only are they often very slow, they also often do not properly implement certain 3D Graphics OpenGL commands. That can result in screen items not being displayed correctly when Blender is being used.
The only real solution when you can't use graphic accelerator expansion cards is to always keep your Intel graphics card drivers up to date and hope that the updated driver fixes any issues you may have.
Compiling Blender
If you want to build Blender from source code so you can get the latest greatest features of Blender, you can follow the official instruction. Building Blender from source is not difficult when compared with other software building proccess, but it takes some preparation and configuration to get it right. If you take your time and read all the instructions, you should be able to do it.
If you still need help with Blender coding and compiling proccess and have tried an internet search first but with no answer, then you can always goto the irc server irc.freenode.net #blendercoders channel and report the problem you are having. The coders are busy so they can take a while to help but they will do in general. If you don't have an irc client on your machine you can click the following link and that will connect you to irc through your web browser:
Useful links
If you want to get versions of Blender which are more up to date as they are built from a current snapshot of the Blender SVN trunk periodically, you have a couple of websites you can use:
The graphicall.org website is a Blender users site where many different snap shots of Blender Source code are compiled by users and made available for download. This website has many builds of Blender with very experimental features enabled.
The builder.blender.org website is the official Blender Foundation source code snap shot builds of Blender from SVN. The builds provided here are built automatically periodically. These builds are built using Blender official features, and although not as stable as the Blender Official release builds, are often more stable than builds provided on graphicall.org. Because they are a snapshot of the most recent SVN trunk, they often have features which will only be available in the next official release of Blender. This gives the user the opportunity to test out and use new features before they become available in Blender Official releases.
