Doc:2.6/Manual/Modifiers/Generate/Skin
Skin Modifier
Mode: Any mode
Panel: Modifiers
The Skin modifier uses vertices and edges to create a skinned surface, using a per-vertex radius to better define the shape.
It is a quick way to generate base meshes for sculpting and/or smooth organic shapes with arbitrary topology.
Note that faces in the input are ignored by the Skin modifier.
Options
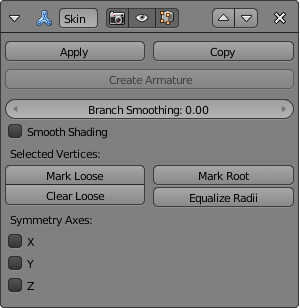
- Create Armature
- Create an armature for your object.
- Branch Smoothing
- Smooth the intersection vertices.
- Selected Vertices
- Mark Loose
- Mark the selected vertices as loosing points. Loosing defines points which merge their faces with each other to fill gaps.
- Clear Loose
- Take the Loose away. The initial behavior.
- Mark Root
- Defines the root points of the object. These are the center of the object.
- Equalize Radii
- Makes the skin radii of selected vertices equal on each axis.
Example
- Select the cube. ⇆ Tab into edit mode and AltM » At Center to merge all vertices at one point. E then Z to extrude the vertex along the Z axis.
Skin Node Set Flag
One of the mesh's vertices must be set to Root. If you by accident delete the default root vertex, select a vertex, hit the Skin Node Set Flag button, and in the Mesh Tools menu set the new vertex to root.
|
- In the modifiers' menu, add a Skin modifier.
- ⇆ Tab into edit mode and start extruding. To see the actual "Z spheres", Z to change to wireframe mode. These spheres are actual meshes with a lot of polygons, so performance issues might occur on older computers.
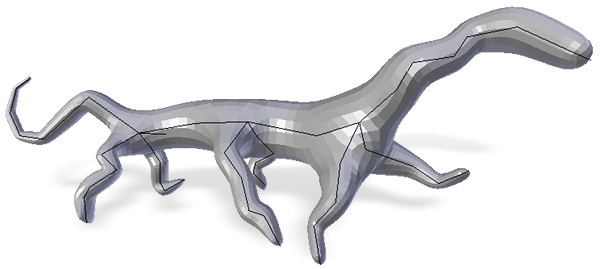
- Try to get sketch results similar to the picture (Simple creature, made with only the Skin modifier.), through extruding the vertices of the object.
- Use CtrlA to change the size of the different regions within the creature.
- Use Mark Loose at regions like the neck, to merge these faces more together.
- To get smoother results, activate Smooth Shading and use Ctrl3 on the object.
External links
- Skin Modifier Development at Blender Nation — An early demonstration of the skin modifier by Nicholas Bishop (March 2011)
- Ji, Zhongping; Liu, Ligang; Wang, Yigang (2010). B-Mesh: A Fast Modeling System for Base Meshes of 3D Articulated Shapes, Computer Graphics Forum 29(7), pp. 2169-2178. — The work this modifier is based on (direct link to PDF)
- Related thread on Blender artists

