Doc:2.6/Manual/Rigging/Armatures/Editing/Templating
Armature Templating
The idea of templating is to use an already existing armature as base ("template") to create a new armature. It differs from a simple copy in that you can directly define the new armature different in some aspects than its reference rig.
In Blender, the only templating tool is the bone sketching one (Skeleton Sketching (heretofore called Etch-a-ton), described in here), with its Retarget conversion method – so you should have read its page before this one!
Using Bone Sketching
Mode: Edit mode
Panel: section Skeleton Sketching on the panel Properties (N)
The Retarget conversion method of Skeleton Sketching tool maps a copy of existing bones to each selected stroke. The new bones will inherit some of their properties (influence, number of segments, etc.) from the corresponding bones in the template, but they will acquire their lengths, rolls and rotation from the sketch; so these properties would be different as compared to the template.
This is easier to understand with some examples.
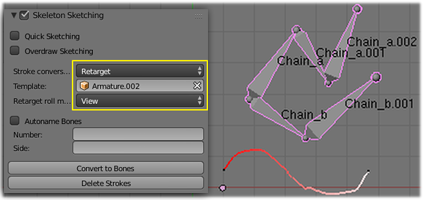
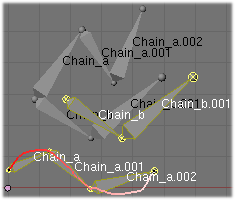
In the following image, armature.002 is set as the template, and the stroke maps with chain_a of this template. None of the bones are selected in the template. Note that there is no second stroke to map with chain chain_b of the template. The result is shown at right: Blender creates a copy of chain_a and matches the bones with the stroke.
Blender also creates a copy of chain_b, but this chain is not altered in any way; because this command can map only one selected chain with a stroke.
Roll methods
Now, let us see the settings of this bone roll method:
- None, View, Joint buttons
- These three toggle buttons (mutually exclusive) control how the roll angle of newly created bones is affected:
- No: Do not alter the bones roll (i.e. the new bones’ rolls fit their reference ones).
- View: Roll each bone so that one of its X, Y or Z local axis is aligned (as much as possible) with the current view’s Z axis.
- Joint: New bones roll fit their original rotation (as No option), but with regards to the bend of the joint with its parent.
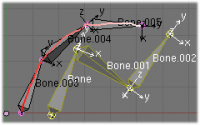
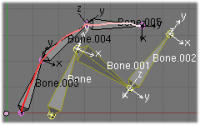
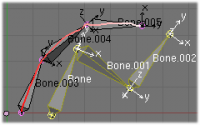
Templating: bone roll example. The Bone.003-to-Bone.005 chain is the mapped-to-stroke version of Bone-to-Bone.002 selected one, and Bone.001 has a modified roll angle.
| ||
Autonaming settings
- Number and Side
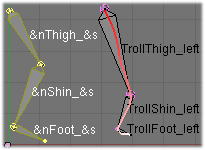
- For these options must be enable the Autoname button. They control how the new bones are named. By default, they just take the same names as the originals from the template – except for the final number, increased as needed. However, if the template bones have “
&s” somewhere in their name, this “placeholder” will be replaced in the “templated” bones’ names by the content of the Side text field. Similarly, a “&n” placeholder will be replaced by the Number field content.
Finally, the Number field content will be auto-generated, producing a number starting from nothing, and increased each time you press the Convert to Bones button, and the “&s” placeholder will be replaced by the Side field content (relative to the local X axis: “r” for negative X values, “l” for positive ones).
|
| |
| Naming and placeholders, using a simple leg template. |
