Doc:2.6/Manual/Textures/Painting
Page status (reviewing guidelines)
Images
examples
|
Texture Painting
A UV Texture is a picture (image, sequence or movie) that is used to color the surface of a mesh. The UV Texture is mapped to the mesh through one or more UV maps. There are three ways to establish the image used by the UV Texture:
- Paint a flat image in the UV/Image Editor onto the currently selected UV Texture, using its UV map to transfer the colors to the faces of the mesh.
- Paint the mesh in the 3D View, and let Blender use the currently selected UV map to update the UV Texture (see "Projection Painting").
- Use any image-editing (paint) program to create an image. In the UV/Image Editor, select the UV Texture and load the image. Blender will then use that texture's UV map to transfer the colors to the faces of the mesh
Blender features a built-in paint mode called Texture Paint which is designed specifically to help you edit your UV Textures and images quickly and easily in either the UV/Image Editor window or the 3D View window. Since a UV Texture is just a special-purpose image, you can also use any external paint program. For example, GIMP is a full-featured image manipulation program that is also open-source.
Since a mesh can have layers of UV Textures, there may be many images that color the mesh. However, each UV Texture only has one image.
Texture Paint works in both a 3D window and the UV/Image Editor window. In the 3D window in Texture Paint mode, you paint directly on the mesh by projecting onto the UVs.
Getting Started
Once you have unwrapped your model to a UV Map (as explained in previous pages), you can begin the texturing process. You cannot paint on a mesh in Texture Paint mode without first unwrapping your mesh, and doing one of the following steps. Either:
- Load an image into the UV/Image Editor (Image->Open->select file), or
- Create a new image (Image->New->specify size).
After you have done one of these two things, you can modify the image using the Texture Paint mode:
- In the 3D View window, select Texture Paint mode from the mode selector in the window header, and you can paint directly onto the mesh.
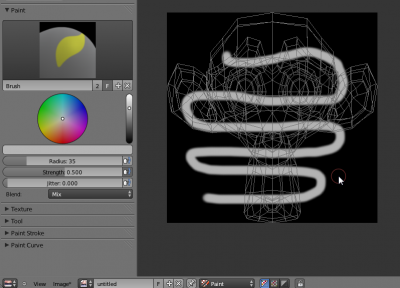
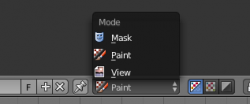
- In the UV/Image Editor window, switch the editing context from View to Paint (shown to the right).
Square Power of 2
Texture paint is very fast and responsive when working in the 3D window and when your image is sized as a square where the side lengths are a power of two, e.g. 256x256, 512x512, 1024x1024, etc.
|
Once you enable Texture Painting, your mouse becomes a brush. To work with the UV layout (for example, to move coordinates) you must go back to "View" mode.
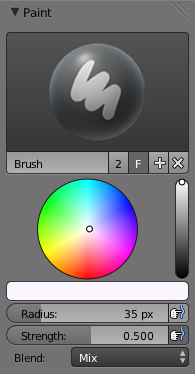
As soon as you enable Texture Painting or switch to Texture Paint mode, brush settings become available in the Toolbar Panel (T-key).
In the UV/Image Editor window, you paint on a flat canvas that is wrapped around the mesh using UV coordinates. Any changes made in the UV/Image Editor window show up immediately in the 3D window, and vice versa.
A full complement of brushes and colors can be selected from the Properties panel in the UV/Image Editor. Brush changes made in either panel are immediately reflected in the other panel. However, the modified texture will not be saved automatically; you must explicitly do so by Image->Save in the UV/Image Editor window.
Texture Preview
If your texture is already used to color, bump map, displace, alpha-transparent, etc., a surface of a model in your scene (in other techie words, is mapped to some aspect of a texture via a texture channel using UV as a map input), you can see the effects of your painting in the context of your scene as you paint.
To do this, set up side-by-side windows, one window in 3D View set to Textured display mode, and the second UV/Image Editor window loaded with your image. Position the 3D View to show the object that is UV mapped to the loaded image. Open a Preview window (see 3D View Options for more info) and position it over the object. In the image to the right, the texture being painted is mapped to the "Normal" attribute, and is called "bump mapping", where the gray-scale image is used to make the flat surface appear bumpy. See Texture Mapping Output for more information on bump mapping.
Brushes Settings
Press T in the UV/Image Editor to show the Toolbar panel. With this panel, you can create many brushes, each with unique settings (such as color and width). Use the Brush selector to switch between brushes, or to create a new brush. When you add a brush, the new brush is a clone of the current one. You can then change the setting for the new brush. Texture paint has an unlimited number of brushes and unique user-defined controls for those brushes which can be set in the Paint Tool panel.
To use a brush, click on its name. Use the selector up/down arrow, if there are more brushes on the flyout window than can be displayed at once. Name your brush by clicking on the name field and entering any name you wish, such as "Red Air" for a red airbrush. To toss out a brush, click the brush delete X button next to its name. If you want to keep this brush around for the next time you run Blender, click the Fake user button next to the brush delete X button.
If you have a tablet pen with pressure sensitivity, toggle the small "P" button next to the opacity, size, falloff and spacing buttons to control these parameters using the pressure of the pen. Using your pen's eraser end will toggle on the Erase Alpha mode.
Press S on any part of the image to sample that color and set it as the brush color.
Brush
- Brush presets
- Select a preset brush. Most brushes have common settings.
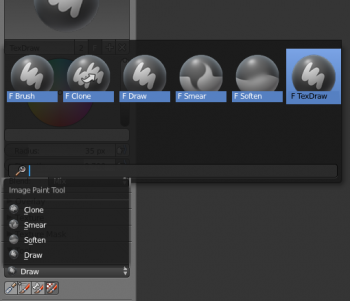
Types of brushes
There are four different types of brushes
- Draw
- the normal brush; paints a swath of color
- Soften
- blends edges between two colors
- Smear
- when you click, takes the colors under the cursor, and blends them in the direction you move the mouse. Similar to the "smudge" tool of Gimp.
- Clone
- copies the colors from the image specified (Tex.Dirt in the example), to the active image. The background image is shown when this brush is selected; use the Blend slider to control how prominent the background image is.
- Enable Pressure Sensitivity
- The icon to the right of the following three settings will enable or disable tablet pressure sensitivity to control how strong the effect is.
- Color
- The color of the brush
- Radius
- The radius of the brush in pixels
- Strength
- How powerful the brush is when applied}}
- Blend
- Set the way the paint is applied over the underlying texture
- Mix: the brush color is mixed in with existing colors
- Add: the brush color is added to the existing color; green added to red gives yellow.
- Subtract: the brush color is subtracted; painting blue on purple gives red
- Multiply: the RGB value of the base is multiplied by the brush color
- Lighten: the RGB value of the base color is increased by the brush color
- Darken: tones down the colors
- Erase Alpha: makes the image transparent where painted, allowing background colors and lower-level textures to show through. As you 'paint', the false checkerboard background will be revealed
- Add Alpha: makes the image more opaque where painted
- In order to see the effects of the Erase and Add Alpha mix modes in the UV/Image Editor, you must enable the alpha channel display by clicking the Display Alpha or the Alpha-Only button. Transparent (no alpha) areas will then show a checkered background.
- Image
- When using the clone brush, this allows you to select an image as a clone source.
- Alpha
- Opacity of the clone image display
Texture
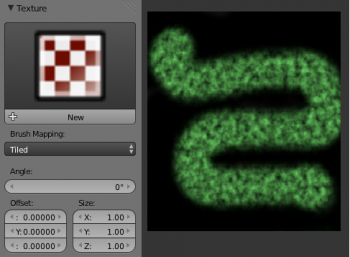
Use the texture selector at the bottom of the paint panel to select a pre-loaded image or procedural texture to use as your brush pattern. Note that in order to use it, you must have a placeholder material defined, and that particular texture defined using the Material and Texture buttons. It is not necessary to have that material or texture applied to any mesh anywhere; it must only be defined. The example to the right shows the effects of painting with a flat (banded) wood texture. Switching the texture to Rings makes a target/flower type of brush painting pattern.
Note: In Clone paint mode, this field changes to indicate the picture image or texture that you are cloning from.
- Brush Mapping
- Sets how the texture is applied to the brush
- View Plane
- In 2D painting, the texture moves with the brush
- Tiled
- The texture is offset by the brush location
- 3D
- Same as tiled mode
- Stencil
- Texture is applied only in borders of the stencil.
- Random
- Random applying of texture.
- Angle
- This is the rotation angle of the texture brush. It can be changed interactively via CtrlF in the 3D view. While in the interactive rotation you can enter a value numerically as well. Can be set to:
- User
- Directly input the angle value.
- Rake
- Angle follows the direction of the brush stroke. Not available with 3D textures.
- Random
- Angle is randomized.
- Offset
- Offset the texture in x, y, and z.
- Size
- Set the scale of the texture in each axis.
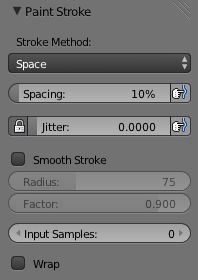
Stroke
- Stroke Method
- Allows set the way applying strokes.
- Airbrush
- Flow of the brush continues as long as the mouse click is held, determined by the Rate setting. If disabled, the brush only modifies the color when the brush changes its location.
- Rate
- Interval between paints for airbrush
- Space
- Creates brush stroke as a series of dots, whose spacing is determined by the Spacing setting.
- Spacing
- Represents the percentage of the brush diameter. Limit brush application to the distance specified by spacing.
- Dots
- Apply paint on each mouse move step
- Jitter
- Jitter the position of the brush while painting
- Smooth stroke
- Brush lags behind mouse and follows a smoother path. When enabled, the following become active:
- Radius
- Sets the minimun distance from the last point before stroke continues.
- Factor
- Sets the amount of smoothing.
- Input Samples
- Average multiple input samples together to smooth the brush stroke.
- Wrap
- wraps your paint to the other side of the image as your brush moves off the OTHER side of the canvas (any side, top/bottom, left/right). Very handy for making seamless textures.
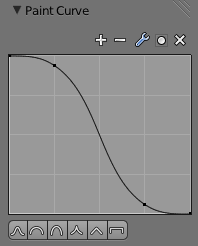
Curve
The paint curve allows you to control the falloff of the brush. Changing the shape of the curve will make the brush softer or harder.
Paint options
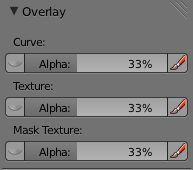
Overlay
Allows you to customize the display of curve and texture that applied to the brush.
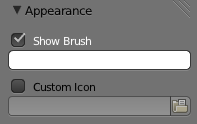
Appearance
Allows you to customize the color of the brush radius outline, as well as specify a custom icon.
Saving
If the header menu item Image has an asterisk next to it, it means that the image has been changed, but not saved. Use the Image->Save Image option to save your work with a different name or overwrite the original image.
UV Textures
Since images used as UV Textures are functionally different from other images, you should keep them in a directory separate from other images.
|
The image format for saving is independent of the format for rendering. The format for saving a UV image is selected in the header of the Save Image window, and defaults to PNG (.png).
If Packing is enabled in the window header, or if you manually Image->Pack Image, saving your images to a separate file is not necessary.
Using an External Image Editor
If you use an external program to edit your UV Texture, you must:
- run that paint program (GIMP, Photoshop, etc.)
- load the image or create a new one
- change the image, and
- re-save it within that program.
- Back in Blender, you reload the image in the UV/Image Editor window.
You want to use an external program if you have teams of people using different programs that are developing the UV textures, or if you want to apply any special effects that Texture Paint does not feature, or if you are much more familiar with your favorite paint program.
