Doc talk:Manual/Lighting/Lamps/Spot/Buffered Shadows
moved tutorial content here temporarily --Matt Ebb 15:21, 19 July 2006 (CEST)
Tweaking Buffer Shadows
Now that you've got the basics we can talk further of about light properties. We will look at a single example that is more complex than a simple "sphere over a plane" setup in order to see what we can achieve in realistic lighting with Blender.
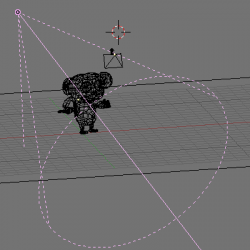
We will use the setup in (Light tweaking setup). The simian figure is Cornelius, Suzanne's baby brother. He has a somewhat shiny light brown material with the following properties:
- R=0.8,G=0.704B=0.584,
- Ref=0.7,
- Spec=0.444,
- Hard=10
Yes, not very monkey-like, but we are talking of lights, not of materials! He also stands on a blue plane with the following properties:
- R=0.275,G=0.5,B=1.0,
- Ref=0.8,
- Spec=0.5,
- Hard=50.
For now he's lit by a single spot light:
- (Energy=1.0,
- R = G = B=1.0,
- SpotSi=45.0,SpotBl=0.15,
- ClipSta=0.1,ClipEnd=100,
- Samples=3,
- Soft=3,
- Bias=1.0,
- BufSize=512).
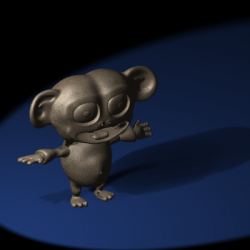
A rendering of Cornelius, with OSA=8 and Shadows enabled, gives the result in (Simple Light Spot set up). The result is not very pleasant. You have very black, unrealistic shadows on Cornelius, and the shadow cast by Cornelius himself is unacceptable.
The first tweak is on ClipSta and ClipEnd, if they are adjusted so as to encompass the scene as tightly as possible:
- ClipSta=5,
- ClipEnd=21
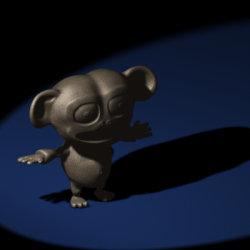
the results is definitely better, at least for the projected shadow. Cornelius's own shadow is still too dark (Appropriate Clipping).


