Extensions:2.6/Py/Scripts/Import-Export/NASA IMG Importer
| UI location | File: 3d window > tool shelf | ||
|---|---|---|---|
| Version | 1.1.8 | Author(s) | Valter Battioli (ValterVB) |
| Blender | 2.61.3 Rev:#43539 | License | GPL |
| File name | https://svn.blender.org/svnroot/bf-extensions/contrib/py/scripts/addons/io_import_LRO_Lola_MGS_Mola_img.py |
|---|
| Links | http://blenderartists.org/forum/showthread.php?t=205737 |
|---|
目次
[非表示]
Description
This script allows you to import a Moon and Mars surface directly into Blender.
Details
This script imports a standard DTM file formatted like a PDS IMG file (*.IMG + *.LBL), reads the PDS label in the LBL file and decodes the raster elevations in IMG file to create a mesh in the current view.
North-South axis is set on Blender Y axis.
East-West axis is set on Blender X axis.
Before you start importing the data, you must select the coordinates that you want imported.
Where to find the DTM IMG files?
The IMG file and the LBL file must be in the same directory.
MOON
Here: ftp Moon
You must download the IMG file and the LBL file with the same name. Use the file that starting with LDEM. Do not use the LDEC files, it won't turn out right.
The first number after LDEM is the resolution: 4=4 pixel/deg16 =16 pix/deg and so on.
From LDEM 4 to LDEM 128 you have the global planet, with LDEM 256 you have 1/4 of the planet, with LDEM 512 you have 1/16 of the planet.
MARS
Here: HTTP Mars
You must download the IMG and the LBL file, Map type= Topography.
File from meg004 to meg016 are global planet, meg064 is 1/4 of the planet, meg128 is 1/16 of the planet.
UI Explanation
Step 1 Select the file

Here you select the file. You can select the file with extension IMG or LBL, is the same thing.
Step 2 Select data and import
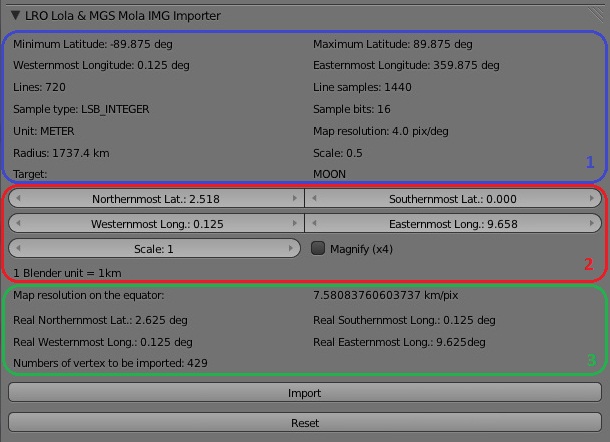
1: IMG Info
Here is showed the recap of the salient data of IMG file.
Minimum Latitude, Maximum Latitude, Westernmost Longitude and Easternmost Longitude represent the area covered by the map.
Lines is the number of the lines of data, Line samples is the number of the points for each line of data.
Sample type and Sample bit are the type of the data.
Unit is the units of the data.
Map resolution: self-explanatory. 4.0 pix/deg mean that every 4 points is covered 1 degree of the planet.
Radius is the radius of the planet.
Scale is used internally for converting the values of height
Target is the name of the Planet.
2: Input data
Here you select the coordinates of the area that you want to import.
Values are limited to the area covered by the map (See Part 2 IMG Info).
Northernmost Lat. must be greater than Southernmost Lat.
Easternmost Long. must be greater than Westernmost Long.
If these 2 rules are not respected, a warning message is showed under the wrong data.

![]()
Scale is the zoom scale. Under the scale you can see the value for 1 Blender unit.
Magnify: if is checked, the height data are magnified (x4)
3: Selected area Info
Is showed only if is all Ok.
Map resolution on the equator: is the distance between two points of the map on equator (worst case).
Real From Lat.,Real to Lat.,Real From Long.,Real To Long., are the real coordinate imported.
Numbers of vertex to be imported: self-explanatory, check always this number, the max quantity depend by memory that you have.
Import button
Click on the button to Import the data
| I don't see nothing! | |
| If after import you can not see anything, press . NumPad and increase the value of End clip in Property Panel View |
Reset button
Click on the button to reset the user interface and start a new import
Usage
1) Download a DTM: #Where to find the DTM IMG files?
2) Inside of Blender activate the script.
CtrlAltU then select Add-Ones tab, then select Import_Export category and at last check Import-Export: LRO Lola & MGS Mola img Importer
Now the user interface of the script is in Tool Shelf. If you can't see it, just resize the Tool Shelf.
3) Select the file. You can select the IMG or the LBL file, is the same.
Select the coordinates that you want imported.
Northernmost Lat. must be higer than Southernmost Lat.
Easternmost Long. must be higher than Westernmost Long.
4) If is all OK you can see more data and the button for import the data, before you click it, check the Numbers of vertex to be imported. The max quantity depend by memory that you have.
5) Rendering. Before you made a rendering you must set the camera.
Example for Camera setting
Location: X=0 Y=0 Z=8000
Rotation: 0,0,0
End Clipping: 10000
With these setting, when you use Camera View, you have North on top, South on bottom, West on the left and East on the right
Some detail
Coordinates system
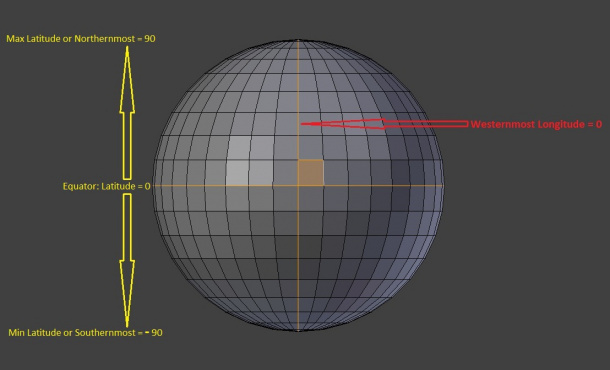
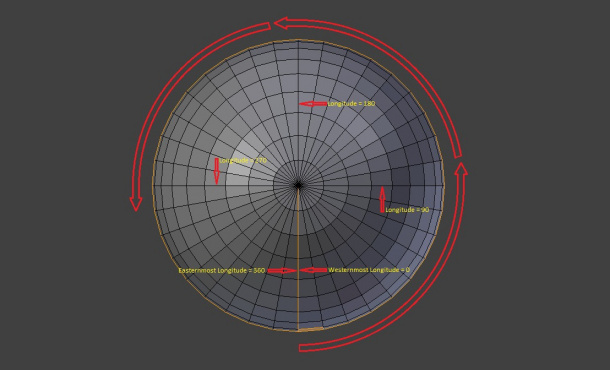
All the coordinates are in decimal format. If you have Degrees, Minutes, Seconds you must convert in decimal. Here you can found a online converter.
Ex. of coordinate to be convert:
(40.1º 40.3' 11 S) (73.7º 56.3' 38.5W)
First group of number is the latitude, second group of number is the longitude.
With the converter you have:
Latitude=40.769722
Longitude=74.644028
If in latitude you read S (it's mean South) you must use minus sign
If in longitude you read W (it's mean West) you must use the following formula:
CorrectLong=360-Long
So the correct coordinates to be use are:
Latitude= -40.769722
Longitude= 285.355972 (360-74.644028)
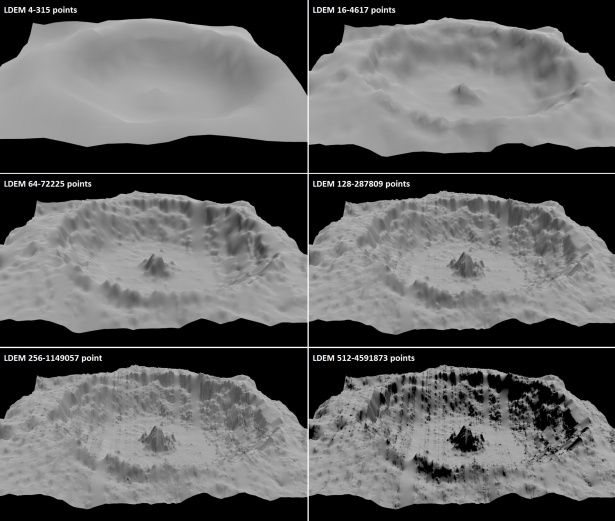
Compare of different DTM
Below is a comparison between different DTM (magnified for best viewing)
Some trick for speed up in 3Dview
Before you start the import, change the View port shading to Bounding box. After the import set in User preference system VBOs and now change View port sahding to Object mode. If you have a Series 400 GeForce video card, before to change VBOs, uncheck Double side in Object data. Last thing: if you change in Sculpt mode, you can gain some FPS.
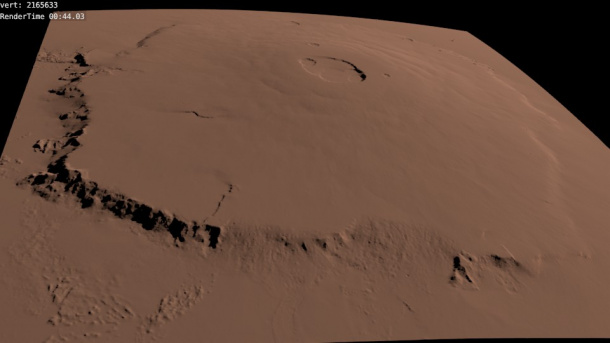
Some example
