Extensions:2.6/Py/Scripts/Mesh/Wetted Mesh
| UI location | View3D > Tool Shelf > Wetted Mesh Panel | ||
|---|---|---|---|
| Usage | Select the fluid and the solid mesh. Calling Wetted Mesh inserts three new meshes. | ||
| Version | 0.2.1 | Author(s) | Freejack |
| Blender | 2.58 | License | GPL |
| Category | Add Mesh | Distribution | Upload |
| File name | wetted_mesh.py |
|---|---|
| Current version download | https://svn.blender.org/svnroot/bf-extensions/contrib/py/scripts/addons/wetted_mesh.py |
Installation
- Download the script and copy to the Blender scripts/addons directory.
- In User Preferences select the Add-Ons tab.
- You can activate the script there.
- The script will now show up in the Object Tool Shelf (press T in object mode)
Overview
The Add Wetted Mesh operator creates three meshes (fluid, dry solid, wetted fluid-solid interface) based on two overlapping input meshes (fluid and solid).
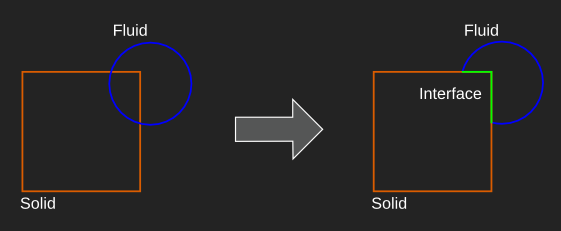
The main purpose of these meshes is usage in a renderer which requires an explicit modellation of the interface between two transparent regions (for example LuxRender).
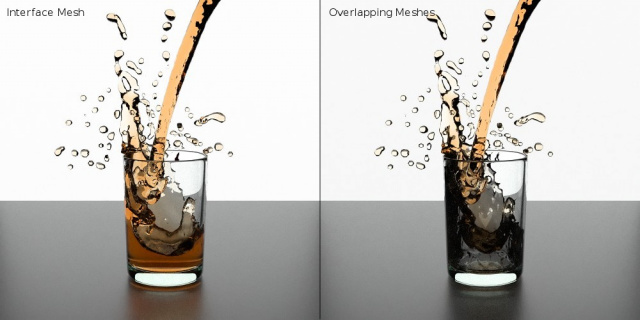
Using overlapping meshes in renderers which do not support them, or non-overlapping meshes in general, leads to a wrong rendering of interfaces between transparent objects. The most common effects are black or very dark areas from rays which are 'caught' between the interfaces or total inner reflection for shallow angles.
Both input meshes have to be selected before calling the operator. The active object (the one selected right before calling the operator) is taken as the solid mesh.
- The resulting solid mesh contains the part from the input solid not covered by the fluid mesh (dry part of the solid).
- The wetted mesh contains the part from the solid covered by the fluid mesh (wetted part of the solid).
- The resulting fluid mesh contains the part from the original fluid mesh which is not intersected by the original solid (so the original solid trims the resulting fluid mesh).
Unlike Blender's built in Boolean operations, the resulting meshes are not closed.
Example
This simple example demonstrates the basic usage of the 'wetted mesh' operator.
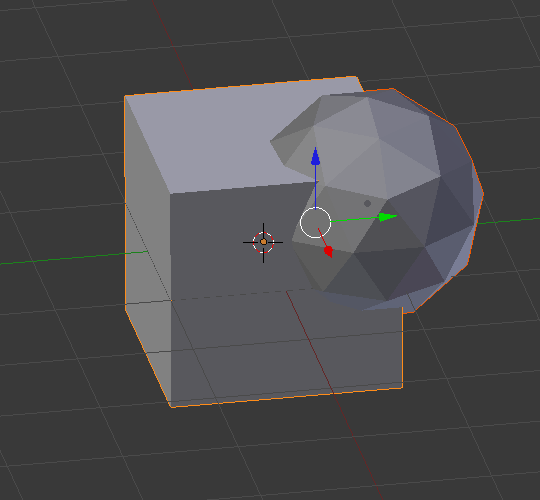
Start a new scene with a default cube, and insert an icosphere partly overlapping the cube. Deselect all, and select first the icosphere and then the cube.
Warning: 2.57b has buggy icosphere normals. Using this Blender version you need to fix up the normals for the icosphere or use an other mesh primitive.
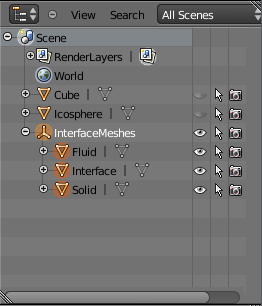
Perform the 'add interface mesh' operator from the object tool shelf. This results in three new meshes (fluid, interface, solid) which are parented by a grouping object (interface meshes) to keep them together and ease transforms. The 3D view does not change much, because all of the results lie on top of each other.
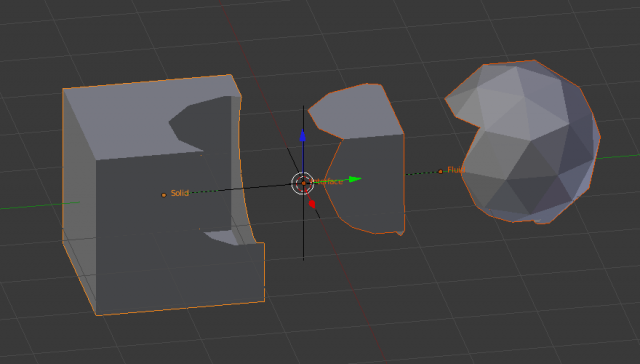
Hide or delete the original cube and icosphere, then separate the result meshes by moving them a bit or toggle visibility to take a look at the created meshes.
If this scene should be rendered using a solid cube, partly covered by the big drop of water modelled with the icosphere, these three meshes would be suitable as solid, interface and fluid mesh.
Hints
- Check the normals of your input meshes if the results seem wrong. Blender's Boolean operations depend on them.
- Check the normals of the created meshes and flip them if needed. The normals of the interface should point from the solid into the liquid if the solid is set up as interior and the liquid as exterior.
- The calculation of the interface meshes depends heavily on Blender's Booleans (namely difference and union). For complex meshes, these ops may yield weird results, so you should be careful. Large fluid meshes, especially if particles are used for extra splashiness, may require some manual work, so that only the part of the fluid which actually intersects the solid is used for the operation. But don't be too scared. The fluid mesh (of size 150) in the example scene used at the top of this page just worked fine without any additional preparation.
- For larger meshes the operation may take some time. Take a look at the console to monitor the progress.