Extensions:2.6/Py/Scripts/Objects/HairNet
| UI location | Properties>Particle | ||
|---|---|---|---|
| Usage | Select hair-mesh objects, then a hair-receiver object and click "Add Hair" in the HairNet panel | ||
| Version | 0.4.5 | Author(s) | Rhett Jackson |
| Blender | 2.6.6 | License | |
| Category | Particles | Distribution | External |
| Note(s) | Note(s) | ||
| File name | HairNet.py |
|---|---|
| Current version download | https://github.com/Jandals/HairNet |
| Python modules | Uses standard Python modules |
| Links | https://developer.blender.org/T35062 |
|---|
目次
Use And Interface
There is a video (now somewhat outdated) which shows some of the basics at this link on YouTube. In the video, the script is run from Blender's script editor but the plugin which is available to users has its own button in Blender's Properties->Particles panel.
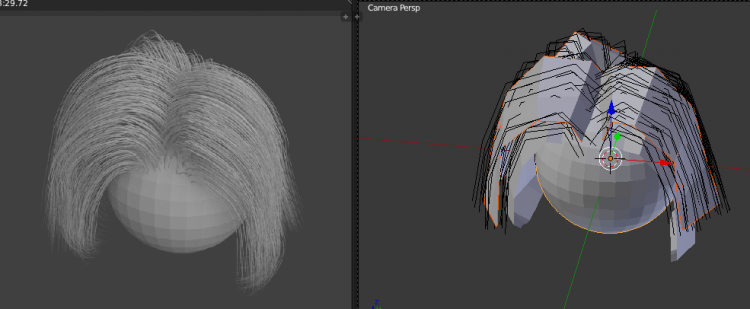
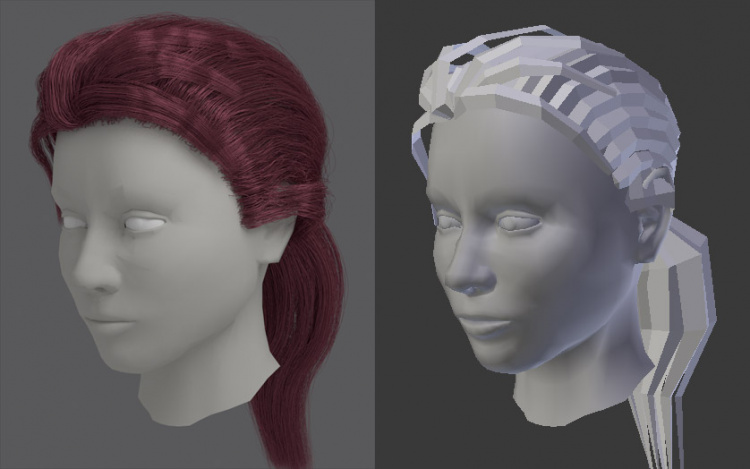
HairNet's tools appear in the Particles tab of the Properties window. As of version 0.4.5, HairNet can create a hair system from three types of geometry: standard Blender curves, mesh "Sheets," and mesh "fibers."
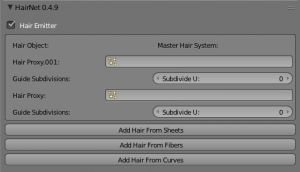
HairNet's Properties
- Hair Emitter: Check this box to make an object receive hair from other selected hair proxy objects. When left unchecked, an object will be treated like a proxy object.
- Master Hair System: All proxy objects can be associated with an existing set of Particle Settings. Use the "Master Hair System" field to choose which settings will be copied to the proxy object when HairNet is run. If "Master Hair System" is left blank, existing hair settings will be preserved. If no settings exist, new settings will be created.
- Subdivide U: The number of additional hairs to be created between guide edges in the proxy object.
Depending on whether a selected object is designated as a "Hair Emitter" in HairNet's properties panel, users will see a slightly different interface.
| When a proxy object is selected, only settings for the current, active selection are shown. |
| When the last object selected has its "Hair Emitter" box checked, the settings for all other selected objects are displayed. |
Curves
Each point on a curve will be transcribed to a guide hair. The curve's starting point will be the hair guide's starting point. All curves used to create a single hair system must have the same number of vertices.
Fibers
A mesh fiber is a series of mesh edges. Each edge in a fiber is used in no faces and intersects with no other edge loops. Hair systems from ZBrush are are usually brought into Blender as fibers. The selection of which vertex/vertices are used at the roots of guide hairs is arbitrary. All curves used to create a single hair system must have the same number of vertices.
Sheets
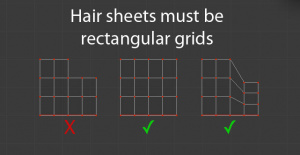
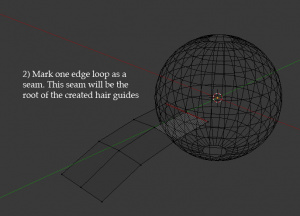
| A rectangular mesh used to make a hair system must have one boundary edge marked as a seam. If an example mesh 4 faces wide and 3 faces tall is to be used, the bottom row of edges could be marked with a seam. That bottom row will be the root of all the guide hairs created. Each of the five columns of edges that "grow" out of it will become a guide hair in the created particle system. Each guide hair created will have 4 vertices (3 segments). All sheets used to create a single hair system must have the same "height" (3 faces tall in the previous example). Sheets may have different widths. |
Step-by-step
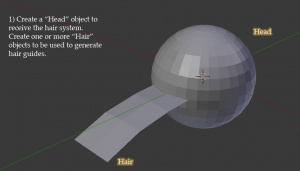
| 1) Create a mesh object to receive the hair system and another one (or more) mesh objects to be used to generate hair guides. | |
| 2) Mark one edge loop as a seam. This seam will be the root of the created hair guides. | |
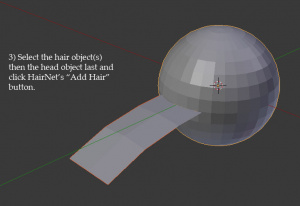
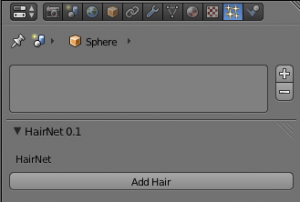
| 3) Select the hair object(s) then the head object last and click HairNet’s “Add Hair” button. | |
| 4) Enter Particle Mode and "touch" all the points of the created hair guides. One click using a Comb brush with very weak strength is enough. |
Conditions For Use
HairNet is not yet very robust and will work best if these guidelines are followed:
- When creating the meshes which will define the shape of the hair, use rectangular meshes and do not delete any faces.
- Mark one external edge of each rectangular mesh as a seam. Use the seam to place the roots of the hair to be created.
- The number of edge loops along a hair's length must be the same for every mesh. The seam-edges may be subdivided freely but each guide "hair" must have the same number of vertices.
- Each time the "Add Hair" button is clicked, the existing hair system(s) are deleted and re-created. So far, using HairNet on objects with more than one particle system has had unpredictable results. Be aware.
- Each time the "Add Hair" button is clicked, the user must manually "touch" all of the newly-created guide hairs in particle mode. An effective way to do this is to switch to particle mode, select the Comb brush at maximum radius and minimum strength and click to cover each created point. If this is not done, all hair positions will be reset upon entering edit mode.
- If the center of the object which receives a hair system (i.e. the head object) is not at (0,0,0), it's location in worldspace will be added to the mesh(es) in it. The result is that when you click "Add Hair" the object will jump to a new location. A similar thing happens if the object's rotation is non-zero.
