Meta:Sanbox/Doc:2.6/Manual/Sequencer/Strips/Properties
Strip properties
The properties for the strip are examined and set in the Properties Panel, shortcut N.
- Edit Strip : change properties of the selected strip
- Strip Input : change the source file(s)'s properties of this strip
- Filter - Image pre-processing
- Proxy / Timecode - Use representatives of the real image, for low-powered PCs
- Modifiers - Add and manage modifiers
- Effect - Settings for Effect strips
- Sound - Settings for a sound clip
- Scene - Settings for a scene strip
- Mask - Settings for a mask strip
Common Sections
These sections appear all the time in the Properties Panel, no matters the selection.
Edit Strip Section
Settings for the strip itself.
- Name
- You can name or rename your strips here.
- Type
- Displays the type of strip selected.
- Blend Mode
- By default, a strip Replaces the output image of any lower-level strips. However, many other blending modes are available based on the strip type. For example, Alpha-Over automatically overlays the image on top of a lower level strip. Autoblending modes remove the need for separate effect strips. Opacity controls how much of an effect the strip exerts, even over time.
- Opacity
- Set the opacity of the strip.
- Mute
- Hides the strip so that it does not participate in the final image computation
- Lock
- Prevents the strip from being moved.
- Channel
- Changes the channel number, or row, of the strip.
- Start Frame
- Changes the starting frame number of the strip, which is the same as grabbing and moving the strip. Tip: when you add a strip, I like to just drop it and then use this field to place it at the frame I want, rather that trying to drag and drop in exactly the right place.
- Length
- Specify the number of frames to use for the strip.
At the bottom you can see several informations about the input media.
Strip Input Section
Controls the source of the strip.
- Path
- This is here you can edit/update the path of the file used by a strip. Very useful when you moved it one way or the other – this avoid you deleting and re-creating the strip!
- File
- Same than before, but in case you renamed the source file, you can retreive it (or change it).
- Input Color Space
- To specify the color space of the source file.
- Alpha mode
- If the source file has an Alpha (transparency) channel, you can choose premultiplied in the list.
- Change Data/File
- Same as the "Path" and "File" fields, but this time combined to open the file browser in order to find the file(s) you search.
- Image Offset
- To modify the image position (X, Y) in the output. Also, checking this box disable the auto-scaling of the image.
- Image Crop
- To crop the source image (Top, Left, Bottom, Right)
- Trim Duration
- Start and End allow you to modify the start / end offset. hard mode will change the effective duration of the strip, while Soft mode will only move the start / end points in the sequencer, the same way you do with you mouse by grabbing the start / end arrows.
- MPEG Preseek
- Displayed only when a video strip is selected. Use the Preseek field to tell Blender to look backward and compose the image based on the n previous frames (e.g. 15 for Mpeg2 DVD)
- Stream index
- Displayed only when a video strip is selected. For files with several movie streams, use the stream with the given index.
Filter Section
Enables you to quickly set common image pre-processing options.
- Strobe
- To display only a defined number of images. For example, if you set this to 10, the strip will only display frames 1,11,21,31,41... of the source.
- Backwards
- To time-reverse the playback of the source.
- De-interlace
- To De-interlace a movie if it's from broadcast video and has even or odd interlacing fields.
- Flip
- X flips (reverses) the image left-to-right, Y reverses top-to-bottom.
- Saturation
- Controls the color saturation of the source
- Multiply
- Controls the brightness of the source
- Convert Float
- Converts input to float data.
Proxy / timecode Section
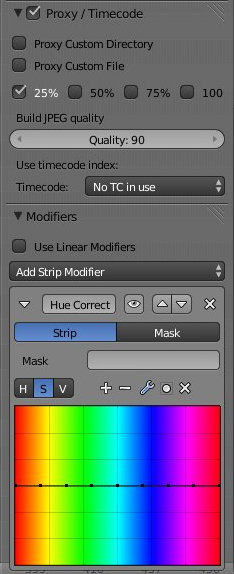
A proxy is a smaller image (faster to load) that stands in for the main image. When you Rebuild proxy Blender computes small images (like thumbnails) for the big images and may take some time. After computing them, though, editing functions like scrubbing and scrolling and compositing functions like cross using these proxies is much faster but gives a low-res result. Disable proxies before final rendering.
Modifiers Section
Modifiers are used to make adjustments on the image, like contrast, brightness, saturation, color balance and applying masks.
You can add these modifiers directly to the selected strip, or you can use it within an "Adjustment Layer" effect strip, which allows you to apply these modifiers onto several strips the same time.
explain the Use Linear Modifiers checkbox:
The modifiers section has a check-box Use Linear Modifiers to calculate modifiers in linear space instead of sequencer space.
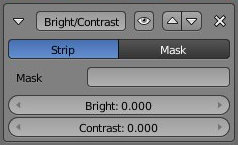
Each modifiers have several buttons at their top:
- The "eye" is to disable the modifier. Very useful to compare the image, with / without modifications.
- The next two buttons (up and down arrows) are used to change the modifier's position in the stack.
- The cross is to delete the modifier from the stack.
- Strip Use this to apply the modification on the whole image, or to use another strip's image (with alpha channel) for masking the modifier (and only this modifier), by choosing it in the "Mask" drop-down list.
- Mask This one allows you to choose a Mask created in the Mask editor which will limit the modification to the masked image's zones.
Modifiers list
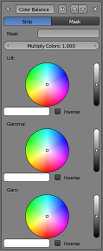
- Color balance
- Color balance adjustments, through Lift, Gamma, and Gain.
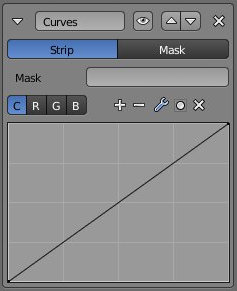
- Curves
- C/RVB curves
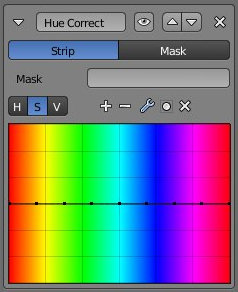
- Hue Correct
- HSV multipoints curves
- Bright/Contrast
- Simplified brightness / contrast adjustment
- Mask
- Use it for masking the other modifiers in the stack which are below.
- For example, to correct the brightness only on a certain zone of the image, you can filter the Bright/Contrast modifier by placing a Mask modifier, just before it in the stack. You can choose to use a Mask created in the Mask editor, or to use another strip as a mask (the image of this strip must have an alpha channel). This mask will be applied on all the others modifiers below it in the stack.
Selection-Dependant Sections
These sections appear only when one of the following strips are selected :
- Effect strip
- Sound strip
- Mask strip
- Scene strip
Note that the Clip strips have no properties available, since a clip can be modified within the Movie Clip Editor (see Motion Tracking page).
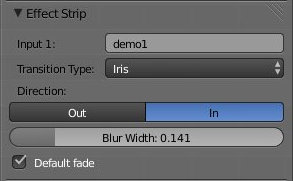
Effect Strip Section
This panel appears when an effect strip is selected. For all effects, use this panel to control the effects; each effect has different controls, but they can all be set in the Properties panel. All effect strips do some special image manipulation, usually by operating on another (or two) strip(s), n different channel(s). (see Effects list page for more details.)
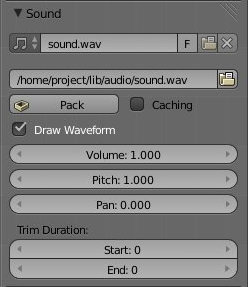
Sound Strip Section
This panel appears when a sound strip is selected. Here you can specify the Sound Strip's file path and file name.
- Pack
- Packs the sound file into the current .blend file.
- Caching
- The sound file is decoded and loaded into RAM.
- Draw waveform
- Draw the sound's waveform directly onto the strip
- Volume
- Set the volume of the sound strip
- Pitch
- Set the pitch (real-time transpose) of the sound strip
- Pan
- Panning sound strip to left / right audio channels
- Trim Duration: Start/End
- Offset the start and end of a sound strip.
Mask Strip Section
Here you can choose in the drop-down list a mask you created before in the Mask editor.
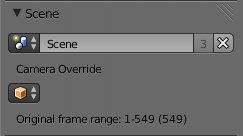
Scene Strip Section
This panel appears when a scene strip is selected.
Here you can specify the scene to be linked to the current scene strip.
- Camera Override
- Change the camera that will be used. You can force the use of any camera, even if it's not the explicitly active one in the scene.

