「Doc:2.6/Manual/Game Engine/Logic/Sensors/Types」の版間の差分
細 (moved Doc:2.5/Manual/Game Engine/Logic/Sensors/Types to Doc:2.6/Manual/Game Engine/Logic/Sensors/Types) |
細 (1版 をインポートしました) |
(相違点なし)
| |
2018年6月29日 (金) 04:44時点における最新版
Page status (reviewing guidelines)
Proposed split
|
Sensor types
Actuator sensor
The Actuator sensor is set off when an actuator with the name specified in the Actuator field is activated.
Always sensor
The Always sensor is used for things that need to be done every logic tick, or at every x logic tick (with non-null f), or at start-up (with Tap).
This sensor doesn’t have any options apart from the general sensor ones.
Collision sensor
A Collision sensor works like a Touch sensor but can also filter by property. Only objects with the property with that name will generate a positive pulse upon collision. Leave blank for collision with any object.
The Pulse button makes it sensible to other collisions even if it is still in touch with the object that triggered the last positive pulse.
The M/P button toggles between material and property filtering.
Delay sensor
The Delay sensor is designed for delaying reactions a number of logic ticks. This is useful if an other action has to be done first or to time events.
The Delay sensor has three options:
- Delay is the number of logic ticks the sensor waits before sending a positive pulse.
- Duration is the time the sensor waits before sending the negative pulse.
- Repeat makes the sensor restart after the delay and duration time is up.
Joystick sensor
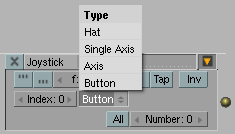
The Joystick sensor detect joystick events.
Index specifies which joystick to use.
The Event Type menu specifies which joystick event to use
- Button
- Specify the button number to use.
- All Events
- Triggered by all events on this joystick's current type
- Axis
- Axis Number specifies the axis
- Axis Threshold specifies the precision
- Axis Direction specifies the direction to use: Left, Right, Up, Down
- Hat
- Use a specific Hat number
- Hat Direction specifies the direction to use: up, down, left, right, up/right, up/left, down/right, down/left.
- Single Axis
- Use a single Axis
Keyboard sensor
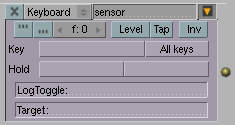
The Keyboard sensor is for detecting keyboard input, it can also save keyboard input to a String property.
The Key field is for single key presses. Press the button with no label and a key to assign that key to the sensor. This is the active key, which will trigger the positive pulse. Click the button and then click outside of the button to deassign the key.
The All keys button will hide all other button and send positive pulses on all key presses. This is useful for custom key maps with a Python controller.
The Modifier buttons work the same way as the key button but won’t set off a positive pulse unless hold down while the key button is pressed. You can have up to two of hold buttons. If a key is assigned here, a positive pulse won’t be send unless both/all keys are pressed. This is useful if you wish to have for example CtrlR or ⇧ ShiftAltEsc to do a specific action.
LogToggle field assigns a Bool property which determines if the keystroke will be logged in the String property (true) or not (false). This needs to be here if you wish to log your keystrokes.
Target is the String property to which the keystrokes are saved. Together with a Property sensor this can be used for example to enter passwords.
Message sensor
Messages can be used to send either text or property values. The Message sensor sends a positive pulse once a message is sent anywhere in the engine. It can filter to only send a pulse upon a message with a specific subject.
Mouse sensor
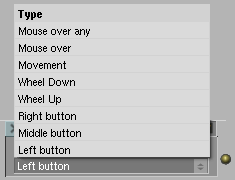
The Mouse sensor is for detecting mouse input. The controller consist only of a list of types of mouse events. These are:
- Left button.
- Middle button.
- Right button
- Wheel Up, the scroll wheel of the mouse.
- Wheel Down, the scroll wheel of the mouse.
- Movement, any movement with the mouse.
- Mouse over, detects if the mouse is over the object.
- Mouse over any, detects if the mouse is over any object.
There is no logic brick for specific mouse movement and reactions (such as first person camera), these have to be coded in python.
Near sensor
A Near sensor detects objects that are within a specific distance of themselves. It can filter objects with properties, like the Collision sensor.
The Property field can be used to limit the sensor to look for only the objects with this property.
Distance is the number of blender units it will detect objects within.
Reset is the distance the object needs to be to reset the sensor (send a negative pulse).
Property sensor
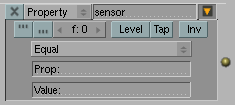
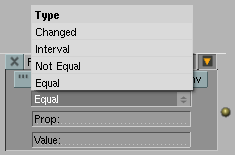
The Property sensor detect changes in the objects properties. This sensor has four modes:
- Equal triggers a positive pulse when the property value matches the value in the sensor. The Prop field is for the name of the property, and Value is for the value it has to match to send a positive pulse.
- Not Equal triggers a positive pulse when the property value differs from the value in the sensor. The same fields as Equal, but Value represents the value the property has to differ from in order to set off a pulse.
- Interval triggers a positive pulse when the value of the property is between the Min and Max values of the sensor. For “more than”, enter the property name in the Max field and the lowest number for triggering in the Min field. For “less than”, enter the property name in the Min field and the maximum value in the Max field. Names of other properties can also be entered to compare properties.
- Changed sends a positive pulse as soon as the property value changes.
Radar sensor
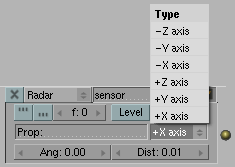
A Radar sensor works much like a Near sensor, but only within an angle from an axis, forming an invisible cone with the top in the objects’ center and base at a distance on an axis.
The Property field can be used to limit the sensor to look for only the objects with this property.
The Axis menu, determines the direction of the radar cone. The ± signs is whether it is on the axis direction (+), or the opposite (-).
Angle determines the width of the cone.
Distance determines the length of the cone.
This sensor is useful for giving bots sight only in front of them, for example. Note that it does see through other objects.
Random sensor
The Random sensor generates random pulses. It has a Seed field to enter the initial seed. 0 is not random, for testing and debugging purposes.
Ray sensor
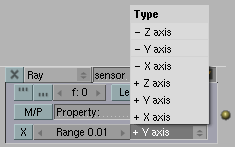
The Ray sensor shoots a ray in the direction of an axis and sends a positive pulse once it hits something. It can be filtered to only detect objects with a given material or property.
It shares a lot of buttons and fields with Radar sensor.
The X-Ray Mode button make it x-ray, it sees through objects that doesn’t have the property or material specified in the filter field.
Touch sensor
The Touch sensor sends a positive pulse when the object is in contact with another object. The MA field is for filtering materials. Only contact with the material in this field will generate a positive pulse. Leave blank for touch with any object. The positive pulse is sent on collision and the negative pulse is sent once the objects are no longer in contact. For a continuous pulse while they are in contact use “True Pulse triggering”.


