「Doc:2.6/Manual/Modeling/Meshes/Editing/Vertices」の版間の差分
(→Vertex Slide) |
細 (1版 をインポートしました) |
(相違点なし)
| |
2018年6月29日 (金) 04:50時点における最新版
Page status (reviewing guidelines)
Images
merging examples
|
Vertex Tools
This page covers many of the tools in the Mesh » Vertices menu. These are tools that work primarily on vertex selections, however, some also work with edge or face selections.
Merging
Merging Vertices
Mode: Edit mode
Hotkey: AltM
Menu: Mesh » Vertices » Merge..., Specials » Merge or Vertex Specials » Merge
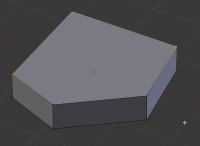
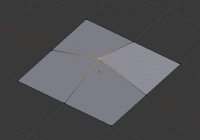
This tool allows you to merge all selected vertices to an unique one, deleting all others. You can choose the location of the surviving vertex in the menu this tool pops up before executing:
- At First
- Only available in Vertex select mode, it will place the remaining vertex at the location of the first one selected.
- At Last
- Only available in Vertex select mode, it will place the remaining vertex at the location of the last one selected (the active one).
- At Center
- Available in all select modes, it will place the remaining vertex at the center of the selection.
- At Cursor
- Available in all select modes, it will place the remaining vertex at the 3D Cursor.
- Collapse
- This is a special option, as it might let “live” more than one vertex. In fact, you will have as much remaining vertices as you had “islands” of selection (i.e. groups of linked selected vertices). The remaining vertices will be positioned at the center of their respective “islands”. It is also available via the Mesh » Edges » Collapse menu option…
Merging vertices of course also deletes some edges and faces. But Blender will do everything it can to preserve edges and faces only partly involved in the reunion.
AutoMerge Editing
Mode: Edit mode
Menu: Mesh » AutoMerge Editing
The Mesh menu as a related toggle option: AutoMerge Editing. When enabled, as soon as a vertex moves closer to another one than the Limit setting (Mesh Tools panel, see below), they are automatically merged.
Remove Doubles
Mode: Edit mode
Panel: Editing context → Mesh Tools
Hotkey: W » 4 or CtrlV » Remove doubles
Menu: Mesh » Vertices » Remove Doubles, Specials » Remove Doubles or Vertex Specials » Remove Doubles
Remove Doubles is a useful tool to simplify a mesh by merging vertices that are closer than a specified distance to each other. An alternate way to simplify a mesh is to use the Decimate modifier.
- Merge Distance
- Sets the distance threshold for merging vertices, in Blender units.
- Unselected
- Allows vertices in selection to be merged with unselected vertices. When disabled, selected vertices will only be merged with other selected ones.
Separating
Rip
Mode: Edit mode
Hotkey: V
Menu: Mesh » Vertices » Rip
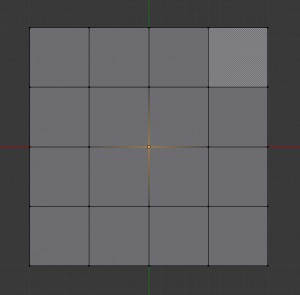
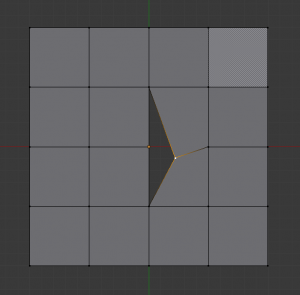
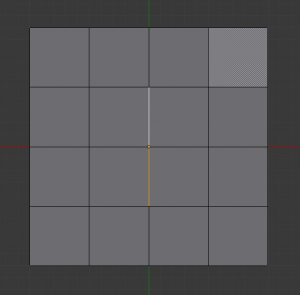
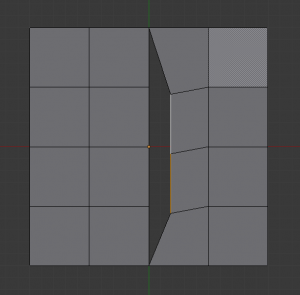
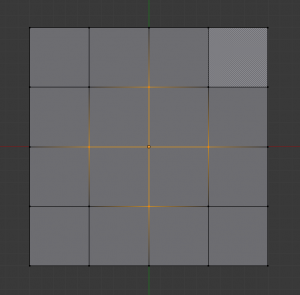
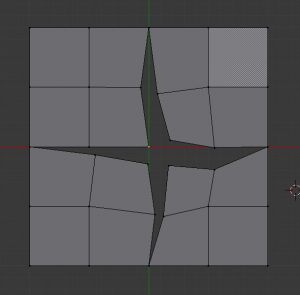
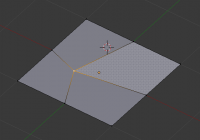
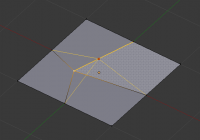
Rip creates a “hole” into a mesh by making a copy of selected vertices and edges, still linked to the neighbor non-selected vertices, so that the new edges are borders of the faces on one side, and the old ones, borders of the faces of the other side of the rip.
Examples
Limitations
Rip will only work when edges and/or vertices are selected. Using the tool when a face is selected (explicitly or implicitly), will return an error message “Can’t perform ripping with faces selected this way”. If your selection includes some edges or vertices that are not “between” two faces (manifold), it will also fail with message “No proper selection or faces include”.
Rip Fill
Mode: Edit mode
Hotkey: AltV
Menu: Mesh » Vertices » Rip Fill
Rip fill works the same as the Rip tool above, but instead of leaving a hole, it fills in the gap with geometry.
Split
Mode: Edit mode
Hotkey: Y
Menu: Mesh » Vertices » Split
A quite specific tool, it makes a sort of copy of the selection, removing the original data if it is not used by any non-selected element. This means that if you split an edge from a mesh, the original edge will still remain unless it is not linked to anything else. If you split a face, the original face itself will be deleted, but its edges and vertices remain unchanged. And so on.
Note that the “copy” is left exactly at the same position as the original, so you must move it (G) to see it clearly…
Separate
Mode: Edit mode
Hotkey: P
Menu: Mesh » Vertices » Separate
This will separate the selection in another mesh object, as described here.
Vertex Connect
Mode: Edit mode
Hotkey: J
Menu: Mesh » Vertices » Vertex Connect or CtrlV » Vertex Connect
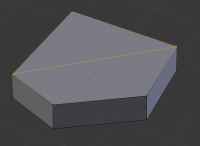
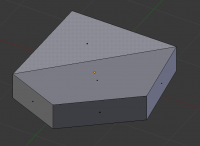
Vertex Connect takes two vertices that share a face, and creates an edge between the two, splitting the face into two new faces.
Vertex Slide
Mode: Edit mode
Panel: Editing context → Mesh Tools
Hotkey: ⇧ ShiftV » Vertex Slide
Menu: Mesh » Vertices » Vertex Slide or CtrlV » Vertex Slide
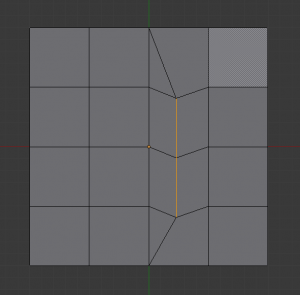
Vertex Slide will transform a vertex along one of its adjacent edges. Use ⇧ ShiftV to access the tool. Highlight the desired edge by moving the mouse, then confirm with LMB ![]() . Drag the cursor to specify the position along the line formed by the edge, then LMB
. Drag the cursor to specify the position along the line formed by the edge, then LMB ![]() again to move the vertex.
There are three options available by holding the following keys:
again to move the vertex.
There are three options available by holding the following keys:
- Snap to Midpoint ⇧ Shift
- Snap to Endpoint Alt
- Snap and Merge to Endpoint Control
Smooth
Mode: Edit mode
Panel: Editing context → Mesh Tools
Hotkey: CtrlV » Smooth vertex
Menu: Mesh » Vertices » Smooth, Specials » Smooth or Vertex Specials » Smooth
This will apply once the Smooth Tool.
Make Vertex Parent
Mode: Edit mode
Hotkey: CtrlP
Menu: Mesh » Vertices » Make Vertex Parent
This will parent the other selected object(s) to the vertices/edges/faces selected, as described here.
Add Hook
Mode: Edit mode
Hotkey: CtrlH
Menu: Mesh » Vertices » Add Hook
Adds a Hook Modifier (using either a new empty, or the current selected object) linked to the selection. Note that even if it appears in the history menu, this action cannot be undone in Edit mode – probably because it involves other objects…
Blend From Shape, Propagate Shapes
Mode: Edit mode
Hotkey: W » AltBlend from shape or CtrlV » Blend From Shape, and W » AltShape propagate or CtrlV » Shape Propagate
Menu: (Vertex) Specials » Blend From Shape and Vertex Specials » Shape Propagate
These are options regarding shape keys.
