「Extensions:2.6/Py/Scripts/3D interaction/Enhanced 3D Cursor」の版間の差分
(相違点なし)
|
2018年4月25日 (水) 02:15時点における版
| UI location | View3D > Action mouse; F10; Properties panel | ||
|---|---|---|---|
| Version | 3.0.7 | Author(s) | dairin0d |
| Blender | 2.7.7 | License | GPL 3+ |
| Category | 3D View | Distribution | Contrib |
| File name | space_view3d_enhanced_3d_cursor.py |
|---|---|
| Current version download | https://raw.github.com/dairin0d/enhanced-3d-cursor/master/space_view3d_enhanced_3d_cursor.py http://developer.blender.org/diffusion/BAC/browse/master/space_view3d_enhanced_3d_cursor.py |
| Python modules | math, time |
| Links | http://blenderartists.org/forum/showthread.php?229754-A-script-to-place-cursor-on-objects-surface-(and-some-other-functionality) |
|---|
目次
Spirou4D has made a French version of this document.
Merci à Spirou4D pour la version française de ce document:
https://www.dropbox.com/s/5ibubuu4281n99l/Enhanced_3D_cursor_add-on_infos.pdf
Installation
- Put the script in your addons folder.
- Activate it in User Preferences / Add-Ons Panel.
- "Transform Extra Options" and "3D Cursor Tools" subpanels will appear in the 3D View Properties Panel. Also, you are now able to drag 3D cursor with Action mouse buttion.
Features
- Drag 3D cursor in a similar way to Grab/Rotate/Scale transform operations
- cursor movement can be constrained to one or two axes of the current coordinate system
- you can enter exact cursor coordinates in the current coordinate system
- cursor can be snapped to grid/vertices/edges/faces/boundbox/objects
- during snapping surface normal and tangentials are displayed
- snapshots of normal/tangential can be added as Empties
- Rotate/Scale cursor position around current coordinate system origin
- Cursor location history
- cursor history is the same throughout all scenes (any change to cursor location is added as a new entry)
- history trace (displayed as polyline in 3D view)
- Cursor location bookmarks
- bookmarks are stored in libraries; for each library an individual coordinate system can be specified
- save/recall bookmarks
- swap cursor and bookmark
- create an Empty object at the bookmark
| Attention | |
| By default, the addon records cursor history (using a Cursor Monitor operator that runs in background), but this may cause Blender's auto-save feature to not work. You can disable Cursor Monitor in the addon's settings. |
Usage
Note: Here I will assume that Action mouse button is LMB ![]() and Select mouse button is RMB
and Select mouse button is RMB ![]() . But if your setup is different, the script will use it.
. But if your setup is different, the script will use it.
Cursor dragging/snapping operator
General
Drag cursor with LMB ![]() . Changes will be confirmed when you release the button.
If view is locked to cursor, the lock will be disabled for the duration of the operation.
. Changes will be confirmed when you release the button.
If view is locked to cursor, the lock will be disabled for the duration of the operation.
Press F10 (or the custom key you assigned to addon in user preferences) to launch the operator without touching the mouse.
You can also press this key during cursor dragging to enter "mouse-free mode". In that case, changes to cursor position would be confirmed on the next F10 or LMB ![]() press.
press.
Note that in Sculpt or Paint mode the operator will not be invoked by mousepress.
To discard changes in cursor position, press Esc or RMB ![]() .
.
Axis constraints and exact cursor coordinates
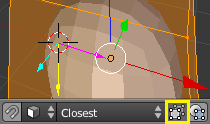
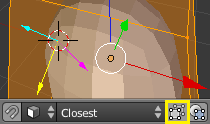
In cursor positioning mode, cursor coordinates are displayed at the left side of 3D view header. At the right side are displayed, from left to right:
- Pivot.
- Coordinate system. Predefined ones are displayed in violet color.
- Snap element. If snapping is on, it will have blue color. If "snap to itself" option is on, a rectangle outline will be also displayed.
If "Manipulate object centers only" mode is on, pivot (and, in some cases, snap element) will have dark-yellow color.
The precision, with which cursor coordinates are displayed, can be controlled by PageUp and PageDown.
Press X, Y or Z to constrain cursor movement to a single axis of selected coordinate system. Pressing them with ⇧ Shift would constrain cursor movement to other two axes. Pressing the same key twice would remove constraints. The axes in which cursor is forbidden to move are greyed out.
You can enter exact coordinates for any of the XYZ axes; they override any constraints and positioning made with mouse. Any valid basic numeric expressions are accepted. Entered values are displayed in blue color; invalid input has brown color. Otherwise, a coordinate will have black color.
Current input position is indicated by the caret (orange vertical line). To switch to next/previous axis, press ↓ or ↑ accordingly.
Also: you can press ⇆ Tab, ↵ Enter or ↵ NumPad to switch input to next axis. If combined with ⇧ Shift, they switch input to the previous axis.
To clear current axis input, press Ctrl← Backspace. To clear input for all axes, press CtrlDelete.
You can copy, cut and paste currently displayed cursor coordinates.
- To copy, press AltC. Now the clipboard will contain three values separated by tab characters. PLEASE NOTE that, depending on the current axis, they can be in XYZ, ZXY or YZX order.
- To cut, press AltX. Besides copying coordinates to clipboard, this also clears all coordinate inputs.
- To paste, press AltV. This will fill the axes with values from clipboard. Values for different axes can be separated either by tab or line break characters. PLEASE NOTE that, depending on the current axis, they can be inserted in XYZ, ZXY or YZX order.
Note: this way you can also paste formulas containing functions and constants defined in Python's math module (e.g. "sin(pi/4)").
Changing the coordinate system
Press A to switch between absolute and relative coordinates. In relative coordinates the position of cursor at the time of operator initialization would be considered origin (0, 0, 0). For absolute coordinates, the origin would depend on the selected transform orientation.
To select coordinate system, press one of the following:
| Key | System | Absolute origin | Notes |
|---|---|---|---|
| B | Global | World center | |
| L | Local | Object mode: pivot. Other modes: active object's location | If no object is selected, has the same effect as Global |
| M | Scaled ("Mesh") | Same as for Local, but takes into account object scale | |
| J | View | Same as for Local | |
| N | Normal | Edit mode: pivot | If nothing is selected (or outside of Edit mode), has the same effect as Local |
| K | Surface | Raycasted point | Z-axis: normal, X-axis: 1st tangential, Y-axis: 2nd tangential |
| [, ] | Custom | Same as for Local | Pressing these keys would cycle through available custom transform orientations (except the ones named "Scaled" or "Surface"). |
If you hold Ctrl when selecting coordinate system, cursor will be snapped to the system's origin. You can also press Ctrl0 to set axes to zero without changing the coordinate system.
Changing the pivot
To set pivot mode, press one of the following:
| Key | Pivot |
|---|---|
| H | Active Element |
| U | 3D Cursor |
| I | Individual Origins |
| O | Bounding Box Center |
| P | Median Point |
If you hold Ctrl when selecting pivot, cursor will be snapped to pivot position.
Also, you can toggle "Manipulate object centers only" option by pressing T. If this mode is enabled, cursor will be snapped to object centers instead of faces/edges/vertices/bounding boxes.
Rotate/Scale modes
You can switch between moving, rotating and scaling the cursor position by pressing G, R and S accordingly.
Rotate and Scale modes work similarly to Blender's Rotate/Scale operations. The differences:
- cursor is always rotated/scaled in the current coordinate system
- instead of "trackball" rotation, you can rotate in a similar way around two non-locked axes
Snapping
Snapping can be enabled by "Snap during transform" option. Also, while dragging the cursor, you can toggle it by holding Ctrl key. If "Cursor Depth" option is enabled (Interface tab in the User Preferences), cursor will always snap to faces unless a different snapping option is explicitly enabled.
You can change type of snapping during the operation by pressing the corresponding key.
| Key | Snap element | Description |
|---|---|---|
| C | Increment | Snap to integer coordinates in the selected coordinate system. If ⇧ Shift is held, snap to 1/10 of coordinate unit. |
| V | Vertex | Snap to the nearest vertex of the polygon under the mouse. |
| E | Edge | Snap to the nearest position on edge of the polygon under the mouse. If ⇧ Shift is held, snap to edge center (midpoint). |
| F | Face | Snap to the surface of the polygon under the mouse. If ⇧ Shift is held, snap to face center. |
| VV | Volume ("BBox") | Snap to corners, edge centers or face centers of object's bounding box in the selected coordinate system. |
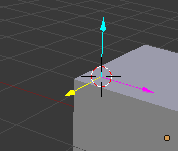
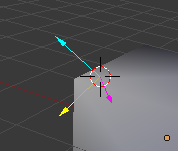
When snap element is any other than Increment (or current coordinate system is Surface), the normal and tangentials of the element are displayed. Normal of edge or face can be optionally interpolated between normals of the corresponding vertices.
Press W to make snapshot of normal (cyan), or Q to make snapshot of 1st tangential (violet). These are added to the scene as new empty objects.
In Edit Mesh mode, you can snap cursor either to the "raw" mesh or the mesh with all modifiers applied. This is controlled by "Snap onto inself" option (available in Edit Mesh mode); you can toggle it during cursor dragging by pressing D.
QWERTY Keymap (click to see in full resolution)
AZERTY Keymap (click to see in full resolution)
UI panels
"Transform Extra Options" panel:
- "Relative coordinates" enables/disables the use of relative coordinates when coordinate system's origin is calculated.
- If "Snap only to solid" is on, any objects with wireframe draw type ("Wire") will be ignored during snapping. Also, unless snap element is "Volume" ("bounding box"), objects with "Bounds" draw type are always ignored during snapping.
- "Normal interpolation mode" defines when to use normal interpolation. Possible options are "Always", "Never" and "Smoothness-based" (default). In smoothness-based mode, normals are interpolated only for faces marked as smooth.
- If "use comma separator" is enabled, the result of copying cursor coordinates will be 3 numbers separated by commas; otherwise, they would be separated by a Tab character.
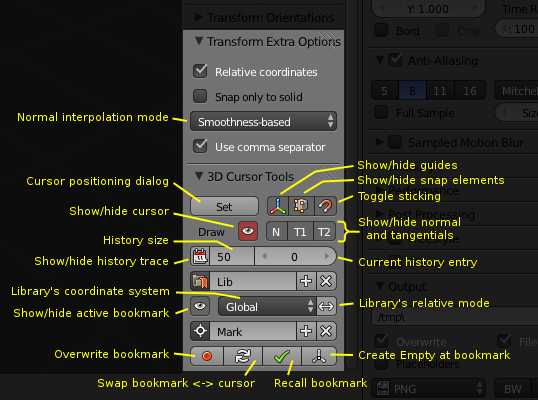
"3D Cursor Tools" panel (general):
- "Set" button -- opens cursor positioning dialog. In the dialog, you can enter exact cursor coordinates in the desired coordinate system using convenient Blender GUI.
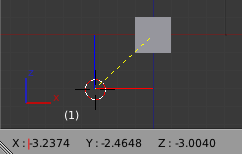
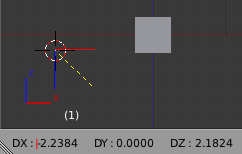
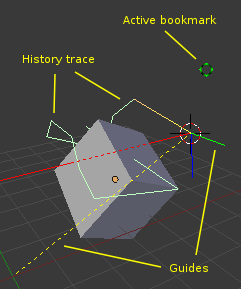
- "Show/hide guides" -- shows/hides helper lines ("guides") visualization during cursor dragging. An example of guides is shown on the illustration; red, green and blue lines correspond to X, Y and Z cursor projections in the current coordinate system. The dashed yellow line indicates offset between the origin of current coordinate system and the cursor position.
- "Show/hide snap elements" -- shows/hides snap elements during cursor snapping.
- "Toggle sticking" -- if enabled, cursor will "stick" to the last object it was snapped to.
- "Show/hide normal and tangentials" -- you can individually turn on/off the visualization of normal and tangentials during cursor snapping.
- "Show/hide cursor" -- can make the cursor invisible, though in a rather hacky way. Has a big downside: causes Blender to redraw all the time.
"3D Cursor Tools" panel (cursor history):
- "Show/hide history trace" -- enables/disables visualization of cursor position history.
- "History size" -- specifies the number of cursor positions that will be kept in cursor history.
- "Current history entry" -- you can use this widget to move cursor to any of the remembered positions of cursor history.
"3D Cursor Tools" panel (cursor location bookmarks):
You can save the cursor locations you want to use later in bookmarks. Bookmarks themselves are stored in bookmark libraries, which is convenient if you want to logically separate bookmarked positions or to store them in different coordinate systems.
If there are no bookmark libraries (a), you can create one by pressing "New Library" button; the library can be renamed after creation. When at least one library is present (b), you can delete it ("X" button), add a new one ("+" button) and select another library (using the icon to the right of the library name). You can add, select, rename and delete bookmarks in a library in a similar way.
- "Show/hide active bookmark" -- toggles visualization of currently selected bookmark's position.
- "Library's coordinate system" -- specifies the coordinate system in which bookmark positions will be stored/restored. Possible options: Global, Local, Scaled, Normal and Context. They do not depend on currently selected transform orientation, except for Context. Note that Local, Scaled and Normal won't work if there is no active object.
- "Library's relative mode" -- specifies whether to use relative coordinates for current library's bookmarks. If relative mode is on, bookmark positions will be stored as difference between current cursor position and the position of the current history entry. This difference is indicated as pale orange line when history trace is visualized. Bookmarked positions in relative mode will be restored relative to current cursor position.
- "Overwrite bookmark", "Swap bookmark and cursor", "Recall bookmark" and "Create Empty at bookmark" are rather self-explanatory :)
Known Issues
- Auto-registration of keymaps/shortcuts may cause glitches for some users. In this case, you can turn off keymap auto-registration in the addon's preferences.
- Pivot position and transform orientation in some cases don't correspond to the ones used by Blender internal tools (caused by Blender API incompleteness).
- Due to the way Blender stores data, cursor history and bookmarks are stored as properties of the "Default" screen (if there is no screen with such name, first available screen will be used). In most of the cases, users never delete or rename screens, so it's unlikely that they will accidentally erase all their bookmarks/history.
- It is necessary to exit-and-enter the editmode to get relevant information about current mesh selection. Thus any interactive edit-mode operator would automatically get applied when you click on 3D View.
- If you disable the addon while cursor move is in progress and re-enable it, there will be errors about removed StructRNA and addon may not work as expected - so don't do that (very, very rare case).
External Links
- A thread on blenderartists.org: http://blenderartists.org/forum/showthread.php?229754-A-script-to-place-cursor-on-objects-surface-(and-some-other-functionality)

