「Doc:2.6/Manual/Rigging/Posing/Editing」の版間の差分
(→Editing Poses: grammar/punctuation) |
(相違点なし)
|
2013年7月1日 (月) 15:00時点における版
Page status (reviewing guidelines)
Text
inbetweens, pose menu tools
Images
update
|
目次
Editing Poses
In Pose mode, bones behave like objects. So the transform actions (grab/rotate/scale, etc.) are very similar to the same ones in Object mode (all available ones are regrouped in the Pose » Transform sub-menu). However, there are some important specificities:
- Bones' relationships are crucial, as detailed below.
- The “transform center” of a given bone (i.e. its default pivot point, when it is the only selected one) is its root. Note by the way that some pivot point options seem to not work properly – in fact, except for the 3D Cursor one, all others appear to always use the median point of the selection (and not e.g. the active bone’s root when Active Object is selected, etc.).
Selecting Bones
Selection in Pose mode is very similar to the one in Edit mode, with a few specificities:
- You can only select whole bones in Pose mode, not roots/tips…
- You can select bones based on their group and/or layer, through the Select Grouped pop-up menu (⇧ ShiftG):
- To select all bones belonging to the same group(s) as the selected ones, use the In Same Group entry (⇧ ShiftGNum1).
- To select all bones belonging to the same layer(s) as the selected ones, use the In Same Layer entry (⇧ ShiftGNum2).
Basic Posing
As previously noted, bones’ transformations are performed based on the rest position of the armature, which is its state as defined in Edit mode. This means that in rest position, in Pose mode, each bone has a scale of 1.0, and null rotation and position (as you can see it in the Transform Properties panel, in the 3D views, N).
Moreover, the local space for these actions is the bone's own one (visible when you enable the Axes option of the Armature panel). This is especially important when using axis locking – for example, there is no specific “bone roll” tool in Pose mode, as you can rotate around the bone’s main axis just by locking on the local Y axis (RYY)… This also works with several bones selected; each one is locked to its own local axis!
When you pose your armature, you are supposed to have one or more objects skinned on it! And obviously, when you transform a bone in Pose mode, its related objects or object’s shape is moved/deformed accordingly, in real time. Unfortunately, if you have a complex rig set-up and/or a heavy skin object, this might produce lag, and make interactive editing very painful. If you experience such troubles, try enabling the Delay Deform button of the Armature panel – the skin objects will only be updated once you validate the transform operation.
Auto IK
The auto IK option in the tool shelf enables a temporary ik constraint when posing bones. The chain acts from the tip of the selected bone to root of the uppermost parent bone. Note that this mode lacks options, and only works by applying the resulting transform to the bones in the chain.
Rest Pose
Once you have transformed some bones, if you want to return to their rest position, just clear their transformations (usual AltG/AltR/AltS shortcuts, or Pose » Clear Transform » Clear User Transform, WNum5, to clear everything at once… – commands also available in the Pose » Clear Transform sub-menu).
Note that in Envelope visualization, AltS does not clear the scale, but rather scales the Distance influence area of the selected bones (also available through the Pose » Scale Envelope Distance menu entry – only effective in Envelope visualization, even though it is always available…).
Conversely, you may define the current pose as the new rest position (i.e. “apply” current transformations to the Edit mode), using the Pose » Apply Pose as Restpose menu entry (or CtrlA and confirm the pop-up dialog). When you do so, the skinned objects/geometry is also reset to its default, undeformed state, which generally means you’ll have to skin it again.
Whereas in Edit mode, you always see your armature in its rest position, in Object and Pose ones, you see it by default in its pose position (i.e. as it was transformed in the Pose mode). If you want to see it in the rest position in all modes, enable the Rest Position button in the Armature panel (Editing context, F9).
In-Betweens
There are several tools for editing poses in an animation.
- Relax Pose (Pose » In-Betweens » Relax Pose or AltE)
- Relax pose is somewhat related to the above topic – but it is only useful with keyframed bones (see the animation chapter). When you edit such a bone (and hence take it “away” from its “keyed position”), using this command will progressively “bring it back” to its “keyed position”, with smaller and smaller steps as it comes near it.
- Push Pose (Pose » In-Betweens » Relax Pose or CtrlE)
- Push pose exaggerates the current pose.
- Breakdowner (Pose » In-Betweens » Pose Breakdowner or ⇧ ShiftE)
- Creates a suitable breakdown pose on the current frame
There are also in Pose mode a bunch of armature-specific editing options/tools, like auto-bones naming, properties switching/enabling/disabling, etc., that we already described in the armature editing pages – follow the links above…
Copy/Paste Pose
Mode: Pose mode
Panel: 3D View header
Menu: Pose » Copy Current Pose, Pose » Paste Pose, Pose » Paste Flipped Pose
Blender allows you to copy and paste a pose, either through the Pose menu, or directly using the three “copy/paste” buttons found at the right part of the 3D views header:
- Pose » Copy Current Pose
- to copy the current pose of selected bones into the pose buffer.
- Pose » Paste Pose
- paste the buffered pose to the currently posed armature.
- Pose » Paste Flipped Pose
- paste the X axis mirrored buffered pose to the currently posed armature.
Here are important points:
- This tool works at the Blender session level, which means you can use it across armatures, scenes, and even files. However, the pose buffer is not saved, so you lose it when you close Blender.
- There is only one pose buffer.
- Only the selected bones are taken into account during copying (i.e. you copy only selected bones’ pose).
- During pasting, on the other hand, bone selection has no importance. The copied pose is applied on a per-name basis (i.e. if you had a “
forearm” bone selected when you copied the pose, the “forearm” bone of the current posed armature will get its pose when you paste it – and if there is no such named bone, nothing will happen…). - What is copied and pasted is in fact the position/rotation/scale of each bone, in its own space. This means that the resulting pasted pose might be very different from the originally copied one, depending on:
- The rest position of the bones, and
- The current pose of their parents.
|
| ||||
Effects of Bones Relationships
Bones relationships are crucial in Pose mode – they have important effects on transformations behavior.
By default, children bones inherit:
- Their parent position, with their own offset of course.
- Their parent rotation (i.e. they keep a constant rotation relatively to their parent).
- Their parent scale, here again with their own offset.
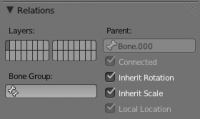
Exactly like standard children objects. You can modify this behavior on a per-bone basis, using their sub-panels in the Armature Bones panel:
- Inherit Rotation
- When disabled, this will “break” the rotation relationship to the bone’s parent. This means that the child will keep its rotation in the armature object space when its parent is rotated.
- Inherit Scale
- When disabled, this will “break” the scale relationship to the bone’s parent.
These inheriting behaviors propagate along the bones’ hierarchy. So when you scale down a bone, all its descendants are by default scaled down accordingly. However, if you set one bone’s Inherit Scale or Inherit Rotation property on in this “family”, this will break the scaling propagation, i.e. this bone and all its descendants will no longer be affected when you scale one of its ancestors.
Connected bones have another specificity: they cannot be translated. Indeed, as their root must be at their parent’s tip, if you don’t move the parent, you cannot move the child’s root, but only its tip – which leads us to a child rotation. This is exactly what happens – when you hit G with a connected bone selected, Blender automatically switches to rotation operation.
Bones relationships also have important consequences on how selections of multiple bones behave when transformed. There are many different situations, so I’m not sure I list all possible ones below – but this should anyway give you a good idea of the problem:
- Non-related selected bones are transformed independently, as usual.
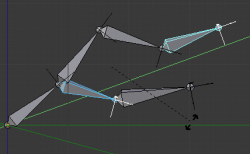
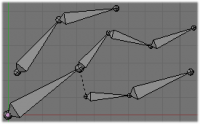
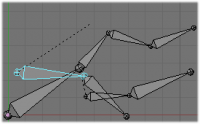
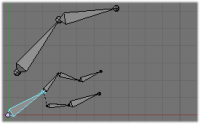
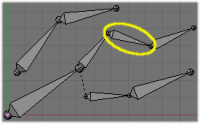
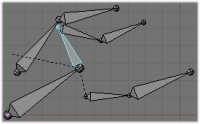
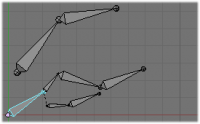
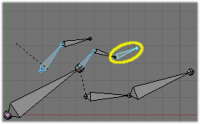
- When several bones of the same “family” are selected, only the “most parent” ones are really transformed – the descendants are just handled through the parent relationship process, as if they were not selected (see Scaling bones, some of them related – the third tip bone, outlined in yellow, was only scaled down through the parent relationship, exactly as the unselected ones, even though it is selected and active. Otherwise, it should have been twice smaller!).
- When connected and unconnected bones are selected, and you start a grab operation, only the unconnected bones are affected.
- When a child connected hinge bone is in the selection, and the “most parent” selected one is connected, when you hit G, nothing happens – Blender remains in grab operation, which of course has no effect on a connected bone. This might be a bug, in fact, as I see no reason for this behavior…
So, when posing a chain of bones, you should always edit its elements from the root bone to the tip bone. This process is known as forward kinematics, or FK. We will see in a later page that Blender features another pose method, called inverse kinematics, or IK, which allows you to pose a whole chain just by moving its tip.
Note that this feature is somewhat extended/completed by the pose library tool.


