「Dev:Ref/Release Notes/2.67/Paint System」の版間の差分
細 (1版 をインポートしました) |
|
(相違点なし)
| |
2018年6月29日 (金) 05:53時点における最新版
The paint system in blender has been refactored to better unify the paint systems stroke management.
Due to this, there are some new features for all paint modes, and some implemented specifically for texture painting.
All Modes
Option consistency
Options were grouped more consistently between paint modes in this release. Stroke modes can be changed via a drop-down menu and by pressing A in the viewport. For modes that support masking, A selects everything instead, when masking is active.
Spacing Pressure Support
Spacing based on stylus pressure. More pressure means dabs are closer together.
Absolute Jittering Mode
Jittering of strokes in 2.66 is done relatively to the brush size. It is possible now to set the jittering amount in pixels, keeping the size independent and allowing for brush spreads greater than before. To switch to absolute mode, press the lock icon next to the jittering amount slider.
Overlay support
All paint modes that use textures now support overlay. Overlay now works slightly differently than older blender versions. There is separate overlay control for the brush itself (under the tool options) and for brush textures. There is also the ability to turn a specific overlay off while a stroke is in progress by clicking the brush icon next to the overlay slider.
New Texture Mapping Modes
Random mapping
Simply picks a random texture coordinate to sample from for each dab.
Stencil mapping
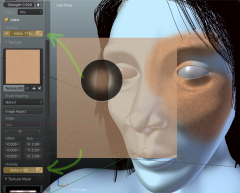
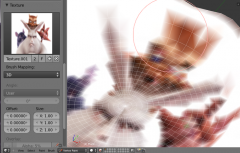
Stencil mapping works by displaying an overlay which users can place on the viewport and paint in a stencil-like way on their mesh. Painting outside the boundaries of the stencil will fail. To control the position, rotation and scale of the stencil, use:
RMB ![]() : Stencil translation
: Stencil translation
CtrRMB ![]() : Stencil rotation
: Stencil rotation
⇧ ShiftRMB ![]() : Stencil scaling
: Stencil scaling
When using stencil scaling, X and Y are used to constrain the scaling to one axis. Pressing one of the buttons twice reverts to unconstrained scaling.
Because of scaling, it is possible to scale an image to aspect ratios different than the original image and introduce stretching. To restore the aspect ratio of the original image, use the Image Aspect button below the brush mapping. This option is only visible for image textures. This operator can even use the tiling and scale values of the brush texture if the relevant operator properties are enabled.
It is also possible to restore the position of the stencil. To do that press Reset Transform
Note: When using stencil mapping it is not possible to deactivate the overlay!
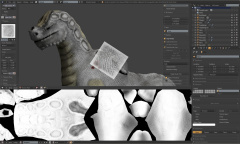
Stencil mapping is supported on the new alpha mask textures too. To manipulate the alpha stencil, use
AltRMB ![]() : Stencil translation
: Stencil translation
AltCtrRMB ![]() : Stencil rotation
: Stencil rotation
Alt⇧ ShiftRMB ![]() : Stencil scaling
: Stencil scaling
Angle Control
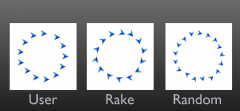
Rake, random and user controlled rotation of textured brushes is now possible across all modes that support textured brushes.
- R: menu, rotation modes.
- User: User specified, tweak in toolbar field or using Ctrl-F
- Random: Random rotation per dab. Supported only on view-mapped textures
- Rake: Rotation follows direction of stroke. Supported only on view-mapped textures
Mode Specific Features
Texture Painting Mode
- Smooth Stroke is now supported in texture painting
- Number of input samples supported for texture painting
- Stroke strength clamping is now supported on 2D painting and has been improved in projective painting too
Texture support for alpha/mask
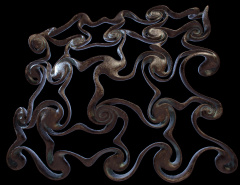
- Brush strength now supports masking with textures in addition to the curve and strength controls. Masks are great for selectively painting screen space patterns in addition to uv texture stencils. Alpha masks will only work properly on space style strokes, since airbrushes accumulate. Currently only projective painting on the 3D viewport supports alpha masks.
Setting properties for mask textures in the texture properties editor is currently somewhat tricky. In cycles, it is possible to select the mask texture through the texture selection drop-down menu but in blender internal, users are required to pin the context and browse to the assigned mask texture, since the default texture displayed in the unpinned context will always get assigned to the primary brush texture.
- Spacing behaves differently in 2.67 and is based on brush radius rather than brush diameter. Old files will have the spacing of brushes halved automatically to match the old behaviour, however if a new file is opened with an old version of blender, space stroked brushes may be laggier unless spacing is brought back to double the value again.
- CtrLMB
 now sets the clone cursor only when the clone tool is active, since it's a tool specific function. The key combination is now reserved for inverted modes in other tools.
 - Sample color is changed to S
- Disabling projection mode is no longer possible in 3d viewport. This was exactly equivalent to simply painting in the image editor, so it was removed as part of the painting code refactoring.
- When the stencil mode is active, selecting individual faces is no longer possible in vertex and image paint mask mode. Use the circle select tool C instead.
Vertex Paint Mode
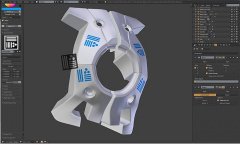
- Support for textured brushes. Vertex painting brushes can now sample textures with full support for most mapping modes.
Sculpt Mode
- Better twist brush:
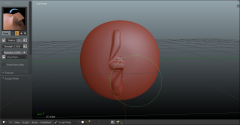
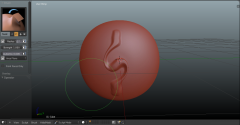
The twist brush has undergone refactoring to become easier to use and produce more interesting results. To use it, start the brush on the object and drag away from the center. The initial drag direction is the zero angle and by rotating around the center you can create a vortex effect. The sculpt plane has direct influence on the direction of the twist. The area plane twists around the normal of the area at the centre of the brush while the view plane twists around an axis perpendicular to the screen. This latter mode can be used as a posing tool.
Comparison between old and new behaviour on the right:
