Doc:2.6/Manual/Render/Camera
Page status (reviewing guidelines)
Text
Options reviewed for v2.70; Video is for old version
|
The Camera
A Camera is an object that provides a means of rendering images from Blender. It defines which portions of a scene is visible at render time. Scenes can have multiples cameras, but must contain, at minimum, one camera in order to generate any images.
Add a new camera
Mode: Object mode
Hotkey: ⇧ ShiftA to add new.
Menu: Add » Camera
In Object mode simply press ⇧ ShiftA and in the popup menu, choose Add » Camera.
Change active camera
Mode: Object mode
Hotkey: Ctrl0 NumPad
The active camera is the camera that is currently being used for rendering and camera view (0 NumPad). Select the camera you would like to make active and press Ctrl0 NumPad (by doing so, you also switch the view to camera view). In order to render, each scene must have a camera.
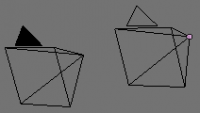
The active camera is the one with the filled “up” triangle on top seen in the 3D viewport, for example, the left camera in (Active camera (left one)).
The active camera, as well as the layers, can be specific to a given view, or global (locked) to the whole scene – see this part of the 3D view options page.
Switching Multiple Cameras
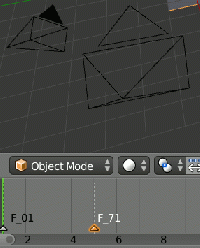
To change cameras mid-animation, you need to use markers.
See details about switching cameras here
Camera Settings
Mode: Object mode
Panel: Camera
Cameras are invisible in renders, so they don’t have any material or texture settings. However, they do have Object and Editing setting panels available which are displayed when a camera is the selected (active!) object.
Lens
- Perspective / Orthographic / Panoramic
- Select what projection type to use. Perspective is the default and makes objects further away appear smaller while Orthographic maintains the exact measures of objects. A Perspective projection is more similar to what an image obtained with a real camera would look like while an Orthographic projection is a more technical view, best for blueprints, but worst to convey distances between objects.
- To configure these projections, see this page on vanishing points and isometric view.
- Panoramic renders the scene with a cylindrical projection.
- Focal Length
- Available in Perspective and Panoramic camera types, represents the lens focal length, represented in degrees or millimeters. When Orthographic mode is selected, the Focal Length setting changes to the Orthographic Scale setting. This setting determines the size of the camera's visible area.
- Shift X/Y
- Shifts the camera viewport. Note that most of the time, this setting should not be used to adjust the camera position, as the Shift setting is relative to the actual camera position, which will not be changed.
- Clipping Start/End
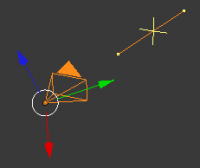
- Sets the clipping limits. Only objects within the limits are rendered. If Limits in the Display panel is enabled, the clip bounds will be visible as two yellow connected dots on the camera line of sight.
Note
The 3D View window contains settings similar to the camera, such as Orthographic/Perspective and Clip Start/Clip End. These settings have no effect on the camera rendering, and only change the view settings when not in Camera view. These settings are accessed through the View menu of the 3D View.
See the 3D view options page for more details.
|
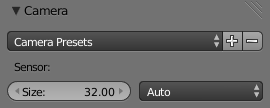
Camera Presets
- ToDo
- Camera Presets
- Sensor
Depth of Field
- Depth of Field object
- When using Depth of Field, the linked object will determine the focal point. Linking an object will deactivate the distance parameter.
- Distance
- Distance to the focal point. It is shown as a yellow cross on the camera line of sight. Limits must be enabled to see the cross. It is used in combination with the Defocus Compositing Node.
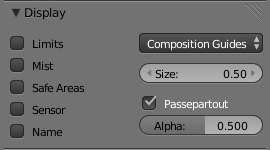
Display
- Limits
- Toggles viewing of the limits on and off.
- Mist
- Toggles viewing of the mist limits on and off. The limits are shown as two connected white dots on the camera line of sight. The mist limits and other options are set in the World panel, in the Mist section.
- Safe Areas
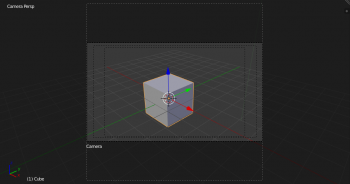
- When this is enabled, extra dotted frames are drawn when in camera view, delimiting the area considered as “safe” for important things.
- Sensor
- Displays a dotted frame in camera view.
- Name
- Toggle name display on and off in camera view.
- Size
- Size of the camera icon in the 3D view. This setting has no effect on the render output of a camera, and is only a cosmetic setting. The camera icon can also be scaled using the standard Scale S transform key.
- Passepartout, Alpha
- This mode darkens the area outside of the camera’s field of view, based on the Alpha setting.
Composition Guides
Composition Guides are available from the drop-down menu, which can help when framing a shot. There are 8 types of guides available:
- Center
- Adds lines dividing the frame in half vertically and horizontally.
- Center Diagonal
- Adds lines connecting opposite corners.
- Thirds
- Adds lines dividing the frame in thirds vertically and horizontally.
- Golden
- Divides the width and height into Golden proportions (About 0.618 of the size from all sides of the frame).
- Golden Triangle A
- Draws a diagonal line from the lower-left to upper-right corners, then adds perpendicular lines that pass through the top left and bottom right corners.
- Golden Triangle B
- Same as A, but with the opposite corners.
- Harmonious Triangle A
- Draws a diagonal line from the lower-left to upper-right corners, then lines from the top left and bottom right corners to 0.618 the lengths of the opposite side.
- Harmonious Triangle B
- Same as A, but with the opposite corners.
Here you will find some handy ways to navigate and position your camera in your scene.
Note
Remember that the active “camera” might be any kind of object. So these actions can be used e.g. to position and aim a lamp…
|
Move active camera to view
Mode: Object mode
Hotkey: CtrlAlt0 NumPad
This feature allows you to position and orient the active camera to match your current viewport.
Select a camera and then move around in the 3D view to a desired position and direction for your camera (so that you're seeing what you want the camera to see). Now press CtrlAlt0 NumPad and your selected camera positions itself to match the view, and switches to camera view.
Camera View Positioning
By enabling Lock Camera to View in the View menu of the View Properties panel, while in camera view, you can navigate the 3d viewport as usual, while remaining in camera view. Controls are exactly the same as when normally moving in 3d.
Roll, Pan, Dolly, and Track
To perform these camera moves, the camera must first be selected, so that it becomes the active object (while viewing through it, you can RMB ![]() -click on the solid rectangular edges to select it). The following actions also assume that you are in camera view (0 NumPad)! Having done so, you can now manipulate the camera using the same commands that are used to manipulate any object:
-click on the solid rectangular edges to select it). The following actions also assume that you are in camera view (0 NumPad)! Having done so, you can now manipulate the camera using the same commands that are used to manipulate any object:
Roll: Press R to enter object rotation mode. The default will be to rotate the camera in its local Z-axis (the axis orthogonal to the camera view), which is the definition of a camera “roll”.
Vertical Pan or Pitch: This is just a rotation along the local X-axis. Press R to enter object rotation mode, then X twice (the first press selects the global axis – pressing the same letter a second time selects the local axis – this works with any axis; see the axis locking page).
Horizontal Pan or Yaw: This corresponds to a rotation around the camera’s local Y axis… Yes, that’s it, press R, and then Y twice!
Dolly: To dolly the camera, press G then MMB ![]() (or Z twice).
(or Z twice).
Sideways Tracking: Press G and move the mouse (you can use X twice or Y to get pure-horizontal or pure-vertical sideways tracking).
Aiming the camera in Flymode
When you are in Camera view, the fly mode actually moves your active camera…
