Doc:2.6/Manual/Rigging/Armatures/Editing/Properties
Editing Bone Properties
In this page, you will learn how to edit and control most of the properties for Blender bones – For editing bones in an armature, you should read the previous page first! We will see how to manage the bones' relationships, rename them, etc.
Transforming Bones
We won’t detail here the various transformations of bones, nor things like axis locking, pivot points, and so on, as they are common to most object editing, and already described here (note however that some options, like snapping, do not seem to work, even though they are available…). The same goes for mirroring, as it’s nearly the same as with mesh editing. Just keep in mind that bones’ roots and tips behave more or less like meshes’ vertices, and bones themselves act like edges in a mesh.
As you know, bones can have two types of relationships: They can be parented, and in addition connected. Parented bones behave in Edit mode exactly as if they had no relations – you can grab, rotate, scale, etc. a parent bone without affecting its descendants. However, connected bones must always have parent’s tips connected to child’s roots, so by transforming a bone, you will affect all its connected parent/children/siblings.
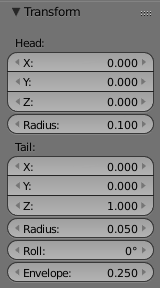
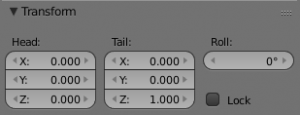
Finally, you can edit in the Transform Properties panel (N) the positions and radius of both ends of the active selected bone, as well as its roll rotation.
Scaling Specificities in B-Bone and Envelope visualization
Mode: Edit mode and Pose mode, Envelope and B-Bone visualization
Hotkey: CtrlAltS
Menu: Armature » Transform » Scale Envelope Distance, Armature » Transform » Scale BBone
CtrlAltS activates a transform tool that is specific to armatures. It has different behavior depending on the active visualization, as explained below:
In Envelope visualization, it allows you to edit the influence of the selected bones (their Dist property, see the skinning part) – as with the “standard” scaling with this visualization (see the previous section), this is a one-value property, so there is no axis locking and such.
In the other visualizations, it allows you to edit the “bone size”. This seems to only have a visible effect in B-Bone visualization, but is available also with Octahedron and Stick… This tool in this situation has another specific behavior: While with other transform tools, the “local axes” means the object’s axes, here they are the bone’s own axes (when you lock to a local axis, by pressing the relevant key twice, the constraint is applied along the selected bone’s local axis, not the armature object’s axis).
WARNING! If you have more than one bone selected, using this tool crashes Blender!
Scaling Specificities in Envelope Visualization
Mode: Edit mode, Envelope visualization
Hotkey: AltS
Menu: Armature » Transform » Scale Radius
When bones are displayed using Octahedron, Stick or B-Bone visualizations, scaling will behave as expected, similar to scaling mesh objects. When bones are displayed using Envelope visualization, scaling will have a different effect: it will scale the radius of the selected bones’s ends. (see: skinning part). As you control only one value (the radius), there is no axis locking here. And as usual, with connected bones, you scale at the same time the radius of the parent’s tip and of the children’s roots.
Note that when you resize a bone (either by directly scaling it, or by moving one of its ends), Blender automatically adjusts the end-radii of its envelope proportionally to the size of the modification. Therefore, it is advisable to place all the bones first, and only then edit these properties.
Bone Direction
Mode: Edit mode
Hotkey: AltF, W2
Menu: Armature » Switch Direction, Specials » Switch Direction
This tool is available from the Armature menu (AltF) and from the Specials pop-up menu(W). It allows you to switch the direction of the selected bones (i.e. their root will become their tip, and vice versa).
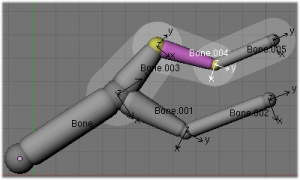
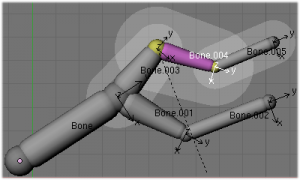
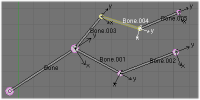
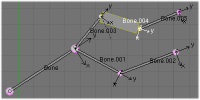
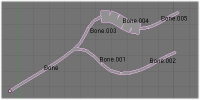
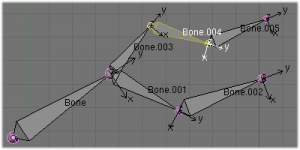
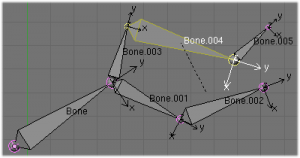
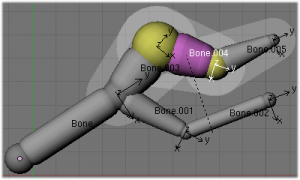
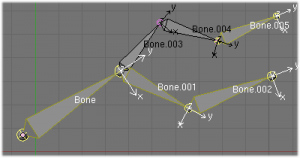
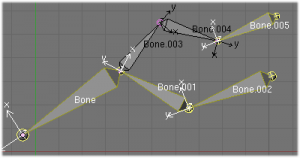
Switching the direction of a bone will generally break the chain(s) it belongs to. However, if you switch a whole (part of a) chain, the switched bones will still be parented/connected, but in “reversed order”. See the Switching example.
| Switching example. | |
Bone Roll
Mode: Edit mode
Hotkey: CtrlR, CtrlN
Menu: Armature » Bone Roll » …
In Edit mode, you have options dedicated to the control of the bone roll rotation (i.e. the rotation around the Y axis of the bone). Each time you add a new bone, its default roll is so that its Z axis is as perpendicular to the current 3D view as possible. And each time you transform a bone, Blender tries to determine its best roll…
But this might lead to an unclear armature, with bones rolled in all angles… nasty! To address this problem, you have three options:
- Armature » Bone Roll » Set Roll (CtrlR) will start a roll-specific rotation, which behaves like any other transform operations (i.e. move the mouse and LMB
 click to validate, or type a numeric value and hit enter – or RMB
  click or hit Esc to cancel everything).
 - Armature » Bone Roll » Recalculate Roll (CtrlN):
- Type
-
- Local X Tangent
- Sets the selected bone roll so that its Z axis is as much as possible pointed to local X tangent.
- Local Z Tangent
- Sets the selected bone roll so that its Z axis is as much as possible pointed to local Z tangent.
- Global X Axis/Global Y Axis/Global Z Axis
- Sets the selected bone roll so that its Z axis is as much as possible pointed to global X, Y or Z axis respectively.
- Active Bone
- Sets the selected bone roll so that its Z axis is as much as possible pointed to active (selected) other bone.
- View Axis
- Sets the selected bone roll so that its Z axis is as much as possible pointed toward to 3D-View plane.
- Cursor
- Sets the selected bone roll so that their Z axis is as much as possible pointed to the 3D cursor.
- Flip Axis
- Negate flipping the alignment axis.
- Shortest Rotation
- Ignore the axis direction, use the shortest rotation to align.
Deform properties for bone
Mode: Edit and Pose mode
Panel: Deform panel of Bones context
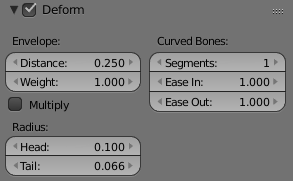
Most bones’ properties (excepted the transform ones) are regrouped in each bone’s sub-panel, in the Deform panel (Bones context. Let’s detail them.
Note that some of them are also available in the 3D views, through the three pop-up menus Toggle Setting (⇧ ShiftW or Armature » Bone Settings » Toggle a Setting), Enable Setting (Ctrl⇧ ShiftW or Armature » Bone Settings » Enable a Setting), and Disable Setting (AltW or Armature » Bone Settings » Disable a Setting) – all three have the same entries, their respective effect should be obvious…
These settings specify how armature bones and particularly their ends influence on model geometry in the posing workflow.
Deform settings with bone envelope visualization
- Envelope
-
- Distance
- Sets overall bone deformation distance to geometry.
- Weight
- Allow to set bone weight value to geometry.
- Multiply
- When deforming bones, multiply effects of Vertex Group weights with Envelope influence.
- Radius
-
- Head
- Sets radius of head (root) of bone (only with envelope visualization) and respectively envelope influence in its area.
- Tail
- Radius of tail (tip) of bone (only with envelope visualization) and respectively envelope influence in its area.
Bone rigidity settings
Mode: Pose modes (only for B-Bone visualization)
Panel: Deform panel of Bones context
Even though you have the Segments setting available in Edit mode (in the Deform panel of Bone context), you should switch to the Pose mode (Ctrl⇆ Tab) to edit these “smooth” bones’ properties – one explanation to this strange need is that in Edit mode, even in B-Bone visualization, bones are drawn as sticks, so you can’t visualize the effects of these settings.
- Curved Bones
-
- Segments
- This setting controls the number of subdivisions that a bone has.
- Easy In
- Length of first virtual Bezier handle with B-Bone visualization.
- Easy Out
- Length of second virtual Bezier handle with B-Bone visualization.
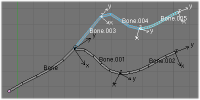
We saw in this page that bones are made of small rigid segments mapped to a “virtual” Bézier curve. The Segm numeric field allows you to set the number of segments inside a given bone – by default, it is 1, which gives a standard rigid bone! The higher this setting (max 32), the smoother the bone, but the heavier the pose calculations…
Each bone's ends are mapped to its “virtual” Bézier curve's “auto” handle. Therefore, you can’t control their direction, but you can change their “length” using the In and Out numeric fields, to control the “root handle” and “tip handle” of the bone, respectively. These values are proportional to the default length, which of course automatically varies depending on bone length, angle with previous/next bones in the chain, and so on.
Chain Relations Editing
Mode: Edit mode
Panel: Relations panel of Bone context
Hotkey: CtrlP, AltP
Menu: Armature » Parent » …
You can edit the relationships between bones (and hence create/modify the chains of bones) both from the 3D views and the Properties window. Whatever method you prefer, it’s always a matter of deciding, for each bone, if it has to be parented to another one, and if so, if it should be connected to it.
To parent and/or connect bones, you can:
- In a 3D view, select the bone and then its future parent, and hit CtrlP (or Armature » Parent » Make Parent…). In the small Make Parent menu that pops up, choose Connected if you want the child to be connected to its parent, else click on Keep Offset. If you have selected more than two bones, they will all be parented to the last selected one. If you only select one already-parented bone, or all selected bones are already parented to the last selected one, your only choice is to connect them, if not already done. If you select only one non-parented bone, you’ll get the Need selected bone(s) error message…
- With this method, the newly-children bones won’t be scaled nor rotated – they will just be translated if you chose to connect them to their parent’s tip.
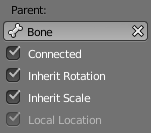
- Parent
-
- Parent bone field
- Parent bone in same armature.
- Conected
- When bone has a parent, bone's head is stuck to the parent's tail.
- Inherit Rotation
- Bone inherits rotation from parent bone.
- Inherit Scale
- Bone inherits scaling from parent bone.
- Local Location
- Bone location is set in local space.
- Object Children (only in Pose mode)
-
- Relative Parenting
- Object children will use relative transform, like deform.
- In the Bone context, Relations panel, for each selected bone, you can select its parent in the Parent drop-down list to the upper right corner of its sub-panel. If you want them to be connected, just enable the little Conected button to the below of the list.
- With this method, the tip of the child bone will never be translated – so if Conected is enabled, the child bone will be completely transformed by the operation.
To disconnect and/or free bones, you can:
- In a 3D view, select the desired bones, and hit AltP (or Armature » Parent » Clear Parent…). In the small Clear Parent menu that pops up, choose Clear Parent to completely free all selected bones, or Disconnect Bone if you just want to break their connections.
- In the Buttons window, Armature Bones panel, for each selected bone, you can select no parent in the Parent drop-down list of its sub-panel, to free it completely. If you just want to disconnect it from its parent, disable the Con button.
Note that relationships with non-selected children are never modified.
Naming Bones
Mode: Edit and Pose mode
Panel: Bone context, Item section of Properties panel in 3D views (N))
You can rename your bones, either using the Bone field in Item section of the Properties panel in the 3D views (N), or using the top field of the Bone context for the active bone.
Blender also provides you some tools that take advantage of bones named in a left/right symmetry fashion, and others that automatically name the bones of an armature. Let’s look at this in detail.
Naming Conventions
Naming conventions in Blender are not only useful for you in finding the right bone, but also to tell Blender when any two of them are counterparts.
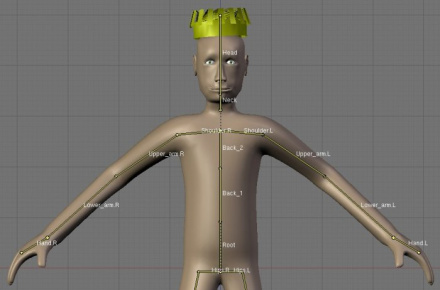
In case your armature can be mirrored in half (i.e. it’s bilaterally symmetrical), it’s worthwhile to stick to a left/right naming convention. This will enable you to use some tools that will probably save you time and effort (like the X-Axis Mirror editing tool we saw above…).
- First you should give your bones meaningful base-names, like
leg,arm,finger,back,foot, etc. - If you have a bone that has a copy on the other side (a pair), like an arm, give it one of the following separators:
- Left/right separators can be either the second position (
L_calfbone) or last-but-one (calfbone.R) - If there is a lower or upper case
L,R,leftorright, Blender handles the counterpart correctly. See below for a list of valid separators. Pick one and stick to it as close as possible when rigging; it will pay off. For example:
- Left/right separators can be either the second position (
| Separator | example | ||
|---|---|---|---|
| (nothing) | handLeft | → | handRight |
| _ (underscore) | Hand_L | → | Hand_R |
| . (point) | hand.l | → | hand.r |
| - (dash) | Foot-l | → | Foot-r |
| (space) | pelvis LEFT | → | pelvis RIGHT |
- Note that all examples above are also valid with the left/right part placed before the name. You can only use the short
L/Rcode if you use a separator (i.e.handL/handRwon’t work!).
- Note that all examples above are also valid with the left/right part placed before the name. You can only use the short
- Before Blender handles an armature for mirroring or flipping, it first removes the number extension, if it’s there (like
.001) - You can copy a bone named
bla.Land flip it over using W » Flip Names. Blender will name the copybla.L.001and flipping the name will give youbla.R.
Bone name flipping
Mode: Edit mode
Hotkey: W4
Menu: Armature » Flip Names
You can flip left/right markers (see above) in selected bone names, using either Armature » Flip Names, or Specials » Flip Names (W4). This can be useful if you have constructed half of a symmetrical rig (marked for a left or right side) and duplicated and mirrored it, and want to update the names for the new side. Blender will swap text in bone names according to the above naming conventions, and remove number extensions if possible.
Auto bone naming
Mode: Edit mode
Hotkey: W5, W6, W7
Menu: Armature » AutoName Left-Right, Armature » AutoName Front-Back, Armature » AutoName Top-Bottom
The three AutoName entries of the Armature and Specials (W) menus allows you to automatically add a suffix to all selected bones, based on the position of their root relative to the armature center and its local coordinates:
- AutoName Left-Right will add the
.Lsuffix to all bones with a positive X-coordinate root, and the.Rsuffix to all bones with a negative X-coordinate root. If the root is exactly at 0.0 on the X-axis, the X-coordinate of the tip is used. If both ends are at 0.0 on the X-axis, the bone will just get a period suffix, with no L/R (as Blender cannot decide whether it is a left or right bone…). - AutoName Front-Back will add the
.Bksuffix to all bones with a positive Y-coordinate root, and the.Frsuffix to all bones with a negative Y-coordinate root. The same as with AutoName Left-Right goes for 0.0 Y-coordinate bones… - AutoName Top-Bottom will add the
.Topsuffix to all bones with a positive Z-coordinate root, and the.Botsuffix to all bones with a negative Z-coordinate root. The same as with AutoName Left-Right goes for 0.0 Z-coordinate bones…
