Dev:Ref/Release Notes/2.64/Skin Modifier
Blender 2.64: Skin Modifier
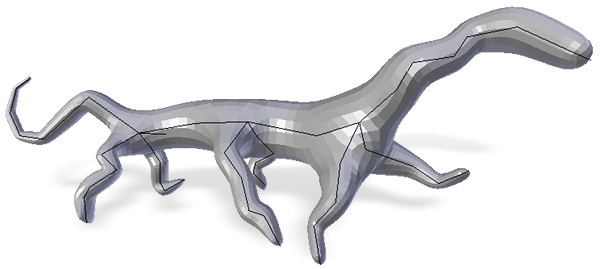
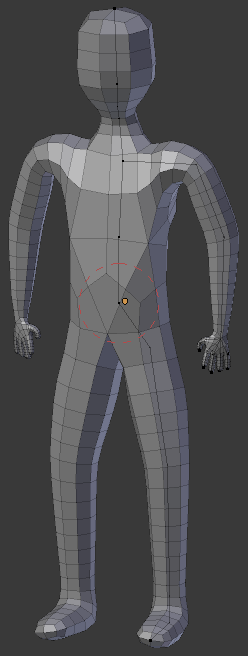
The Skin modifier takes a skeleton made up of vertices and edges as input and generates a polygon skin as output. The output is mostly quads, although some triangles will appear around intersections.
Usage
Add the Skin modifier to a mesh. Ensure the modifier is enabled for display in edit mode. Disable clipping of hidden geometry in the 3D view.
The skin modifier uses ordinary vertices and edges as input. All of the regular Edit Mode tools (such as extrude, subdivide, grab, scale, and rotate) can be used when building a skinned mesh. Note that faces in the input are ignored by the Skin modifier.
Displaying the Skeleton
The input skeleton is made up of ordinary vertices and edges. To make it easier to see the vertices and edges of the input skeleton while in Edit Mode with the Skin modifier enabled, ensure that clipping of hidden geometry is disabled in the 3D view. The button is shown in the 3D view header when the object is in Edit Mode and viewport shading is set to anything other than Wireframe and Bounding Box.
Skin Radius
While using Skin modifier, the input vertices can be individually scaled in edit mode to alter the thickness of the skin by pressing CtrlA. Non-uniform scaling of the X and Y axes is accessible by pressing CtrlA followed by X or Y.
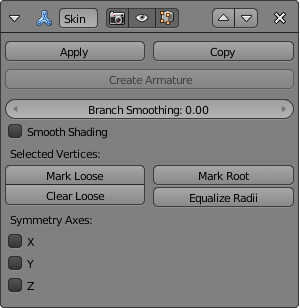
A skin vertex with non-uniform scaling can be reset to a square by clicking Equalize Radii in the Skin modifier panel.
Create Armature
Because the input vertices and edges used for Skin modifier resemble bones, the Skin modifier can automatically generate an armature. A bone will be generated for each input edge. The input vertices marked as "root" in Skin modifier will become root bones. If the skin root has more than one adjacent edge, a fake root will be created to serve as the parent of those edges.
To generate an armature, click the Create Armature button. This has several effects:
- A new armature object is added with bones matching the input mesh. The active selection is switched to the new armature.
- Weight groups are added to the input mesh. The Skin modifier propagates these weights to the output as well.
- An Armature modifier is added directly below the Skin modifier. Note that the Armature modifier is being applied after the Skin modifier because it should only deform the output, whereas if it were above the Skin modifier it might change the resulting topology.
Branch Smoothing
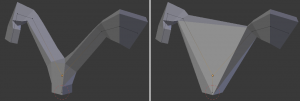
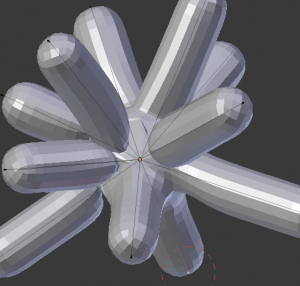
A branch point is a vertex with three or more connected edges. These areas tend to produce more complicated topology, some of which may overlap. The Branch Smoothing setting relaxes the surface around these points. Smoothing has the side effect of shrinking the surface.
Loose Branches
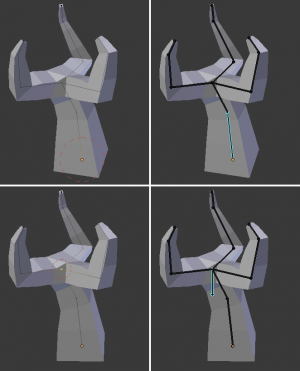
By default, a branch vertex (vertex with three or more connected edges) will generate extra edge loops along adjacent edges in order to keep the output tight. Branches can be made loose by clicking Mark Loose, which will allow the output to stretch between all adjacent vertices. This can be disabled again by clicking Clear Loose with the vertex selected.
Root Vertices
Marking a vertex as root causes that vertex to be used for calculating rotations for connected limbs (including any limbs connected to those limbs, and so on.) Root vertices also affect the armature output; they will be used as the origin for the root bones.
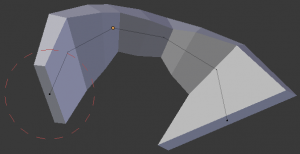
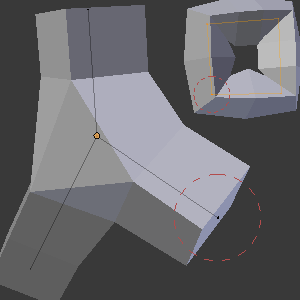
To set a vertex as root, select it and press Mark Root. Roots are shown in the 3D View with a red dashed circle around the vertex.
Each set of connected vertices should have one root node. (A set of connected vertices is a group of vertices that will all be selected if the Select Linked operator is run on any of the group's vertices.) Mark Root enforces the one-root per set rule, so it is not necessary to manually unmark roots.
Symmetry Axes
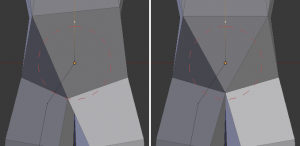
The Symmetry Axes checkboxes are used to keep the output topology symmetrical in their respective axes. In other words, using avoids merging triangles across an axis unless the triangles form a symmetric quad. Please note that these symmetry axes checkboxes do not add geometry flipped across an axis. For that, the Mirror modifier should be used, commonly placed above the Skin modifier. Commonly, in practice, if a Mirror modifier is present in the stack above the Skin modifier, the Skin modifier's Symmetry Axes should match the Mirror modifier's Axis. For example, if the Mirror modifier uses Y axis, then the Skin modifier's Y axis should be checked, too. Of course, this is not a rule, rather a hint.
Shading
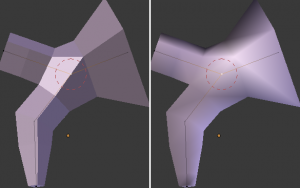
The faces output by the Skin modifier are flat shaded by default. They can be set to smooth shaded by checking the Smooth Shading checkbox. Furthermore, the faces output by the Skin modifier will all have the same attributes. All faces will use the material assigned to the object's first material slot.
Interaction with Other Modifiers
The Skin modifier can be combined with many other modifiers. Particularly relevant are the Mirror and Subsurf modifiers. For example, for many organic models it is useful to sandwich the Skin modifier between Mirror and Subsurf modifiers (with Mirror at the top of the stack).
Limitations
Interaction with Sculpting
The Skin modifier cannot be directly used in sculpt mode, nor can the Multires modifier be placed below the Skin modifier. (This is true of all generative modifiers.) The workflow is therefore not entirely non-destructive: the Skin modifier should be applied before sculpting or adding multires. The model can still be posed easily after applying the Skin modifier by using the Create Armature button.
Imperfect Symmetry
Some configurations of branch vertices can generate regions of asymmetry. In most cases these can be dealt with by tweaking vertex positions; other cases may require applying the modifier and manually fixing in edit mode.
Irregular Geometry
Although the modifier attempts to produce a smooth manifold mesh at all times, there are cases that will not work correctly. Branches (vertices with three or more connected edges) may produce extreme folds in the mesh, and in rarer cases disconnected geometry.
The Branch Smoothing control can reduce the amount of folding, but in most cases it can only be resolved by tweaking the location of nearby vertices. A small movement of vertices is often enough to generate better connectivity. If this still fails, it may be necessary to apply the Skin modifier and manually fix the topology in edit mode.
