利用者:Pepribal/Ref/Interface/Customization
Customizing the interface
To resize an editor, place the mouse cursor on one of its borders (the cursor turns into a double-pointed arrow). Then click and drag with LMB ![]() until you get the desired size.
until you get the desired size.
The editor that has the mouse cursor over it is said to have the focus. Its header appears in a slightly lighter color.
Some hotkeys are global, i.e. they are available no matter where the mouse cursor is. Others are local to a specific editor, so they will work only when that editor has the focus; some of those are available only on a specific region of the editor (mouse cursor off the sidebars for instance), or while in a specific mode.
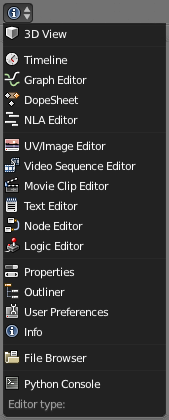
To change the type of editor, you can use the Editor type select button. It's the first button of the editor header. You can choose between all the types of Blender editors. You can also use the following hotkeys to change the editor type quickly:
- ⇧ ShiftF2 - Logic Editor
- ⇧ ShiftF3 - Node Editor
- ⇧ ShiftF4 - Python Console
- ⇧ ShiftF5 - 3D View
- ⇧ ShiftF6 - Graph Editor
- ⇧ ShiftF7 - Properties
- ⇧ ShiftF8 - Movie Clip Editor
- ⇧ ShiftF9 - Outliner
- ⇧ ShiftF10 - UV/Image Editor
- ⇧ ShiftF11 - Text Editor
- ⇧ ShiftF12 - DopeSheet
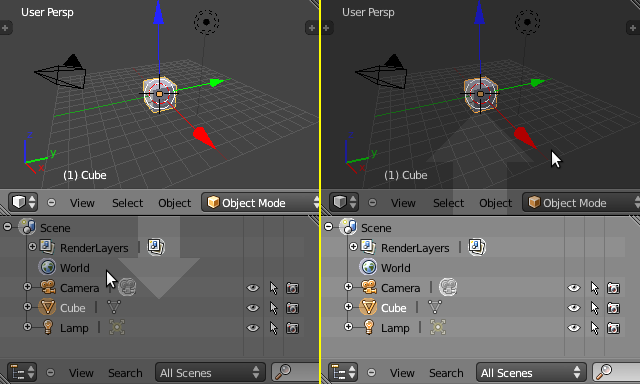
Next to the Editor type select button you can find the editor menu. This menu can be hidden with LMB ![]() on the small minus sign next to it, and then shown once more by clicking again on the same icon (which has turned into a plus sign). You can see it in Shown vs. hidden menu.
on the small minus sign next to it, and then shown once more by clicking again on the same icon (which has turned into a plus sign). You can see it in Shown vs. hidden menu.
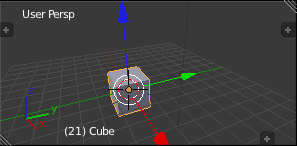
To hide the header or a sidebar, drag its border and shrink it to nothing. When it has disappeared, a small plus sign appears, so that you can recover the element by clicking with LMB ![]() on it. You can see that in 3D View with hidden header and sidebars.
on it. You can see that in 3D View with hidden header and sidebars.
Headers can be placed on top or bottom of their editors. You can set the desired position with RMB ![]() on the header, and then selecting either Flip to Top or Flip to Bottom. If the RMB
on the header, and then selecting either Flip to Top or Flip to Bottom. If the RMB ![]() is done on a button, the option might not be available.
is done on a button, the option might not be available.
The editor with the focus can be maximized or tiled back again using ⇧ ShiftSpace, Ctrl↑ or Ctrl↓. In that case, the editor fills the entire Blender screen, with the exception of the upper part, which shows an Info editor (just its header). The operation can also be done with RMB ![]() on the editor header and selecting Maximize Area or Tile Area. Like before, if the RMB
on the editor header and selecting Maximize Area or Tile Area. Like before, if the RMB ![]() is done on a button, the option might not be available.
is done on a button, the option might not be available.
Editor splitters are used to split or join editors.
To split en editor in two, click with LMB ![]() on a splitter and drag it towards the position of the new border. You define the direction of that border by either dragging horizontally or vertically.
on a splitter and drag it towards the position of the new border. You define the direction of that border by either dragging horizontally or vertically.
Both editors will display the same contents initially, but they can be tuned separately after the split.
To join two adjacent editors, these must be completely aligned and must have the same width (in a vertical join) or height (in an horizontal join). Click with LMB ![]() on the splitter of one of the editors that is next to the second editor; drag towards that second editor. Then, one of the editors is darkened, showing a big arrow. The editor with the arrow will be "invaded" by the other, losing its content. You can change the big arrow from one editor to the other by moving the mouse cursor from one editor to the other before releasing the mouse button.
on the splitter of one of the editors that is next to the second editor; drag towards that second editor. Then, one of the editors is darkened, showing a big arrow. The editor with the arrow will be "invaded" by the other, losing its content. You can change the big arrow from one editor to the other by moving the mouse cursor from one editor to the other before releasing the mouse button.
Once the arrow is on the proper side, release the mouse button to complete the join. To cancel the operation, press Esc or RMB ![]() before release.
before release.
There is another way to split and join editors without using splitters. Move the mouse cursor on the editor border until it turns into a double pointed arrow; then click with RMB ![]() and a popup menu appears. Select Split Area. Move the indicator line with your mouse to the desired spot (even across editors), and LMB
and a popup menu appears. Select Split Area. Move the indicator line with your mouse to the desired spot (even across editors), and LMB ![]() to confirm, or cancel with Esc or RMB
to confirm, or cancel with Esc or RMB ![]() . Before confirming you can switch the split direction (vertical/horizontal) with ⇆ Tab.
. Before confirming you can switch the split direction (vertical/horizontal) with ⇆ Tab.
Similarly, you can choose Join Area. If editors can be joined, move your mouse to choose which of them will prevail over the other, and LMB ![]() to confirm, or cancel with Esc or RMB
to confirm, or cancel with Esc or RMB ![]() .
.
You can swap the contents of two editors: click with CtrlLMB ![]() on any splitter of one of the editors and drag, releasing the mouse button on the second (target) editor. Contents will be swapped right away. The editors don't need to be aligned nor be adjacent.
on any splitter of one of the editors and drag, releasing the mouse button on the second (target) editor. Contents will be swapped right away. The editors don't need to be aligned nor be adjacent.
By clicking with ⇧ ShiftLMB ![]() on a splitter and dragging slightly anywhere, the contents of the editor will be copied into a new Blender window. You can place that new window anywhere, including into another monitor.
on a splitter and dragging slightly anywhere, the contents of the editor will be copied into a new Blender window. You can place that new window anywhere, including into another monitor.
CtrlAltW duplicates the entire Blender screen into a new window. Once again, you can drag this window where you wish.
Blender panels can be expanded and contracted with LMB ![]() on its header (triangle and title). The triangle shows the state: pointing right means contracted; pointing down means expanded.
on its header (triangle and title). The triangle shows the state: pointing right means contracted; pointing down means expanded.
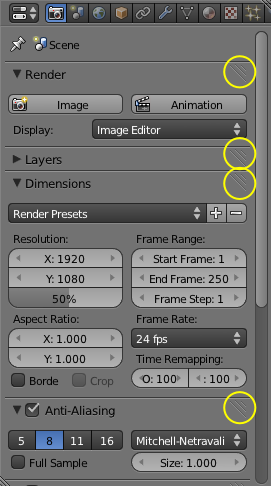
Panels have a widget on his upper right corner, resembling an editor splitter. The widget can be used to change panel position inside the editor or sidebar, by clicking with LMB ![]() on it and dragging to the desired spot.
on it and dragging to the desired spot.
The panels of the Properties editor can be aligned vertically or horizontally. RMB ![]() on the editor brings up a popup menu with 2 options: Horizontal and Vertical. If RMB
on the editor brings up a popup menu with 2 options: Horizontal and Vertical. If RMB ![]() is done on a button, these options might not be available.
is done on a button, these options might not be available.


