Doc:2.6/Manual/Render/Freestyle/Parameter Editor/Line Style/Thickness
目次
Thickness
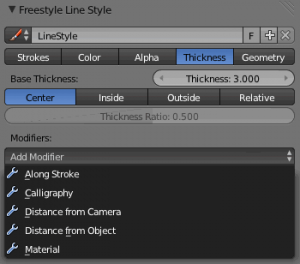
In this tab you control the thickness of your strokes.
- Base Thickness
- The base thickness for this line style.
- Thickness Position
- Control the position of stroke thickness from the original (backbone) stroke geometry. There are four choices:
- Center
- The thickness is evenly split to the left and right side of the stroke geometry.
- Inside
- The strokes are drawn within object boundary.
- Outside
- The strokes are drawn outside the object boundary.
- Relative
- This allows you to specify the relative position by a number between 0.0 (inside) and 1.0 (outside), in the Thickness Ratio numeric field just below.
The thickness position options are applied only to strokes of edge types Silhouette and Border, since these are the only edge types defined in terms of the object boundary. Strokes of other edge types are always drawn using the Center option.
Modifiers
There are five thickness modifiers available, which can be mixed with the base thickness using a subset of the usual methods (see for example the Mix compositing node for further discussion of this topic). As with other modifier stacks in Blender, they are applied from top to bottom.
- Influence
- How much the result of this modifier affects the current thickness.
Along Stroke
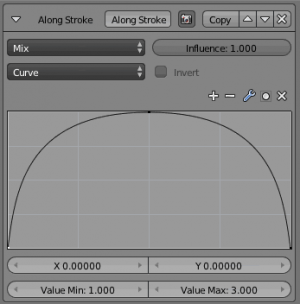
The Along Stroke modifier alters the base thickness with a new one from either a linear progression or a custom curve, mapped along each stroke's length. In other words, it applies the selected progression along each stroke.
- Mapping
- Either a linear progression (from 0.0 to 1.0, which may be inverted with the Invert option), or a custom mapping curve.
Calligraphy
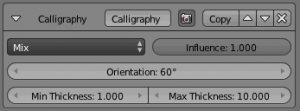
The Calligraphy modifier mimics some broad and flat pens for calligraphy. It generates different thickness based on the orientation of the stroke.
- Orientation
- The angle (orientation) of the virtual drawing tool, from the vertical axis of the picture. For example, an angle of 0.0° mimics a pen aligned with the vertical axis, hence the thickest strokes will be the vertical ones, and the thinnest, the horizontal ones.
- Min Thickness and Max Thickness
- The minimum and maximum generated thickness (as explained above, minimum is used when the stroke’s direction is perpendicular to the main Orientation, and maximum, when aligned with it).
Distance from Camera
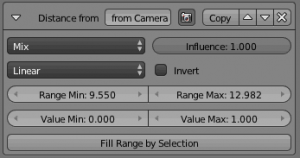
The Distance from Camera modifier alters the base thickness with a new one from either a linear progression or a custom curve, using the distance to the active camera as the parameter.
- Mapping
- Either a linear progression (from 0.0 to 1.0, which may be inverted with the Invert option), or a custom mapping curve.
- Range Min and Range Max
- The limits of the mapping from “distance to camera” to “thickness in mapping”. If the current point of the stroke is at Range Min or less from the active camera, it will take the start thickness of the mapping, and conversely, if it is at Range Max or more from the camera, it will take the end thickness of the mapping. These values are in the current scene’s units, not in pixels!
- Fill Range by Selection
- Set the min/max range values from the distances between the current selected objects and the camera.
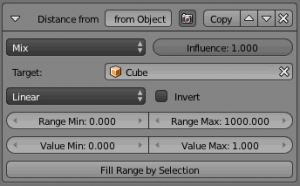
Distance from Object
The Distance from Object modifier alters the base thickness with a new one from either a linear progression or a custom curve, using the distance to a given object as parameter.
- Target
- The object to measure distance from.
- Mapping
- Either a linear progression (from 0.0 to 1.0, which may be inverted with the Invert option), or a custom mapping curve.
- Range Min and Range Max
- The limits of the mapping from “distance to object” to “alpha in mapping”. If the current point of the stroke is at Range Min or less from the target, it will take the start thickness of the mapping, and conversely, if it is at Range Max or more from the target, it will take the end thickness of the mapping. These values are in the current scene’s units, not in pixels!
- Fill Range by Selection
- Set the min/max range values from the distances between the current selected objects and the target.
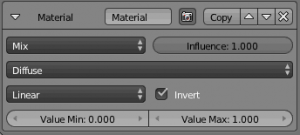
Material
The Material modifier alters the base thickness with a new one taken from the current material under the stroke.
You can use various properties of the materials, among which some are multi-components (i.e. give RGB results). In that case, the mean value will be used.
- Mapping
- Either a linear progression (from 0.0 to 1.0, which may be inverted with the Invert option), or a custom mapping curve. Note the linear non-inverted option is equivalent to “do nothing”, as original values from materials are already in the [0.0, 1.0] range…
If used with the Split by Material option in the Stroke tab, the result will not be blurred between materials along the strokes.
