Doc:2.6/Manual/3D interaction/Transform Control/Pivot Point/Individual Origins
Individual Origins as Pivot
Mode: Object mode and Edit mode
Hotkey: Ctrl.
Menu: Select from the following icon in the 3D window header ![]()
In Object mode
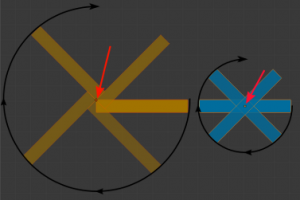
The Origin of an Object is shown in the 3D view by a small orange circle. This is highlighted in the image to the right by the red arrow. The origin tells Blender where that Object is in 3D space. What you see in the 3D view (vertices, edges etc) is what makes up the Object.
While the Origin is equivalent to the center of the Object, it does not have to be located in the center of the Mesh. This means that an Object can have its center located on one end of the mesh or even completely outside the mesh. For example, the orange rectangle in the image has its Origin located on the far left of the mesh.
Now let’s examine Rotation around the individual origins.
- The blue rectangle has its Origin located in the center of the mesh, while the orange rectangle has its Origin located on the left hand side.
- When the Pivot Point is set to Individual Origins, the center of each Object (indicated by the red arrow) remains in place while the Object rotates around it in the path shown by the black arrow.
In Edit mode
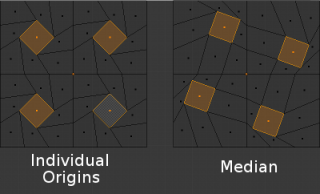
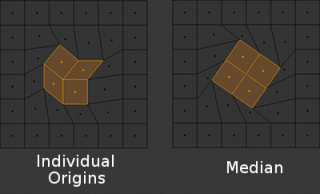
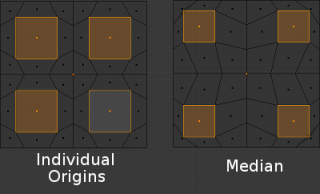
In Edit mode, setting the Pivot Point to Individual Origins produces different results when the selection mode is set to Vertex, Edge or Face. For example, Vertex mode produces results similar to setting the pivot point to median and Edge mode often produces distorted results. Using Individual Origins in Face mode produces the most predictable results.
As can be seen in the images above, faces that touch each other will deform when rotated when the pivot point is set to Individual Origins. Faces that do not touch will rotate around their Individual Origins (their center).
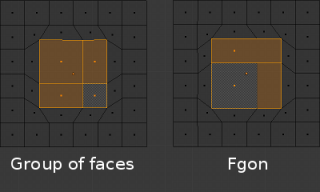
Groups of faces and Fgons can be scaled without their outside perimeter being deformed. However, the individual faces inside will not be scaled uniformly.
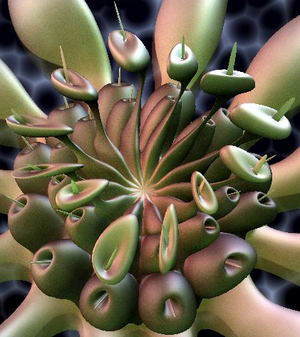
Once you are aware of its limitations and pitfalls, this tool can save a lot of time and lead to unique shapes. This “anemone” was modeled from a 12 sided cylinder in about 10 minutes by repeatedly using this workflow: extrusions of individual faces, scaling with median as a pivot point, and scaling and rotations of those faces with Individual Origins as pivot points.
