Doc:2.6/Manual/Animation/Editors/DopeSheet
目次
The Dopesheet Editor
Classical hand-drawn animators often made a chart, showing exactly when each drawing, sound and camera move would occur, and for how long. They nicknamed this the 'dopesheet'. While CG foundations dramatically differ from classical hand-drawn animation, Blender's Dopesheet inherits a similar directive. It gives the animator a 'birds-eye-view' of every thing occurring within a scene.
Dope Sheet Modes
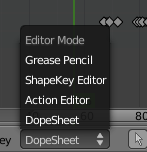
There are five basic views for the Dopesheet. These all view different contexts of animation:
- DopeSheet
- The dopeSheet allow you to edit multiple actions at once.
- Action Editor
- Action Editor is the default, and most useful one. It’s here you can define and control your actions.
- Shape Key Editor
- ShapeKey Editor is dedicated to the Shape Ipo datablocks. It uses/edits the same action datablock as the previous mode. It seems to be an old and useless thing, as the Action Editor mode handles Shape channels very well, and this mode adds nothing…
- Grease Pencil
- Grease Pencil is dedicated to the grease pencil tool’s keyframes – for each grease pencil layer, you have a strip along which you can grab its keys, and hence easily re-time your animated sketches. As it is just another way to see and edit the grease pencil data, this mode uses no datablock (and hence has nothing to do with actions…). Note that you’ll have as much top-level grease pencil channels as you have sketched windows (3D views, UV/Image Editor, etc.)
- Mask
- This mode is using for working with animation timing of masks from an external footages. See more details about the Mask mode here and a masks — here.
Interface
The Dope Sheet interface is similar to the Graph Editor one, it is divided in three areas:
Header
Here you find the menus, a first block of controls related to the editor “mode”, a second one concerning the action datablocks, and a few other tools (like the copy/paste buttons, and snapping type).
The Header of Dope Sheet Editor almost identical to the Graph Editor one, except:
- Pivots selector for keyframes rotation/scaling (or more exactly their handles in the Bezier interpolation mode);
- Snapshot Ghost button of F-curves.
Also, the header of Dope Sheet Editor has the different sets of menus for their modes:
- Shape Key editor adn Mask modes has not the menu Channel;
- Grease Pencil mode — the menu Key is cliped to menu Frame with only duplicate and transform options.
By their functionality, menus of the Header of Dope Sheet Editor is a same as menus of the Graph Editor and Timeline window. See more info about:
Edit Area
It contains the keyframes for all visible action channels.
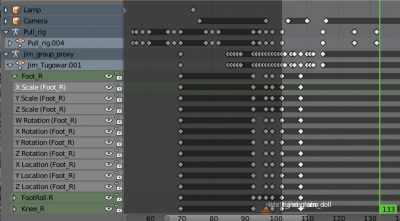
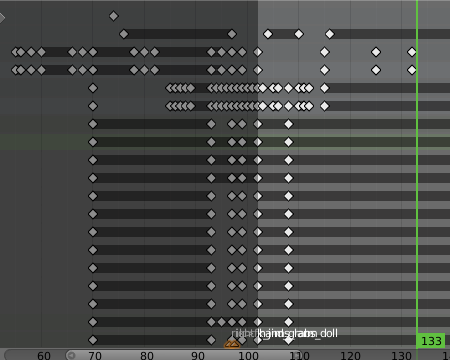
As with the other “time” windows, the X-axis materializes the time. The Y-axis has no mean in itself, unlike with the Graph Editor, it’s just a sort of “stack” of action channels – each one being shown as an horizontal colored strip (of a darker shade “during” the animated/keyed period).
On these channel strips lay the keyframes, materialized as light-gray (unselected) or yellow (selected) diamonds.
One of the key feature of this window is that it allow you to visualize immediately which channel (i.e. Ipo curve) is really affected. When the value of a given channel does not change at all between two neighboring keyframes, a gray (unselected) or yellow (selected) line is drawn between them.
Channel Region
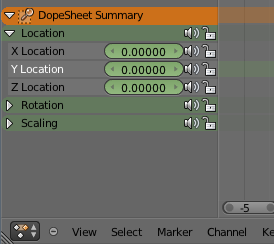
This is left “list-tree” part of the Dope Sheet Editor which shows the action’s channel “headers” and their hierarchy. Basically, there are:
- “Top-level” channels, which represent whole FCurve datablocks (so there’s one for Object one, one for Shape one, etc.). They gather all keyframes defined in their underlying FCurve datablock.
- “Mid-level” channels, which seem currently to have no use (there’s one per top-level channel, they are all named FCurves, and have no option at all…).
- “Low-level” channels, which represent individual FCurve , with their own keyframes (fortunately, only keyframes are shown!).
Each level can be expended/collapsed by the small arrow to the left of its “parent” channel.
To the right of the channel’s headers, there are some channel’s setting controls:
- Clicking on the small “speaker” will allow you to mute that channel.
- Clicking on the small “lock” will allow you to prevent this channel.
A channel can be selected (text in white) or not (text in black), use LMB ![]() clicks to toggle this state or ⇧ ShiftLMB
clicks to toggle this state or ⇧ ShiftLMB ![]() to multiply selection.
to multiply selection.
You can rename “Top-level” and “Mid-level” channels by twice clicking LMB ![]() on its header.
on its header.
Keyframe Type
In «pose-to-pose» animation all of an animation events or states is divided by the significance on different pose or states. See more info about this here.
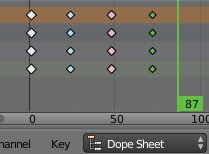
For visually distinguish different poses (extremes, breakdowns, other inbetweens) and regular keyframes in the Dopesheet editor there is the possibility the applying different colors for them. It is represented by feature «Keyframe Types».
All it do is change the color. The main intent is to help visual sorting when you are looking at your Dope Sheet.
To select the required keyframe type there is available submenu Keyframe Type in Key menu of header Dope Sheet editor:
- Keyframe
- Normal keyframe - e.g. for key poses.
- Breakdown
- A breakdown pose - e.g. for transitions between key poses.
- Extreme
- An ‘extreme’ pose, or some other purpose as needed.
- Jitter
- A filler or baked keyframe for keying on ones, or some other purpose as needed.
