Doc:2.6/Manual/Modifiers/Generate/Booleans
Boolean Modifier
Mode: Any 3d View Mode, can only be applied when in Object Mode.
Panel: Modifiers
Introduction
The Boolean Modifier performs operations on meshes that are otherwise too complex to achieve with few steps by editing meshes manually, meaning you can achieve good results with little to no effort to make mesh operations like Unions, Differences and Intersections. The Boolean modifier uses one of three Boolean operations (Difference (negation), Union (conjunction), and Intersect (disjunction)) to create a single compound object out of two Mesh objects.
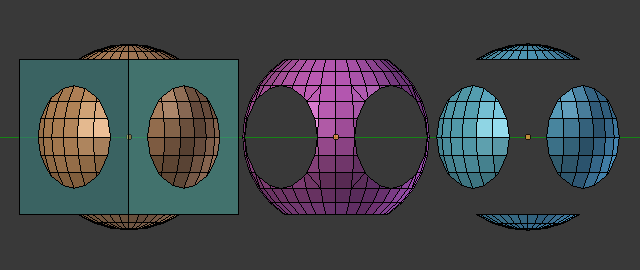
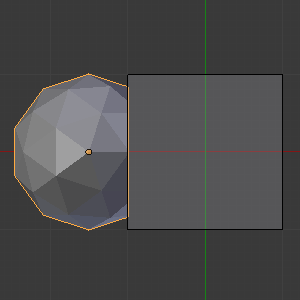
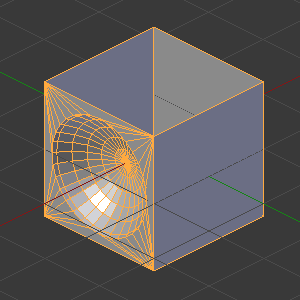
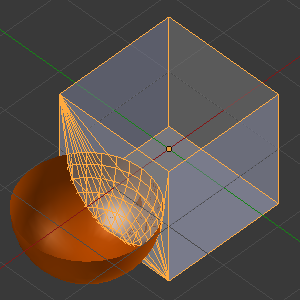
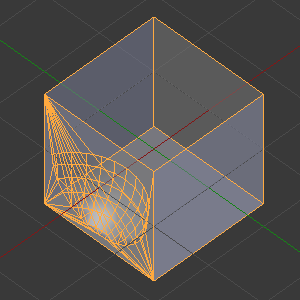
- See Fig. 1 - The Union, Intersection and Difference between a Cube and a UV Sphere, with the modifier applied to the Sphere and using the cube as target (Detail, Union is using Ngons).
Description
The Boolean Modifier applies only for Mesh objects.
It performs one of the three Boolean Operations for the faces of open or closed volumes that creates a complete topology in the faces it's being used. This means that this modifier will only work properly for the intersection of faces of the two meshes that will result in another closed loop of edges (filled with faces), creating a new resulting face topology.
The Boolean modifier is non-destructive for the target; it uses the topology of the target to make the calculations, but you will still have the target in the scene. In normal conditions, using face normals pointed outside, when you apply the Boolean modifier operation, the modified mesh will receive changes in topology, and you will have to move the target to see the resulting mesh. The only exception is when you are using inverted normals; in this case, depending on the calculations, you will also change the topology of the target. You can see one example of a target being modified in the Materials section in this page, see Fig. 7 and 8.
You can add this Modifier in any of the Blender Modes, including some other Modes of different Blender screens, but the results of the mesh operation will only be shown in the Object Mode of the 3D View Window.
- The Boolean modifier works with open or closed volumes.
- The Boolean modifier doesn't work on edges without faces.
- The target topology determines the new topology of the modified mesh.
- The Face normals are taken into account for the calculations.
- Whether faces are marked for smooth or flat for shading doesn't affect the calculations of this modifier. (See Fig. 28 and 29.)
- The line at which this modifier is calculated is delimited by the first tangential contact between faces of the modified mesh and target.
| This is a dynamic real-time modifier! | |
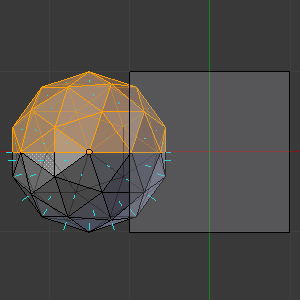
| If you have marked your Objects to show the Edges (in Properties Window, Object Properties context, Display Tab, click Wire), you will see the Edge creation process while you're moving your Objects, but, depending on your mesh topology, you can also enable X-Ray and Transparency and see the topology being created in real time! |
Usage
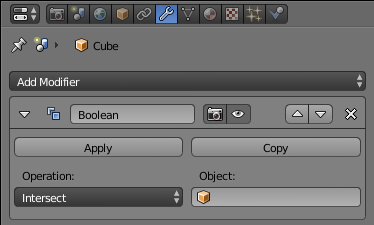
Using the default Blender install, with the desired mesh Object selected, go to the Properties Window which is located at the right of your Blender Screen, below the Outliner. Click on the Modifiers Context, which is represented by a wrench (see Fig. 2 - The Boolean Modifier; the wrench is highlighted in blue). Then, click on the Add Modifier Button and Blender will show you a list of all of the available Modifiers. The Boolean Modifier is located on the third row in the Generate Column.
You can also click on the Add Modifier Button and use N to add the Boolean Modifier, or use Blender search with the shortcut Space and type "Add Modifier" , click on Add Modifier and press N.
When you add the Boolean Modifier for an Object, Blender will need a second Object to perform the operation. You can use open or closed Meshes, as long as they have faces for calculations.
You can add one or more modifiers of this type for an Object but you can only apply one operation for the Boolean Modifier at a time.
Options
- Input Box
- In this Input Box you can give your Modifier a name. Blender default is Boolean.
- The Camera Button toggles the Modifier result to be visible during rendering, and the Eye toggles the Modifier result to be visible in the real-time session (with the effect shown only in Object Mode of the 3D View Window.)
- The Arrows let the user define the position of the Modifier in the modifiers stack when there are more modifiers applied to the object.
- The X is used to remove the modifier from the object.
- Apply
-
- This Button applies the operation to the modified mesh and only works in Object Mode of the 3D View Window. If you click on this Button in Edit Mode, Blender will present you with the standard message for modifiers,
Modifiers Cannot be applied in Edit Mode.
- This Button applies the operation to the modified mesh and only works in Object Mode of the 3D View Window. If you click on this Button in Edit Mode, Blender will present you with the standard message for modifiers,
- Copy
-
- Clicking in this Button will make Blender copy the Modifier, giving it a dot and a numeric suffix using three digits with a counter starting from 001 (e.g. Boolean.001).
Operations
- Operation:
- Difference
- The modified mesh is subtracted from the target mesh.
- If the target Mesh uses inverted normals, Blender will Intersect the modified mesh.
- If the modified Mesh uses inverted normals, Blender will add both meshes (Union).
- If both Meshes use inverted normals, Blender will Intersect the target Mesh.
- Union
- The target mesh is added to the modified mesh.
- If the target Mesh uses inverted normals, Blender will Intersect the target Mesh.
- If the modified Mesh uses inverted normals, Blender will subtract the target Mesh.
- If both Meshes use inverted normals, Blender will Intersect the modified Mesh.
- Intersect
- The target mesh is subtracted from the modified mesh.
- If the target Mesh uses inverted normals, Blender will subtract the target Mesh.
- If the modified Mesh uses inverted normals, Blender will intersect the target Mesh.
- If both Meshes use inverted normals, Blender will add both meshes (Union).
- Object
- The name of the target object. Must be a mesh.
Materials
The Boolean Modifier preserves the Materials of the participant Meshes, including their basic textures and mappings, and the modified mesh will receive its first active material index assigned to its new topology (the first active material).
The only exception is the difference operation when the normals of the target and modified mesh are inverted (Fig 7 and 8). In this case, Blender will project the textures in an inverted direction over the target using the center contact of the meshes as a pivot and the resulting mesh will have the modified mesh subtracted from the target. For complex target meshes in some particular cases, you may have to reassign materials to faces because Blender will use the possible projection, and this may result in a sub-optimal texture assignment.
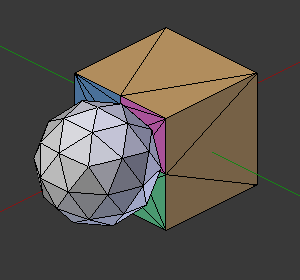
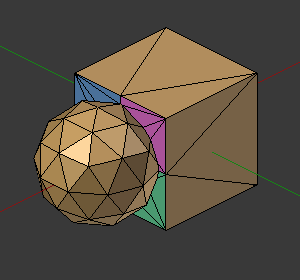
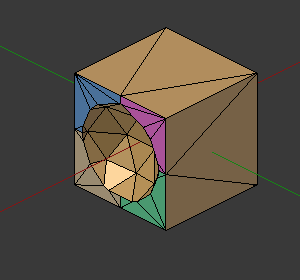
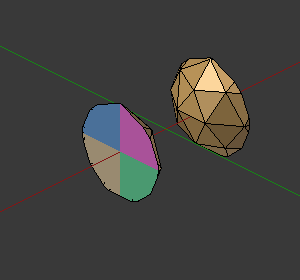
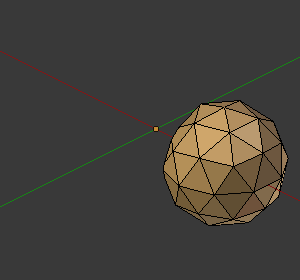
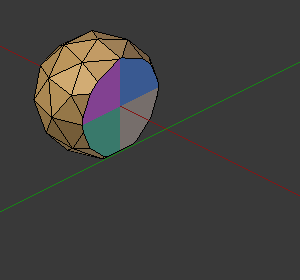
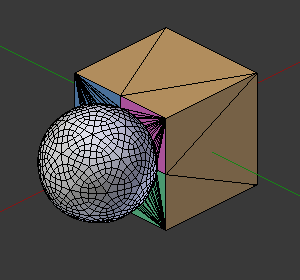
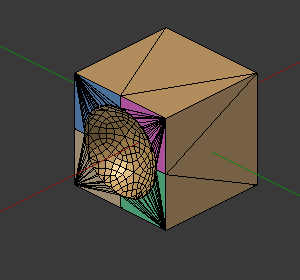
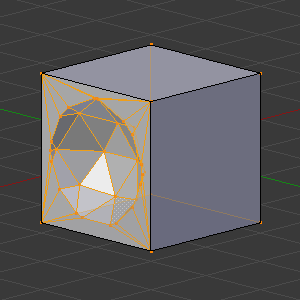
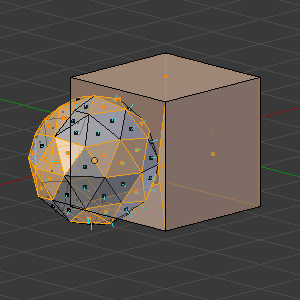
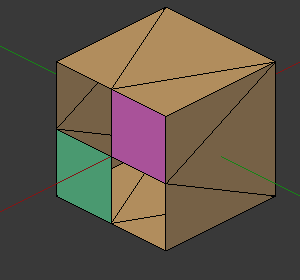
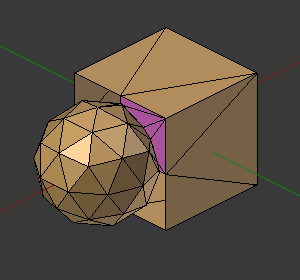
Below, some examples are shown to exemplify how materials work with the Boolean modifier; we took the cube as the modified mesh, and the icosphere as the target with one material (white). We added 4 different indexes to one of the faces of the cube, leaving another basic material in the other faces. Fig. 3 - Cube with Multi-Material Mesh (modified) and Icosphere (target) with basic material - shows how the Boolean modifier interacts with the materials. Figs. 4, 5 and 6 show three different Boolean operations applied to the modified mesh. The meshes used have normals pointed outwards (Normal meshes). See their captions for more information.
- In our last examples (Figs. 7 and 8) of how the Boolean modifier works with Materials, we have inverted normals for both the target (Icosphere) and modified mesh (Cube). As we said before, this is an exception rather than the rule. As you can see, the target received the materials of the modified mesh.
UV Mappings
When you map UV Images to your target, Blender will add a map for each of the faces of the target. When you apply the Boolean modifier, Blender will follow the UV maps already assigned to the faces of the target topology that will be the result of the operation on the modified mesh. Blender will also use the same image mapped to the target faces in the modified mesh. But be aware that depending on your UV scheme (the way you have assigned textures to the faces during the UV unwrap), and the complexity of your meshes, the maps may not result in perfectly mapped UVs!
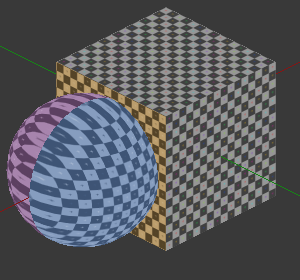
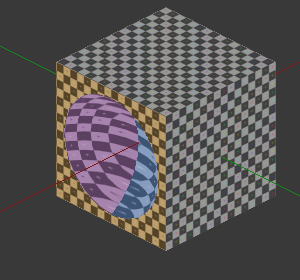
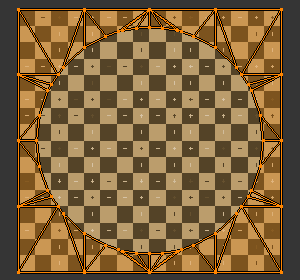
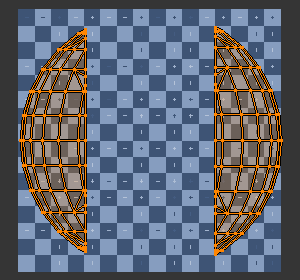
Below we have four Images, a UV sphere mapped with a test grid tinted blue and the other face tinted in purple, one face of the cube tinted in a light orange and the other faces using the normal test grid. Fig. 9 shows the operation at the start (difference), and on the right (Fig. 10), the resulting mesh. In Figs. 11 and 12 we show the unwrap in the Blender UV/Image Editor Window.
Other Modifiers
The Boolean Modifier calculation is performed using the target modified mesh topology and dimensions. Other modifiers added to the modified mesh are bypassed. It means that if a target is using another modifier, like subsurf, the resulting topology for the modified mesh will take into account the subsurf of the target; but for the modified mesh, the basic topology is used anyway (see examples).
If you add subsurf to the modified mesh with a Boolean modifier, Blender will visually add the subsurf for the modified mesh, but not for its calculations; it will only take into account its basic mesh topology. If you want to have a subsurf added to the modified mesh, you have to apply the subsurf to the Boolean modified mesh before applying the Boolean operation.
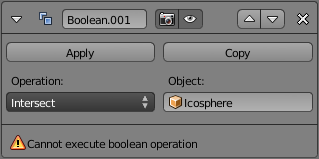
The Boolean Modifier can be added together with other modifiers in the modified mesh, but depending on the modifier, the calculations can't be done and/or the modifier cannot execute. When the modifier cannot execute, it will show the message "Cannot execute boolean operation" (see Fig. 13), and when the modifier cannot be applied to the mesh, Blender will show the message "Modifier is disabled, Skipping Apply.". In this case, you either have to remove some modifiers or apply the necessary ones.
The most common case is when you add or copy a Boolean modifier to use the modified mesh in conjunction with another target later; Blender will place the warning in the subsequent Boolean modifiers in the stack depending on the operation, because you may be creating concurrent Boolean operations for the same modified mesh, which in most cases is impossible to execute depending on the chosen target. In this case, you can apply the first Boolean modifier of the stack for the target and then use the other Boolean modifier(s) in the stack for subsequent operations.
Also, if some other modifiers are placed above this modifier and you click on Apply, Blender will warn you with the message "Applied Modifier was not first, results may not be as expected" . The best usage scenario for this modifier is to prepare your modified mesh and target to work with the Boolean modifier.
When the Boolean modifier is the first of the stack and is applied, the other Modifiers will act over the resulting meshes using the resulting topology and will remain in the modifiers stack.
Below are two images: one with the subsurf added to the target (Fig. 14), and another with the resulting topology (Fig. 15).
- As you can see, the added (not applied) subsurf to the target was taken into consideration. The topology of the Icosphere with subsurf (Level 2) was completely transferred to the modified mesh.
| The target topology determines the resulting topology | |
| The target topology determines the results of the Boolean Modifier operation. It means that any modifier added to the target which modifies its topology will affect the resulting mesh of the operation. |
Animation
The Boolean Modifier is a generating modifier, but its normal behavior is to be applied to static meshes. You can animate the target, the modified mesh or both, but the effects will only be visible when you render the edges of the modified mesh and the target to the final image or using recorded OpenGL animations.
Concurrent Operations
For the modified meshes, you can only apply one operation at a time, but you can use the same target for other modified meshes and use modified meshes as a target for other meshes as well. Also, you can copy or add the same modifier to the modifiers stack as many times as you wish to suit the number of operations you need, but be aware that if you choose concurrent targets which are, at the same time, modified meshes pointing to each other, you can cause Blender to crash with closed loops!
Hints
Be aware that other modifiers and their stack position could cause this modifier to fail in certain circumstances. Also, if you make two meshes act as a target for each other (in fact, creating a closed loop using concurrent operations), you can cause Blender to stop responding or crash.
| The best usage scenario for sequential operations | |
| The best way to work with this modifier when you need to make lots of sequential operations of the same modifier is to define the target at the time you need to apply the changes to the topology. |
Face Normals
When using the Boolean Modifier, Blender will use the face normal directions to calculate the three Boolean operations. The direction of the normals will define the result of the three available calculations (see Operations in this page); when one of the participants uses a set of inverted normals, you're in fact multiplying the operation by -1 and inverting the calculation order. You can, at any time, select your modified mesh, enter Edit Mode and flip the normals to change the behavior of the Boolean modifier. See Tips for fixing Normals in this page.
Blender also cannot perform any optimal Boolean operation when one or more of the mesh Normals of the participants that are touching has outwards/inwards normals mixed.
This means you can use the normals of the meshes pointed completely towards the inside or outside of your participants in the operation, but you cannot mix normals pointed inwards and outwards for the faces of the topology used for calculations. In this case, Blender will enable the modifier and you may apply the modifier, but with bad to no effects. We made some examples with a cube and an icosphere showing the results.
- See Fig. 16 and 17 - All face normals are pointing outwards (Normal meshes).
- See Fig. 18 and 19 - All face normals are pointing inwards (Meshes with inverted normals)
- Now, let's see what happens when the normal directions are mixed for one of the participants in the Boolean Modifier operation. In Fig. 20 - Face normals mixed, pointed to different directions and 21 - Resulting operation, you can see that the modifier has bad effects when applied, leaving faces opened:
As you can see, the normal directions can be pointing to any of the Mesh sides, but can't be mixed in opposite directions for the faces of the participants. The Library can't determine properly what's positive and negative for the operation, so the results will be bad or you will have no effect when using the Boolean Modifier operation.
Tip for Fixing Mixed Normals
- You can fix mixed normals by recalculating them outside or inside; here we also give you a small hint on how to do this prior to Boolean Modifier usage:
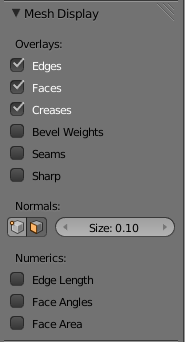
To show the normals of the faces, you can open the Transform Panel, find the Mesh display tab, and click on the small cube without the orange dot. (See Fig. 22 - Mesh Display in the Transform Panel.) You can also change the height of the axis that points the direction of the normal. The default is '0.10.
When some normal directions are mixed pointing inwards and outwards, you can recalculate them to the inside using ⇧ ShiftCtrlN and to outside using CtrlN.
If the normals still get mixed due to Mesh complexities, you can change to Face selection Mode while in Edit Mode using Ctrl⇆ Tab and choosing Face Mode. Then select the faces that are pointing in the wrong direction using ⇧ ShiftRMB ![]() and use the Mesh Menu entry in the Header of the 3D View Window, go to Normals and choose Flip Normals. (See Fig. 16 - Recalculate and Flip Normals in Mesh Menu Entry - 3D View.)
and use the Mesh Menu entry in the Header of the 3D View Window, go to Normals and choose Flip Normals. (See Fig. 16 - Recalculate and Flip Normals in Mesh Menu Entry - 3D View.)
Empty or Duplicated Faces
This modifier doesn't work when the modified and/or the target mesh uses empty faces in the topology used for calculations. If the modifier faces a situation where you have empty faces mixed with normal faces, the modifier will try, as much as possible, to connect the faces and apply the operation. For situations where you have two concurrent faces at the same position, the modifier will operate on the target mesh using both faces, but the resulting normals will get messed. To avoid duplicated faces, you can remove doubles for the vertices before recalculating the normals outside or inside. The button for remove doubles is located in the Mesh Tools Panel in the 3D View Window, while in Edit Mode.
The best usage scenario for this modifier is when you have clean meshes with faces pointing clearly to a direction (inwards/outwards)
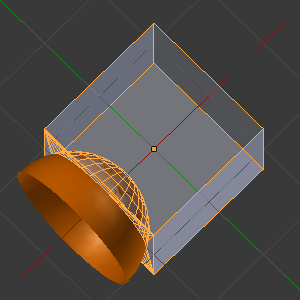
Below we show an example of meshes with open faces mixed with normal faces being used to create a new topology. In this example, a difference between the cube and the icosphere is applied, but Blender connected a copy of the icosphere to the Cube mesh, trying to apply what was possible.
Open Volumes
The Boolean modifier permits you to use open meshes or non-closed volumes (not open faces).
When using open meshes or non-closed volumes, the Boolean modifier won't perform any operation in faces that don't create a new topology filled with faces using the faces of the target.
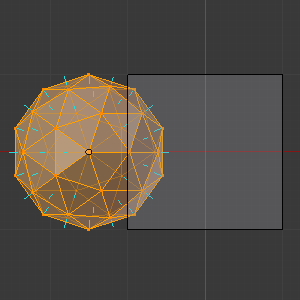
- See Fig. 26 and Fig. 27 - Resulting operation using two non-closed volumes with faces forming a new topology.
- Now, let's see what happens when we use meshes that are partially open, incomplete, or meshes that aren't forming a new topology.
As you can see in Fig. 28, the faces of one participant in the Boolean operation gives incomplete information to the modifier; the result is shown in Fig. 29 - Resulting operation using two open volumes that aren't forming a new topology. The resulting edges get messy and there is not enough information to create faces for the resulting Mesh. This example uses a smooth shaded UVsphere cut in half. As explained before, the shading (smooth/flat) doesn't affect the calculations of the modifier.
History
Since version 2.62, Blender uses a new Library, the Carve library, which should give much improved results. This library is more stable and faster, resolving old well-known limitations of our previous library.
The general workflow and options available in the user interface are unchanged; usually the modifier will simply run faster and produce a better output mesh. However there are also some changes in behavior. In particular, Carve will perform Boolean operations only if the intersection of two meshes is a closed loop of edges.
release Notes and Development Page: Boolean Modifier
Useful Links
- Carve Developement Home - GPLv2 C++ source at Google Code
- Carve library - Homepage for the Carve Library project.
- Sculpt Tools - Link for a Blender Addon - This addon uses another approach to use the Boolean operations, when you select two or more objects, the active one becomes the modified mesh and all the others becomes a target. This addon will add the Boolean modifier and apply it to the meshes automatically.
