Doc talk:Books/Essential Blender/03.1.Object Manipulation and Basic Animation: Hands on
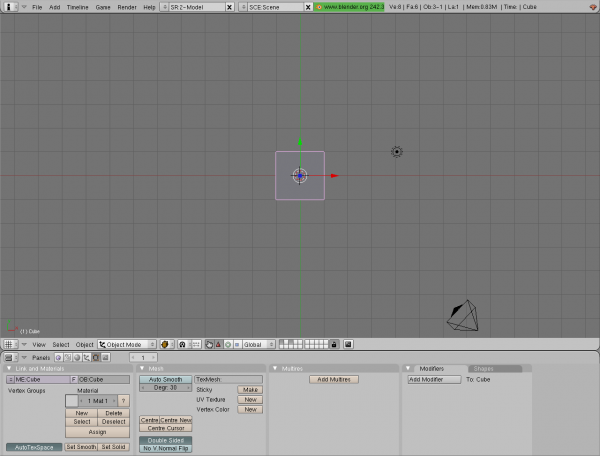
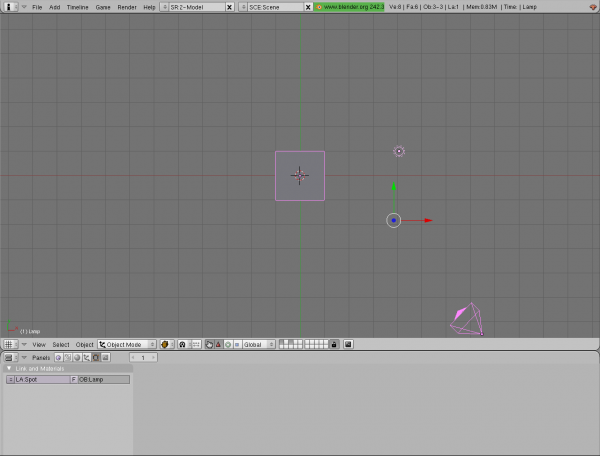
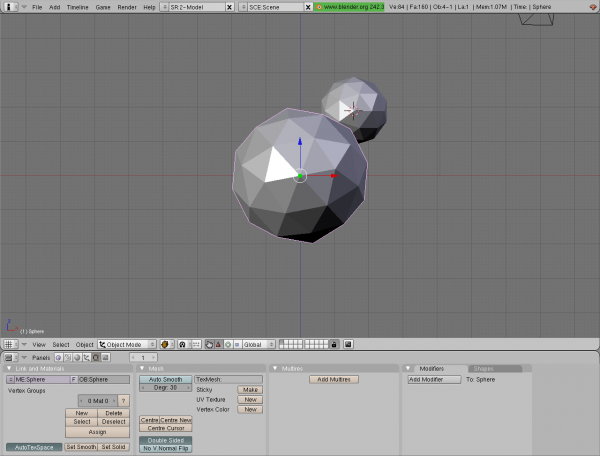
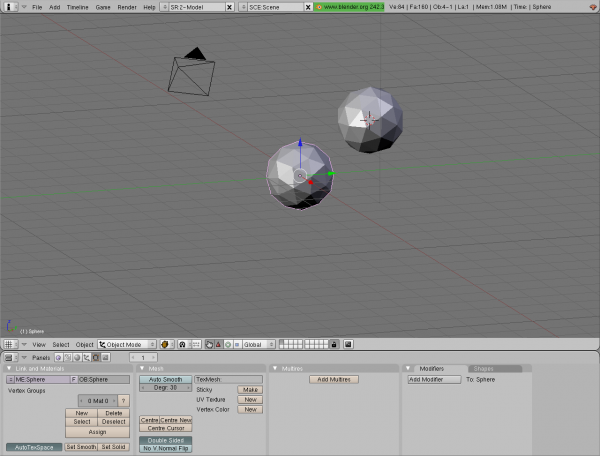
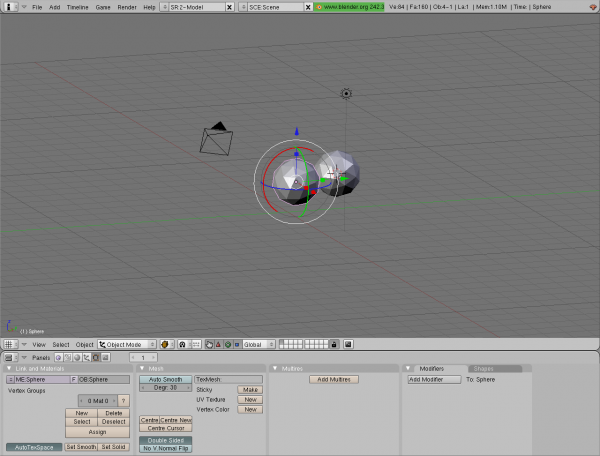
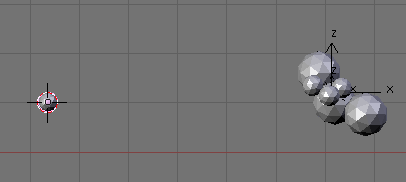
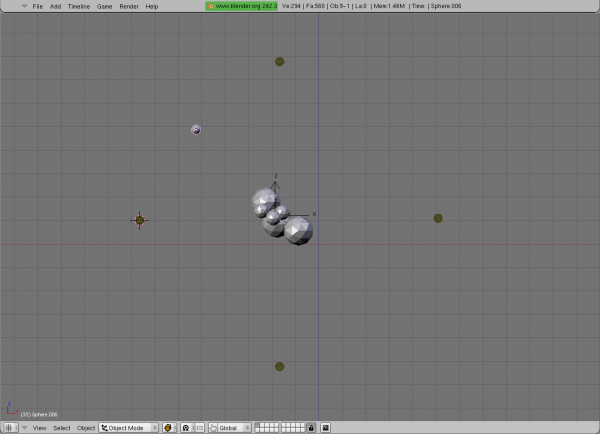
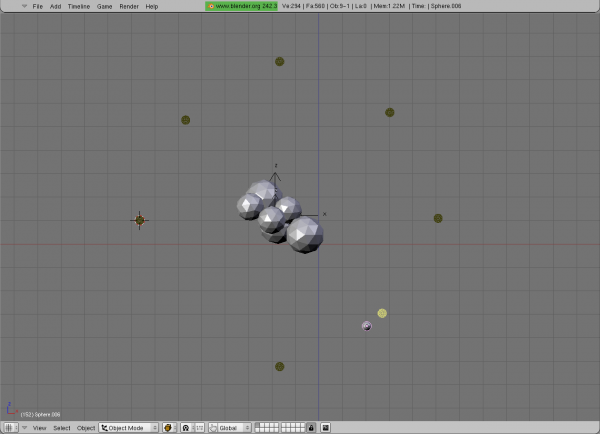
I cannot duplicate the behavior described below in Key mode. I have filed a bug:
http://projects.blender.org/tracker/index.php?func=detail&aid=19732&group_id=9&atid=125
Test page with images

目次
- 1 Chapter 3: Object Manipulation and Basic Animation
- 1.1 Undo
- 1.2 The 3D Cursor
- 1.3 Adding Objects
- 1.4 Getting Oriented
- 1.5 Moving, Rotating and Scaling Objects
- 1.6 Manipulators
- 1.7 Gestures
- 1.8 Duplication
- 1.9 Moving On
- 1.10 Empties
- 1.11 Parenting
- 1.12 Snapping
- 1.13 Animation and Keys
- 1.14 Working in the Ipo Window
- 1.15 Layer Management
- 1.16 Constraints
- 1.17 Finishing Up
- 1.18 Rendering for Animation
Chapter 3: Object Manipulation and Basic Animation
By Roland Hess
In this tutorial, you'll learn about object creation, manipulation and organization in Blender, as well as different techniques of object-level animation. In this tutorial, we will be make a model of a molecule that will allow us to experiment with different methods of creating motion through animation.
Use Ctrl-X to begin a clean session of Blender.
At this point, it wouldn't be a bad idea to review the interface elements for changing the 3D view (Numpad-1, 3, and 7 for front, side and top view; Numpad-5 to toggle into and out of perspective mode; Z-key to toggle shaded view, as well as the MMB and scroll wheel to freely zoom and rotate the view. If you haven't already worked through Chapter 2: The Basic Interface, now would be a good time to do so). Once you're done getting your 3D legs, its time to start creating your molecule.
First, you must get rid of the default cube. If your zooming about in the previous paragraph has resulted in the default objects being off screen, press the Home key and Blender will auto-zoom the view so that all objects are visible again. Now, press Numpad 7 to move into a top view.
Select the default camera by placing the cursor over it and pressing the Right Mouse Button (RMB). Many new users are thrown off by this unconventional selection method (many programs use the Left button for selection). Learn, right now, that RMB selects in the 3D view. When you RMB the camera, you will see that its outline is highlighted in light pink. This pink outline indicates that the object, in this case the camera, is selected.
RMB the cube and you will see that it is now outlined in pink (selected), while the camera has returned to its original state. Selection in Blender is accumulated like most other programs with which you are familiar, with the Shift key. With the cube still selected, hold down the Shift key and RMB the camera. Keep holding the Shift key and RMB select the default lamp. Your selection has been extended to all three objects: the cube, camera and lamp.
But you don't want all of that to be selected. You only want the cube selected.
Press the A-key. A-key toggles selection on and off for everything. Pressing A-key once selects everything (you can think of it as 'select All'). Pressing it again deselects everything. Do you want to make sure that nothing is selected? Press A-key twice.
Of course, when you just pressed the A-key, everything most likely deselected. Why? Well, remember that by Shift-RMB clicking you had already selected all the objects in the Scene. So, if nothing is selected, you're where you need to be. If instead everything is selected, press the A-key one more time. Get the current scene to a point where nothing is selected. Now, you'll learn one final method of selection.
With your cursor over the 3D window, press the B-key, and watch the cursor become the target of moving crosshairs. These moving guidelines indicate that you are in Border Select mode. Simply LMB click and drag across the 3D window, and any object that falls within the area of the box shape that your dragging creates becomes selected when you release the mouse button. Unlike RMB selection, border select is always cumulative and will add to your previous selection. If you want to use border select to deselect objects, then drag with either the MMB or RMB instead of the LMB.
You might want to try using the B-key and border selecting objects for practice, clearing your selection each time with the A-key.
When you're done, use the selection method of your choice to select only the default cube.
Press the X-key to delete the cube. You will be prompted "OK? Erase selected object(s)". Click the LMB to accept this and erase the cube. Over time, you will probably find that the combined motion of X-key/LMB to delete an object will become second nature, and that you'll probably forget there's a click-through confirmation there.
| Tip:
Right Mouse Button selects in the 3D view. Shift-RMB builds selection. A-key toggles between Select All and Select None. B-key enters border select mode. Dragging with LMB selects. Dragging with RMB/MMB deselects. X-key deletes selected objects. |
Undo
But wait, you didn't want to remove that cube! Why? Well, let's pretend for a second that the cube was in fact a head model that you've just worked on for eight hours straight without saving once. And you accidentally deleted it.
Ctrl-Z, like in many other programs, is Undo. Press Ctrl-Z to bring the cube you just deleted back from the great digital beyond. Ctrl-Shift-Z is the Blender equivalent of Redo, sending the cube back to the netherworld. Unlike other programs, however, there is no menu entry for Undo or Redo, so learning to use the hotkey combination for this one is essential.
The 3D Cursor
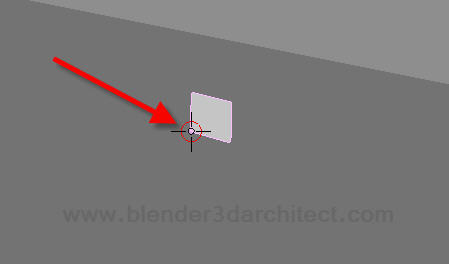
The 'aiming sight' that you've seen hanging around in the 3D view is the 3D cursor. The 3D cursor is where new objects and items will appear when created in the 3D workspace. It can also be used to control how objects rotate and scale.
If you're like most new Blender users, you've mistakenly LMB clicked somewhere in the 3D view, hoping to select something (and select is RMB, remember?). Using LMB in the 3D view sets the location of the 3D Cursor. Before you begin creating your first model, we'd like to make sure that the 3D Cursor is in the center of the 3D world.
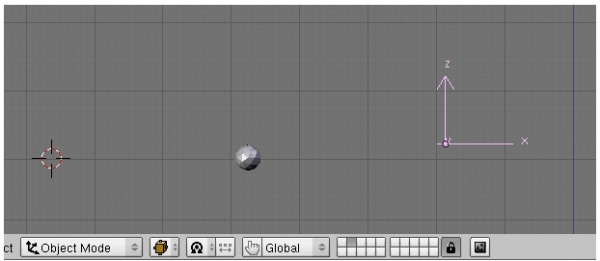
Go into front view (Numpad 1) and LMB as close to the center of the intersection of the blue and red (z and x) axes as you can. The 3D Cursor jumps to the position of your click. Now go into side view (Numpad 3) and LMB once again at the intersection of the blue and green (z and y) axes, if the 3D Cursor isn't already there. Use Numpad 1 to return to a front view. Great. Now you're set.
We wanted you to practice using the LMB to set the 3D Cursor in the previous example, but there's an even easier way to return the 3D Cursor to the origin. Shift-C snaps the 3D Cursor to the center of the 3D world.
| Tip:
LMB in the 3D view sets the location of the 3D Cursor Shift-C centers the 3D Cursor in the global workspace. |
Adding Objects
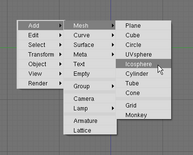
With the cursor over the 3D window, bring up the toolbox by pressing the Spacebar.
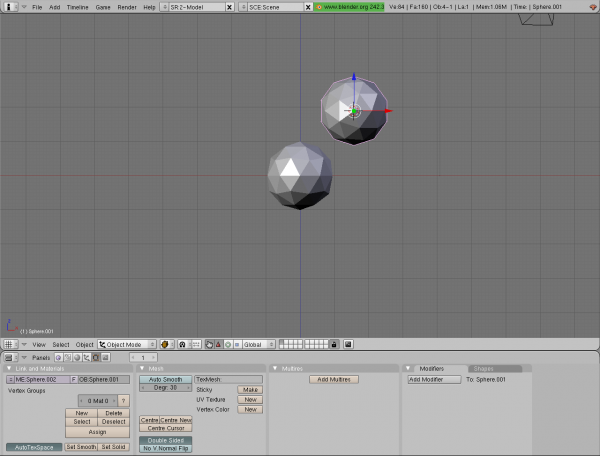
As you can see in the illustration, there are many different kinds of objects you can add to the 3D view, but for this chapter we're going to focus on the Mesh category. From within the Add->Mesh section of the toolbox, choose Icosphere, then click OK when a pop-up says 'Subdivision: 2". You've just added a mesh sphere object to the 3D world, and it has been created at the location of the 3D cursor.
Note: If you've done this, but don't see anything resembling a sphere on your screen, you may be zoomed in or out too far, or have panned the view too far off to one side. Try pressing the Home key, which will auto-zoom and pan the view to show all available objects.
The icosphere will most likely be a lavender or purple color with yellow edges covering its surface. This is because new objects are created in Edit Mode, which allows you to change the mesh's shape and geometry. You won't be dealing with that yet, but you can learn about it in Chapter 4. For now, get out of Edit Mode by pressing the Tab key. When you do it, the mesh lines disappear, the faces turn gray, and the entire object is given a light pink outline. If you'll recall from earlier in the chapter, that pink outline indicates that the icosphere you just created is currently selected.
So, adding a new object does three things:
- Creates a new object wherever the 3D Cursor is;
- Puts the object in Edit Mode (if such a thing is possible for that object. For example, Lamps do not have an Edit Mode);
- And automatically selects the new object.
Just to give you enough examples to work with, your sample atom will have three protons and three neutrons in its nucleus, so you're going to need to create a few more objects. If you just added several more with the spacebar toolbox right now, they would all be created at the location of the 3D cursor, meaning that they would be created in the same space as your first icosphere. Of course, this is a virtual world, so doing this won't hurt anything. It would only make it difficult to keep track of how many objects you have and where they are. You already know how to set the location of the 3D Cursor, so go ahead and reposition it away from the first sphere.
LMB a short distance away from the original icosphere. Then, use the spacebar toolbox to add another icosphere. Don't forget to hit Tab afterward to get out of the default Edit Mode.
Getting Oriented
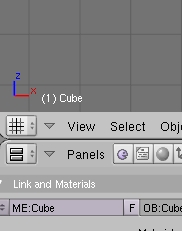
Before you start moving things around, you need to get oriented in 3D space. Use Numpad-1 to make sure you are looking at the scene from the front. Notice the little icon in the lower left of the view: a vertical blue line labeled Z that meets a horizontal red one labeled X.
This icon is to help you remember that the x axis runs left to right, and the z axis runs bottom to top. Press Numpad-3 to move into side view, and you will see that the icon still shows the z axis, but now also shows the y axis. The y axis runs from back to front.
If you're completely new to 3D, a little explanation is in order. An 'axis' is a convenient way to refer to a direction. 3D objects are located by finding their location along each axis. A more detailed explanation is in the discussion section of this chapter if you should need it.
In the illustration, the object is said to be located at (3,2,4), with each of those numbers corresponding to its location along the respective axes (x,y,z).
So, in Blender, the axes are: X: left/right Y: back/front Z: bottom/top
This will have to become second nature to you, and, if you use the keyboard shortcuts for object manipulation and again later for modeling, it will.
Moving, Rotating and Scaling Objects
There are three main things you can do to an object once it has been created. Move it around, rotate it, and change its size (usually called scaling). All together, these kinds of changes are referred to as "transformation".
RMB on one of the icospheres to select it.
To rotate the icosphere, press the R-key. Now start moving the mouse in circles around the icosphere. You will see it rotate to follow your motion. When you're done, RMB will cancel this rotation mode, returning the sphere back to its original orientation. Try it again, by hitting R-key, then rotating, but this time, end the motion with the LMB instead. The sphere leaves rotation mode, but now stays wherever it was when you hit LMB.
This is the main workflow for manipulating objects and using tools in the 3D workspace throughout Blender. A hotkey (R in this case), followed by a mouse motion, ending either with RMB to cancel and return to the previous state, or with LMB, which confirms the change.
Since the R-key triggered a rotation, any guesses as to how to go about scaling an object?
S-key, followed by mouse motion, ending in either LMB (accept) or RMB (cancel). Try scaling one of the spheres. Select it, use S-key, and make it grow to twice the size of the other. LMB to accept the change.
Now, use the same procedure to try to return that icosphere close to its original size. If things get really messed up, remember that you can use Ctrl-Z to Undo.
And finally, movement. In Blender, although R rotates and S scales, it is the G-key that moves objects. G stands for what? Most Blender users think of it as "Grab". If it helps you to remember it, you can too.
Select your icospheres and use the G-key to move them around. Once again, RMB cancels the movement, resetting things to how they were before you pressed G, while LMB accepts the movement.
Now, let's put your knowledge of the axes (x,y,z) to work in conjunction with these basic motion tools.
Using the MMB, click-drag in the 3D window to rotate the view until you have something similar to this (it doesn't really matter as long as you have a nice angled view).
Select one of the icospheres and press G-key to "grab" and start moving. While you're still in Grab mode, moving the sphere around, press the X-key. Suddenly, a line appears through the sphere, running parallel to the X axis, and you find that the object will only move along that line. You have constrained the object's motion to the x axis. Now, without RMB canceling the movement, press the Y-key. The guideline shifts to parallel the Y axis, and the motion is constrained to only front/back. You know what the Z-key will do.
So you see that if you want to move an object up a bit, you select it, press the G-key, then press the Z-key. When you do that, you can be sure that the object will only move up and down. And that's why it's important to learn which axes are which when you are moving things around. You will not always be in one of the straight-on views (front, side, top, etc.), and it can often be essential to be certain of which direction you are moving things.
| Tip:
G-key lets you move (Grab) an object. R-key lets you rotate an object. S-key lets you scale (resize) an object. With these operations, LMB accepts your changes. RMB cancels and returns the object to its original state. While in any of these transformation modes (G/R/S), pressing the X, Y or Z-keys constrains you to transforming along that axis. |
Manipulators
You've eaten your vegetables and learned the main hotkeys for transforming objects in Blender. Let's look at two alternate workflows for doing the same thing that may suit your way of thinking better.
With the 3D window still at an angled view, re-examine the selected sphere.
Those red, blue and green arrows sprouting from the center of the sphere are its translation manipulators. LMB click and drag on the blue arrow head.
The sphere moves along the z axis (vertically). When you release the LMB, the motion stops and the sphere comes to rest in its new location. Try it with the green and red arrow heads. Each one controls translation along a different axis.
Now, take a look at the manipulator controls on the 3D view header.
Each button enables a different manipulator, all of which function the same way: LMB and drag. Particularly useful are the visualizations for the rotation manipulators, which actually show the growing angle as you rotate the object.
Just like holding down the Shift key with RMB builds a selection of 3D objects, holding down Shift while clicking the manipulator buttons in the header builds a selection there as well. In fact, by using Shift-LMB, you can enable all three manipulator types at once, giving you quick access to all transformation features directly in the 3D view.
Give them a try. They might fit the way you work better than the hotkeys. Later on, during character animation and certain kinds of mesh modeling, there are tasks for which the manipulators are very well-suited. Of course, the manipulators are not for everyone, and if you find that you don't care for them and would prefer to have them out of your way, you can. The "pointing finger" icon, shown in the illustration, will turn the manipulators off.
Gestures
Blender also allows users to trigger the basic transformations through mouse gestures. Try this: RMB select one of the spheres. Now, LMB click and drag, slowly carving a circle like this:
When you release the LMB, you will find that the sphere is now in rotation mode as though you had pressed the R-key. Using the LMB again will confirm the rotation, and RMB will cancel it.
The other mouse gestures are:
Some experienced Blender artists swear by the mouse gestures, as they allow them to position and construct their scenes with minimal interaction from the keyboard. They are not for everyone, but definitely worth a try!
Duplication
Back to our atomic example. To make the little atom have the right stuff inside, it will need three protons and three neutrons. You could move the existing icospheres away from the 3D Cursor and add four more from the toolbox. Or, you could make use of what you already have.
RMB select one of the icospheres, then press Shift-D.
Shift-D duplicates the selected objects. The duplicate object is created at the location of the original object, and is put into Grab (move) mode. Move the new object away from the original and press LMB to lock it into position. Note that pushing RMB to cancel Grab mode after duplication does not cancel the duplication. A duplicate will still have been made, but will be "hiding" at the exact location of the original. For that reason, if you accidentally duplicate an object, it's better to get into to the habit of moving it away from the original, LMB, then deleting it with the X-key.
You need a total of six icospheres to make up the atom's nucleus. RMB select one of the icospheres you have so far. Next, use the B-key area selection method to select the other two as well. If you accidentally select the camera or lamp object, you can remove them from the selection by holding down the Shift key and RMB (probably twice) on them until they are no longer outlined in pink. Alternatively, you can press the A-key twice (once to select All, and again to deselect everything), then begin from scratch.
When you have the three icospheres (and nothing else) selected, press Shift-D to duplicate all three at once.
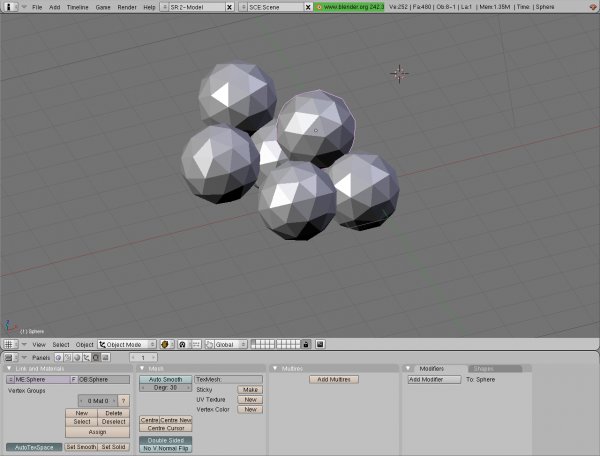
Using different views (Numpad 1,3,7 and MMB drag), the Grab/move tool and the x, y and z movement constraint hotkeys (or the manipulators!), move the six icospheres together to form a nice, messy, nucleus. It doesn't matter if it matches the illustration or not. The point is for you to start to become familiar with the tools you will be using all the time.
| Tip:
Shift-D duplicates selected objects. |
Moving On
At this point, it's best to spell out what goals we would like you to accomplish to get the big picture. You still need to add three electrons and animate them so they fly around the nucleus. It would also be nice to add some sort of animation to the nucleus as a whole, so it's not just sitting there in quantum laziness the entire time.
Before you begin animating, you should adjust your workspace to one more suitable to the task than the one you've been using up to this point. Do you remember from the Interface chapter that Blender's workspace is highly configurable, and that the default installation comes with several different screens, each suited to a different task? Now's the time to start making use of it.
Use the Ctrl-Left Arrow hotkey to change working screens. If you are using the default Blender installation, this hotkey will have placed you in a screen labeled "1-Animation". Alternately, and a little more slowly, you could have chosen that option from the Screens drop down in the main header.
Lots of new stuff here, but no need for panic. In fact, the only really important stuff you'll be dealing with right now is the timeline, the 3d view (which you already know), and something called the Ipo view.
The timeline is pretty self-explanatory. It is the timeline in seconds over which your animation takes place. Controls on the timeline are simple as well. Start and End represent the start and end frames of the animation, and can be changed by clicking on them and entering new values. The "play" button plays your animation in the 3D view. Pressing it again halts animation. The "skip to start/end" buttons do exactly as advertised. LMB dragging within the timeline window plays through any animation you have created in other windows. Moving through an animation by dragging the mouse over a timeline is known as "scrubbing".
The timeline can display either seconds or frames. With the cursor over the Timeline window, the T-key toggles between these display methods. Press the T-key and choose "Frames" for now. (If you're completely new to animation and need an explanation of time in animation and what the term "frame" means, check out the "Frames and Time" sidebar.)
Frames and Time
In animation (and television and film), time is divided into Frames. Each frame is a still image that represents a slice of time. When played one after the other quickly enough, these individual frames give the illusion of motion.
Different media have different frame rates. For most film productions, each second in time is divided into 24 frames. The common terminology is to say that film runs at 24 frames per second.
For North American television (NTSC), the rate is 30 frames per second (fps).
For European TV (PAL format), the rate is 25 fps.
It is important that you know your target media before you begin to animate, as changing the frame rate mid-way through an animation can lead to poor results, as objects and effects animated at a different frame rate will appear unnatural.
Empties
Sometimes, it would be nice to create an object that you can animate or use as a reference, but that you won't need to render. A simple mesh could be used, but it would be even more efficient if there was a type of "placeholder" object. What would something like that be useful for? Well, let's say that you would like to make the entire nucleus of your atom pulsate (shrink and grow repeatedly). Since the nucleus consists of a number of objects, you would like to have a way to only animate such an effect once, as opposed to animating each object individually. In Blender, placeholders to help with such things are called Empties. You create an Empty object, then animate it to grow and shrink. Afterward, you get all the parts of your nucleus to follow that animation.
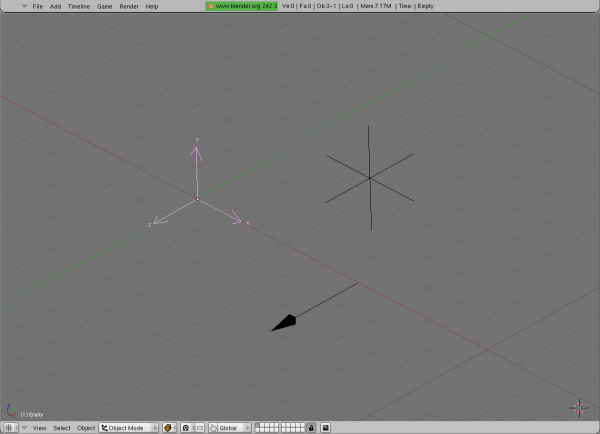
Let's add an Empty to your Scene.
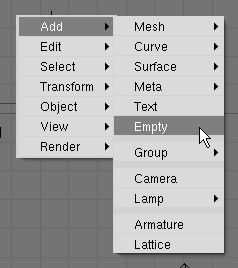
First, to make sure that you can see it clearly when it's created, LMB somewhere away from the icospheres, setting the 3D cursor. Then, use the toolbox to Add->Empty. The Empty appears at the location of the 3D cursor, like any other new object.
Now, let's do your first bit of animation. In Blender, as in most 3D animation programs, animation is accomplished by changing the location, rotation or scale of an object over time. The markers that keep track of these changes are called Keys.
In the Timeline window, make sure that the green time marker that indicates the current time is as far left as it will go. This should put you on Frame 1 of your animation.
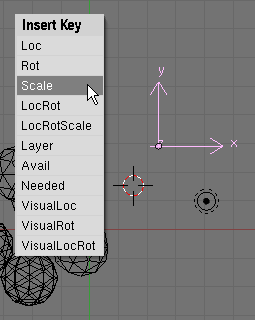
Move the cursor over the 3D window and press the I-key. A menu titled "Insert Key" pops up. Choose "Scale" from the menu, as you are going to only animate the scale of this empty.
Back in the Timeline window, LMB around frame 80, setting Blender's frame counter to 80. Over the 3D window, press the S-key and scale the Empty up to twice its original size. LMB to confirm the change in scale. Now, press the I-key again and choose "Scale."
You will notice that the timeline now contains two small yellow lines, one at the location in time of each key you just set (i.e. one at frame 1, and one around frame 80). Use the LMB to scrub the timeline between these two yellow markers. Watch the 3D view as you do it. You will see the Empty change scale as you scrub back and forth.
As you can see, the Start and End frames for your animation are set to the defaults of 1 and 250, and you need to set a few more keys to fill out the space. Continue positioning the frame counter in the timeline with LMB, then scaling the Empty and inserting Scale keys for it. As you will see, fewer keys in the timeline will result in slower animations, while dense groupings of keys will lead to rapid changes. Remember to press the timeline's play button to have Blender play back your animation for you. Really, it doesn't matter how many keys you insert, or how you decide to scale the empty in this step. If you're the kind of person that needs detailed Instructions though, try setting a new key every twenty frames, alternating between a large scaled empty and a small scaled one.
Note: Another popular method of playing back your animation is to position the cursor over the window you would like to see animated (most likely the 3D view), and pressing Alt-A. Pressing Alt-Shift-A will accomplish the same thing, but will run the animation in all windows on the current screen.
Now you have your Empty shrinking and growing. In the next step, you'll connect the spheres of your nucleus to it.
| Tip:
I-key brings up a menu of available properties on which to set animation keys. Alt-A plays animation in a particular window. |
Parenting
In the real world, children inherit traits from their parents. In the world of 3D graphics, you can give your objects parent-child relationships. A child object will inherit certain characteristics (like scaling) from its parent: if the parent object scales, so will the child. The child can have its own characteristics -- it can move, rotate and scale on its own -- but anything that its parent does, it will do too. So, if you have an Empty with animated scaling like you just created, making that Empty the parent of your sphere nucleus objects should cause them to scale just like it.
Before you do the next bit, let's make sure that nothing is selected. Press the A-key twice to clear any selections that are currently made. Use the method of your choice (RMB, B-key border) to select all the icospheres that make up the nucleus of your atom. Then, holding down the Shift key, RMB select the Empty.
Note: Something we haven't mentioned before is the distinction between "selected" objects and the "Active" object. Notice how the Empty, which was selected last, is a brighter shade of pink than the other selected objects? This brighter selection indicates that the Empty is the "Active" object. The Active object will always be the last one that you select. Having an Active object is important when you will be performing an operation (like Parenting) in which one or more objects will be linked or referenced in some way to a target object. That target will always be the Active object.
So, with all of your icospheres selected, and with the Empty as the Active object, press Ctrl-P and click through the "OK? Make Parent" message that comes up.
The icospheres are now the child objects of the Empty. In some tutorials and references other than this book, they are said to be "parented" to the Empty, even though they are its children. Although that is a common usage, it is technically inaccurate and counterintuitive so we will avoid it here.
RMB select the empty, and use the G-key grab tool to move it around the 3D view (then RMB to cancel the move). The spheres move with it. Use the R-key to rotate the empty and see how the spheres move with it again (then RMB to cancel). RMB select one the icospheres and move it around by itself (don't forget to RMB to cancel the operation). Child objects can still be moved independently, but follow the motion of their parents.
Press the Play button in the Timeline window (or Alt-A over the 3D view) to see how parenting has caused the icospheres to inherit the scaling animation of the Empty.
Weird, huh? The icospheres grow and shrink with the Empty, but their distance from the Empty changes as well. That's not what you wanted. What is happening is that the children are changing size, but they are changing size as though they and the parent Empty are all one large object, growing and shrinking overall. Let's change this so it works correctly. If you wanted to, you could repeatedly use Undo (Ctrl-Z) to back step until the parenting relationship is removed.
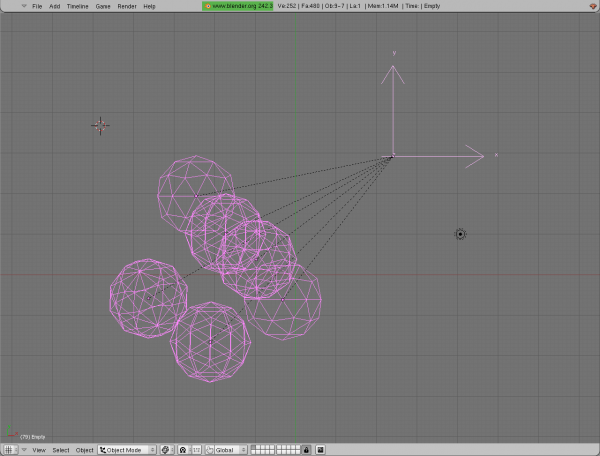
Instead, select the icospheres and press Alt-P. An "OK?" menu pops up, with "Clear Parent" already selected. LMB to accept this (or you can press Enter on your keyboard for the same effect). The dashed lines that had been an indicator of the parent-child relationship have disappeared, showing that the spheres are no longer the children of the Empty.
To get the correct effect this time, you would like to put the empty in the middle of your nucleus, so that when it grows and shrinks, the nucleus will follow it properly. You could just use the G-key to position the Empty somewhere near the middle, but there is a more accurate way.
| Tip:
Ctrl-P creates a parent-child relationship between objects, with the Active object as the parent. Alt-P breaks the parent-child link of a selected child object. |
Snapping
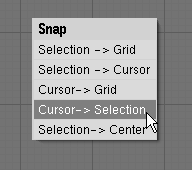
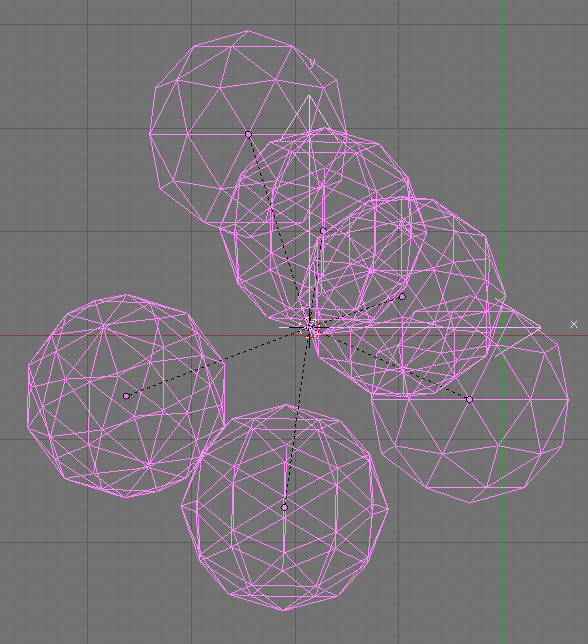
Select the icospheres of the nucleus. Press Shift-S. A "Snap" menu pops up, with five options. There are only two that you should really be concerned with: "Selection to Cursor" and "Cursor to Selection". Select "Cursor to Selection". This option places the 3D cursor at the center of the current selection.
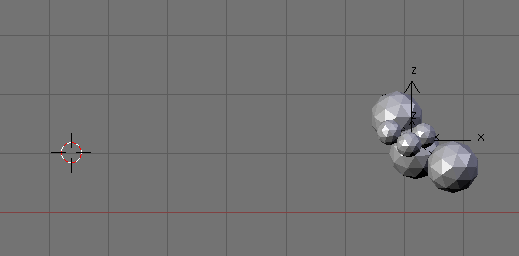
So, how do you get the Empty to the exact center of the nucleus? Select the Empty (only the Empty, nothing else!), press Shift-S and this time choose "Selection to Cursor". This option moves any selected objects to the location of the 3D cursor.
You can see then that the workflow for precision movement in Blender is a two step process. First, position the 3D cursor via selection and Snap "Cursor to Selection". Then, Select the object you wish to position and Snap "Selection to Cursor".
In the example above, you've used the Snap menu to position your animated Empty in the center of the nucleus icospheres.
Use B-key to select the icospheres. The Empty, which was selected in the previous step, remains selected and is, in fact, the Active object, as you can see by its brighter color. (If the Empty is not the Active object, hold down the Shift key and RMB click it to make it so.)
With the icospheres selected and the Empty as the Active object, press Ctrl-P to create a parent relationship.
Scrub the mouse back and forth in the timeline. This time, the scaling of the whole nucleus functions as you had hoped. At this point, if you wanted some extra practice, you could create a new Empty and animate it to pulse in a different fashion from the first. Then, you could make half the spheres the children of this new empty, leaving the others as the children of the original. This would create a more complex and hopefully more interesting animation.
| Tip:
Shift-S brings up the Snap menu. |
Animation and Keys
Let's get a little more acquainted with Blender's system for creating keys for animation. To do this, you will add an electron to your atom and make it travel around the nucleus.
Before you do anything else, let's make sure that you are looking at your atom from the front - if you aren't, then some of the following examples will not quite work. Use Numpad-1 to go to a front view.
LMB to the left of the nucleus, setting the 3D cursor there, so that your electron is created at a good location. Use the spacebar toolbox to add an icosphere. Remember to use the Tab key after the object is created, to get out of Edit Mode. Really, you can add any kind of object you choose to experiment with, but our illustrations will use the icosphere. With the S-key, shrink the icosphere so it's a bit smaller than the ones already in the nucleus.
Make sure Blender's frame counter is set to 1 (use the Timeline view for this) and that only the electron is selected. Press the I-key and choose "Loc" (Location) from the Insert Key menu that pops up.
LMB in the timeline to set the frame counter to somewhere around 60. Use G-key to move the electron to a position above the nucleus in the 3D view. Insert another location key.
Skip ahead to around frame 120, move the electron to the right of the nucleus and insert a location key. Finally, skip to around frame 180, move the electron below the nucleus and insert a key.
Press the play button in the timeline or use Alt-A over the 3D view to play your animation.
| Tip:
I-key brings up the Insert Key menu, which lets you set animation keys for the Active object. |
You'll see that this animation is not satisfactory for two reasons. First, the electron follows more of a diamond shaped path around the nucleus than a circle. Second, the electron stops below the nucleus, instead of continuing back through to its starting point.
First, let's round out the path that the electron follows. With the electron selected, press the K-key. Three olive-colored copies of the icosphere appear, one at each of the locations where we had set a key. The K-key toggles the display of keys in the 3D view.
Scrub with the LMB in the timeline until the electron is halfway between the left and upper keys.
If you try to use the G-key at this point, you will find that the icosphere does not move. This is because in this key view mode your transformations like move, rotate and scale only work on already set keys, not the actual object.
So, let's add a new key here, then move it to create a better circular path. Use I-key, and select "Loc" as before to insert a new key. Then with the G-key, move the key up and to the left. You will see the electron object move too, but this is only a result of moving the key. You are not moving the electron directly.
Now, as you scrub back and forth in the timeline, you can see the motion for this part of the animation is much closer to circular. Using LMB to move through the timeline, set new keys halfway between the other keys that have already been set, moving them slightly to make the entire animation more circular.
You have fixed the first problem with your animation. As you're finished with Key mode for the moment, use the K-key to exit that mode, hiding the keys in the 3D view. Let's move on to the second problem, which is that you would like the electron to end in the exact place it begins.
| Tip:
K-key toggles Key mode in the 3D view, which allows you to see and adjust key transformations directly. |
Working in the Ipo Window
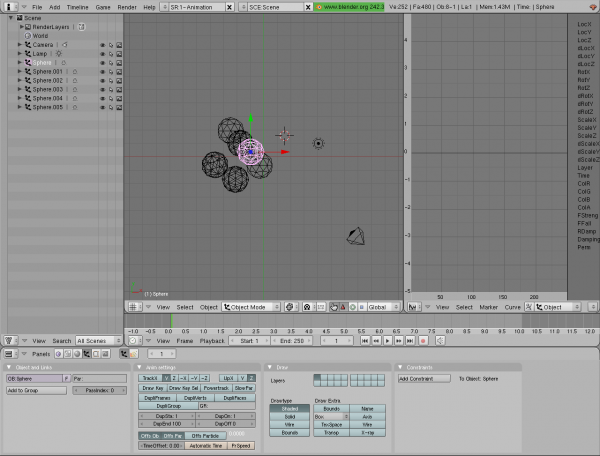
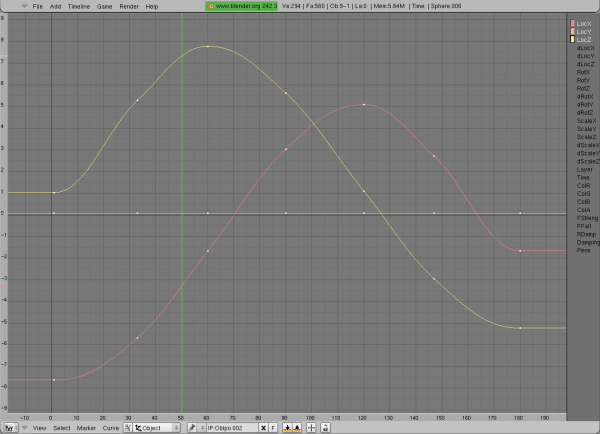
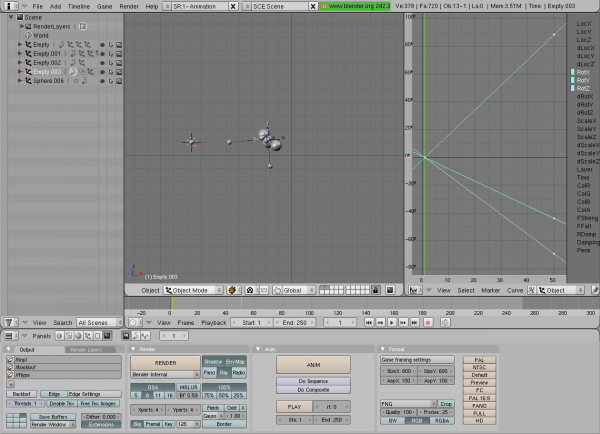
Let's finally take a look at the Ipo window, shown in the illustration. The first thing to do is to make sure that your orbiting electron is selected in the 3D view. Then, place the mouse over the Ipo window and press the Home key. Recall that in the 3D view, the Home key zooms and translates the view so that every existing object becomes visible. It does the same thing in the Ipo window.
The curves in this window represent the object's motion through space. You can see that there are three curves, each color coded to match one of the labels on the window's legend at the right. (If instead of colored curves you see a bunch of vertical yellow lines and gray curves, press the K-key. We'll explain in a moment.)
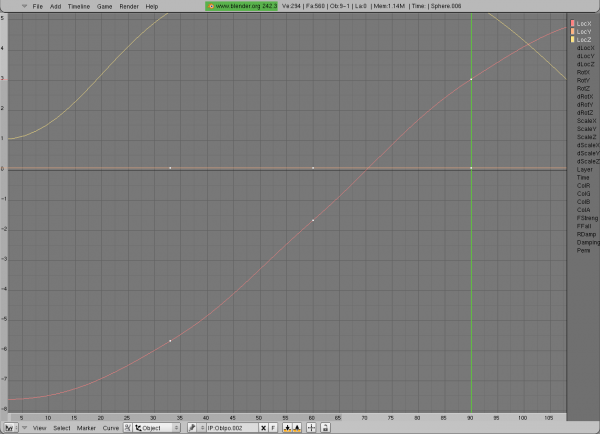
If you look along the bottom of the Ipo window, the ascending numbers indicate frames. Along the left side of the window is another scale that indicates values (locations in this case). So, LMB somewhere in the Ipo window to move the frame counter to that frame, just like the Timeline window. Use LMB to place the frame indicator line near frame 50. The legend on the right of the window tells you that LocZ (Location on the Z axis) is represented by yellow. In the Ipo window, then, find where the vertical frame indicator crosses the yellow curve. Look to the left-hand scale to see the approximate value of that orange curve at the intersection. In the illustration, it appears to be around seven.
This means that at frame 50, the Z location value for the selected object is close to seven.
Remember how objects are created in the 3D view in Edit Mode, which allows you to change their shape and geometry? When working with 3D objects, you have always used the Tab key to return to Object mode. As with 3D objects, the Tab key also lets you enter and exit Edit mode on Ipo curves.
RMB on the LocZ (yellow) curve to select it (RMB functions as select in more than just the 3D view). Now, press the Tab key.
Users who are completely new to 3D probably aren't going to need to directly edit these Ipo curves for a while, but suffice it to say that the same tools that worked in the 3D view (Grab, Scale, RMB select, etc.) all work for editing and moving the points along the curves. Users who do want to edit curves directly like this will be helped by pressing the N-key, which pops up a panel that allows examination of and changes to the actual numeric values of the curve points.
You don't really need to edit anything here. The point is to show you that the curves are editable on a very fine level, if you should ever need to do so. Now that you've noted that, press the Tab key again to leave Edit Mode.
When we left the example, your first electron only went three quarters of the way around the nucleus. You would like it to end up exactly where it started so the circle is complete. Of course, you could just move it with the G-key and set a key frame, hoping to hit the same spot. Or, if you remembered the snapping functions of the 3D cursor, you could set the frame counter to 1, snap the 3D cursor to the electron; then advance to frame 250, snap the electron to the 3D cursor and set another key.
But just to demonstrate the use of the Ipo window, we'll accomplish the task there.
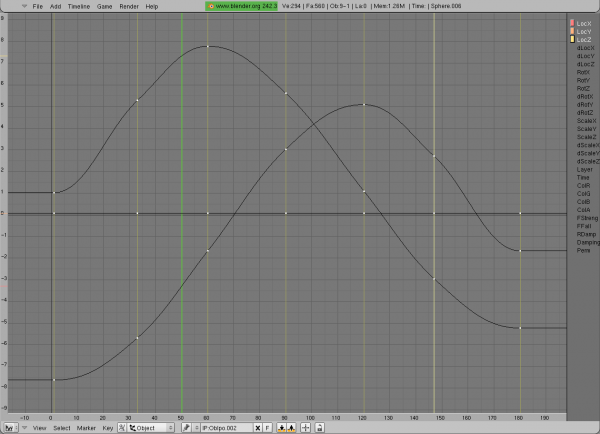
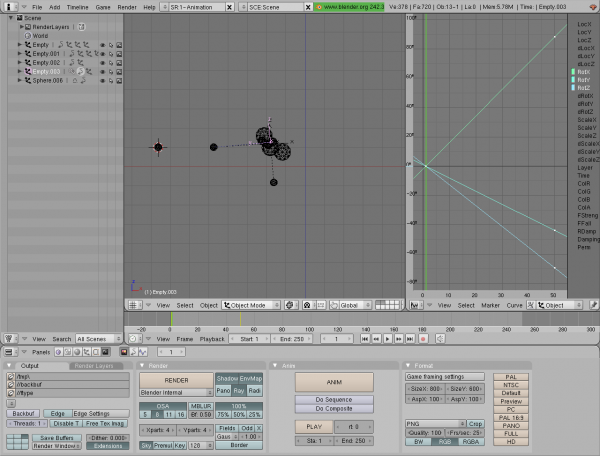
The Ipo view has another visualization mode - one that shows vertical markers on every keyframe. Just like the K-key showed keyframe markers in the 3D view, it does so in the Ipo window as well. Press the K-key, and your Ipo view changes to something like this:
Each of those dull yellow vertical lines indicates that there is a key set on that frame. You're going to do some work in the window now, so use the mouse's scroll wheel to zoom the window out a bit. You'll need some unused space on either side of the first and last keyframes.
Select the vertical keyframe marker that sits on frame 1 by RMB clicking on it. Its yellow becomes brighter, indicating that it is selected. Recall that Shift-D duplicated an object in the 3D view. Press Shift-D with the key marker selected and the same thing happens: the set of keys marked by the selected line are duplicated and put into Grab mode. Move that Grabbed line to the right until it is over the indicator for frame 250, the last one in the animation.
You will notice as you move the line that a readout at the bottom of the window tells you how far you have moved. As you move the line, and before you use LMB to confirm the move, try holding down the Ctrl key. You will see that instead of moving smoothly, the line moves in steps, one whole number at a time. Using the Ctrl key during a transformation constrains the transform to operating in nice even steps, and can be very useful, for example, when trying to move something exactly 250 frames.
So now that you've duplicated the location keys from the first frame and moved them to frame 250, your animation starts and begins in the same place, meaning that it will work seamlessly if played in a loop.
| Tip:
Ipo curves are a graphical representation of each animated value of an object. Ipo curves can be worked with and transformed like any other Blender object, using the Tab key, RMB for selection, Shift-D for duplication and G-key and S-key for movement and scaling. K-key toggles between curve view and key view. |
Layer Management
Most creative programs, 2D and 3D, have the ability to group objects by layers. Layers can help you to keep your workspace organized. Imagine a large scene based on a tourist attraction that includes a parking lot with cars, grass, a monument and models of people. When working on the monument portion of the scene, having the cars, grass and people cluttering the 3D view can be distracting and make work more difficult than it needs to be. If you put each set of objects into its own layer, it becomes possible to easily hide or show any set of objects as you need to work with them.
Let's create another electron, then start practicing with layers.
Select the already-existing electron and use Shift-D to create a duplicate, moving it about halfway toward the nucleus before using LMB to accept the move. Look at the Ipo window for this newly created and selected object. It contains the exact same animation curves as the original object. In fact, both the original and the duplicate object are linked to the same Ipo curves, meaning that if you were to play the animation right now, the duplicate object would immediately jump to the same position as the original and follow it exactly throughout the timeline. Obviously, you don't want that to happen.
To remove the link between your newly duplicated object and the old animation curve information, click the "X" beside the "IP: ObIpo.001" drop down menu in the Ipo window header. (If the dropdown doesn't appear on your Ipo header like it does in the illustration, try MMB dragging the header to the left to show additional header items.) This drop down menu contains all of the sets of animation curves you have created so far, including the scaling animation you did earlier with the nucleus' Empty parent. The "ObIpo.001" is just the name of this particular set of Ipo curves and can be changed to something relevant like "electronOrbit" if you so choose. In any case, clicking the "X" beside the name removes the link between your new object and the Ipo curves, freeing it up for other purposes.
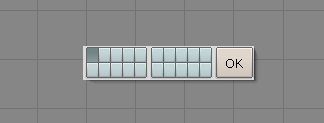
Placing the mouse cursor back over the 3D view, press the M-key. A little grid of twenty boxes and a large Okay button appear. Press the number 2 on your main keyboard (NOT the one on the Numpad), and hit Enter. The electron disappears. We'll find it in a moment.
Begin to RMB on the nucleus until you have the nucleus' parent Empty selected. Shift-D to duplicate the Empty and RMB again to cancel any movement of the duplicate. At this point our duplicate Empty is selected, but resting in exactly the same position as the original. Press the M-key, followed by 2 again, and Enter.
You may (or may not) suspect that you've just sent these two objects (the electron and the new Empty) to Layer 2 of your scene.
Each Scene in Blender in comprised of twenty layers. An object can exist on several layers at once. You can set Blender to display any combination of layers that you need to see. In your current scene, the nucleus and first electron exist by default on Layer 1. You have placed the new Empty and second electron on Layer 2. Let's find them.
LMB on the button in the 3D window header that corresponds to Layer 2. Immediately, Layer 1 objects disappear and Layer 2 objects are shown. LMB on the Layer 1 button to go back to the original view. Like other selectors in the computer world, you can build a selection or take away from it by holding down the Shift key while selecting. Hold the Shift key and LMB on the Layer 2 block. Now, both Layer 1 and Layer 2 are showing.
Remember when you sent the objects to Layer 2? You simply used the number 2-key on the keyboard. That works here as well, and it would be a good idea to get in the habit of using the number keys to address layers. Just for fun, press the 1-key, then the 2-key. It has exactly the same effect as clicking on the buttons in the 3D view header. Now, hold down Shift while you press the 1 and 2-keys. It adds to and subtracts from the layer selection, just like the mouse clicks.
Sending objects to another layer is as simple as selecting the object, pressing the M-key to bring up the Move-to-Layer widget, then selecting the target layer and hitting okay. As with the earlier example, you can also use the number keys to assign a layer and the Enter key to accept the changes, meaning that you can keep your mouse cursor focused on your work. In fact, you will probably get to the point where layer assignment and selection is second nature - your fingers will just hit the right keys when you decide you want to work on a different layer.
| Tip:
Layers control which objects are displayed in the 3D view. Layers can be turned on and off either with their number keys or by clicking on the buttons. The Shift key adds to and takes away from layer selection. M-key in the 3D view pops up a layer button selector that is used to send objects to other layers. |
Now that we've covered the basics of working with layers, let's look at a different method of making your new electron circle around the nucleus. This way builds on things we've already covered, and adds one more trick.
Using either the mouse, or the 2-key, show only layer 2 of your Scene.
Select the Empty. Before you do anything else, remember that this Empty is a duplicate of the one in the middle of your nucleus, meaning that it is still linked to the same scaling animation you made before. Go over to the Ipo window header, like you did with the duplicate electron, and break the link by LMB clicking on the "X" next to the Ipo name.
Now, make sure that you are on Frame 1. Use I-key and set a "Rot" (Rotation) key for the Empty. Pick a frame further on in the animation, say, 50 or so. Rotate the Empty along several axes, making it a fairly significant rotation from the original. Place another rotation key. If you like, play back the animation (Play in the timeline or Alt-A) to see the Empty do its rotation.
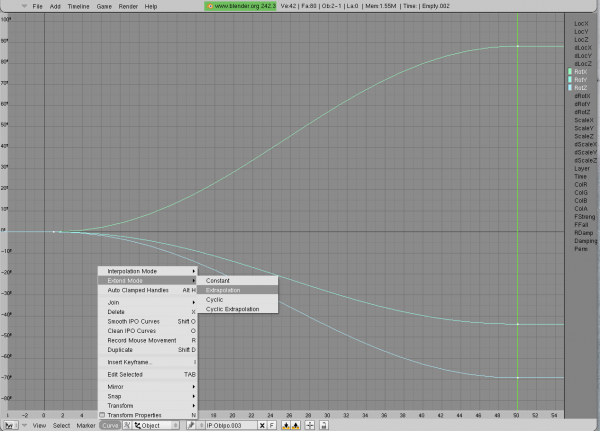
Now, switch your focus to the Ipo window, and use the Home key to make sure that it shows you everything that's available. You will see three curves, each representing the Empty's rotations along different axes. Use the A-key to make sure all the curves are selected (selected curves have white key points; unselected have black).
From the "Curve" menu in the Ipo window header, choose "Extend Mode", then "Extrapolation". On either side of the outermost keys, the curves turn into straight lines extending off into infinity. What does this mean? Play the animation now. The empty continues to rotate, even after the last frame with a key - Blender is extrapolating a continued animation based on the keys you had previously set.
Part two of this bit of animation is very simple. Return the frame counter to Frame 1. Select the electron, followed by the Empty (both should be selected, with Empty as the Active object). Use Ctrl-P to make the electron the child of the Empty. Play the animation and smile. That was easy.
Constraints
Before we end this basic discussion, we'll look at one more method of animating objects in Blender. This one doesn't even use key frames.
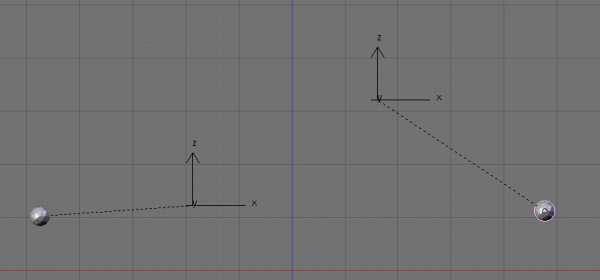
Return the animation to Frame 1. Duplicate both the Empty and the electron. You can select them both and use Shift-D, which creates two new objects with the same parent-child relationship as the originals. When you duplicate the objects, move them away from the others a bit so you have room to work.
RMB on the new electron and move it so its position relative to the new Empty is different than that of the original's, but try to keep it about the same distance.
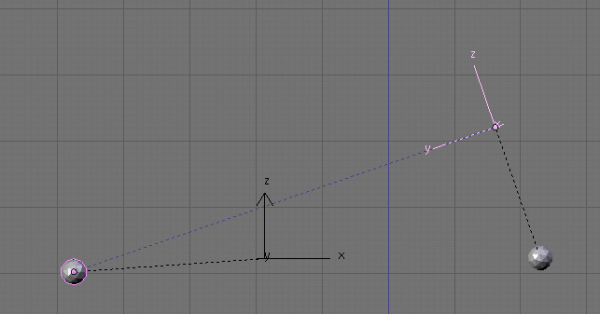
Now, RMB select the original electron, then hold down Shift and RMB on the new Empty. If you do it correctly, both the original electron and the new Empty will be selected, but the Empty will be the Active object (brighter pink). Use the keyboard combination "Ctrl-Alt-C", and a menu titled "Add Constraint to Active Object" will pop up. From this menu, choose "Track To".
Instantly, the empty rotates so that it points toward the original electron, moving its child with it.
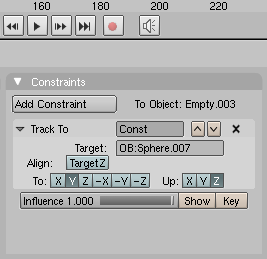
What you've just done is added something called a "constraint" to the Empty. Constraints are mostly used in Blender to limit or change locations, sizes and rotations of objects. In the case of the "Track To" constraint you just added, the constraint changes the rotation of the constrained object (the Empty) so that it always points to the target object (the original electron).
Notice in the buttons window below the 3D view how a Track To constraint has been added to the Constraints panel.
You could have used the "Add Constraint" button in this panel to do the same thing you've just done in the 3D view, but you would have had to fill in the proper object name in the panel's "OB:" field to get things to link up properly. Using selections and the Ctrl-Alt-C hotkey builds the constraint for you automatically.
| Tip:
Ctrl-Alt-C brings up the Constraint menu, which adds a constraint to the Active object, using the other selected object as its target. |
What is the final effect? Move the new empty back to its original position (just using G to move it by hand will surely be close enough, but if you'd like to practice your precision movement, you can always use the Shift-S snap method described earlier). Play the animation.
The new Empty rotates, without any keys, so that it always points to ("tracks") the electron to which it is constrained. Its child electron, in turn, follows the Empty's rotation, most likely generating some neat orbital motion.
Finishing Up
Use Shift-1 (or Shift LMB on the layer 1 button) to add Layer 1 back to the display. Play the animation to see it in all its silly glory. While the animation is playing, you'll learn one more trick.
Let the animation run, and as it plays, try using the MMB-drag in the 3D view that you've used before to rotate your view. It works while the animation plays back! The other view translation controls work as well, although you'll have to use Ctrl-MMB for zoom, as the scroll wheel won't work in this mode.
Now that you've made three protons, three neutrons and three electrons in orbit, you have yourself a finished atom. If you would prefer to have some more practice, add some objects to the nucleus and toss in some more electrons until you have the element of your choice.
Rendering for Animation
In the Interface chapter, you rendered a still of the default cube which was, without a doubt, thrilling. Since you've just animated a nucleus, let's render it and watch it move.
On the far right of the 3D window's header (you may have to MMB-drag the header to see it) is a small Render icon. LMB click it.
Almost instantly, the render window appears with a preview image of the Scene, drawn in whatever style (solid/wireframe) and from whatever perspective the 3D window is using. This sort of preview render (technically, it's called an "OpenGL" render) can be triggered from any 3D view by LMB on the render icon in its header.
Now, Ctrl-LMB on the same render icon. This time, the preview seems to animate, albeit slowly. What it's really doing is creating 250 OpenGL preview images and saving them somewhere (secret!) on your hard drive. If you don't feel like waiting for this to happen, you can cancel it (or any render, even one with a single frame) by pressing the Esc key.
When it has finished making the preview renders, you can press the Esc key to go back to the main Blender window. From there, find the Scene buttons (F10), and press Play.
A new window opens and your animation will play in a continuous loop.
Okay, that was the fast, crummy OpenGL preview render. It's great for checking your animation to make sure that everything is moving correctly, but not nearly suitable as a final product.
Chapter 12 contains full instructions for rendering animations to disk, so we're just going to take a shortcut here:
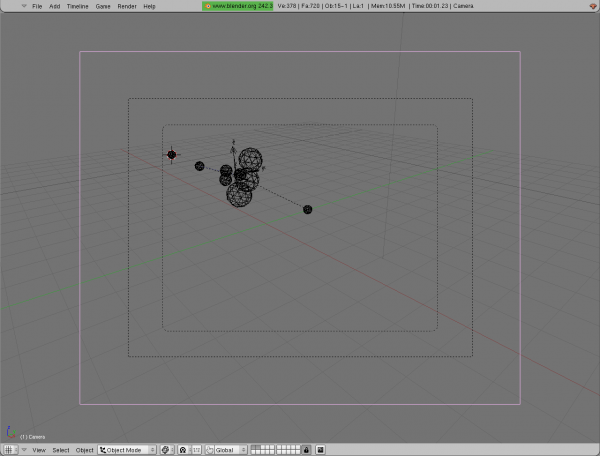
Zoom outward in the 3D view until you can see the Camera. RMB select it. Now, with the mouse still over the 3D view, press Numpad-0 to switch to the view from the camera.
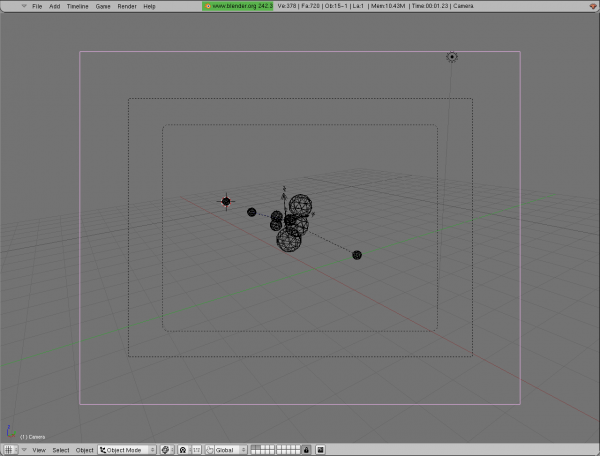
The outer solid border in this view represents the camera object itself and should be pink. If it's not, then you may not have the camera selected (just RMB on the solid border to select it). At the moment, your atom is most likely not in the center of the camera's view. Press the R-key twice to put the camera into an "aiming" mode and fiddle around by moving the mouse until your atom seems to be reasonably in the center of things.
If you're up for it, and you have some time to kill, press the Anim button in the Scene buttons (F10). Blender will begin to actually render your scene, frame by frame. Even on a speedy computer, this will take several minutes, so go get yourself a drink.
When it's done, press the play button again to see the finished, rendered animation.
It doesn't look so hot, does it? Even rendered. Don't despair - you haven't learned modeling yet, or materials. Or lighting for that matter. But you know the basics of working with Blender objects and animation now, so the rest will come easily.
| Previous: Chapter 3 2 | Next: Chapter 4 1 |
