Doc:2.6/Manual/Animation/Editors/Graph/FCurves
Page status (reviewing guidelines)
Text
move direction of time?
|
F-Curves
Once you have created keyframes for something, you can edit their corresponding curves. In Blender 2.5, IPO Curves have been replaced by F-Curves, however, editing these curves is essentially still the same.
The concept of Interpolation
When something is "animated," it changes over time. In Blender, animating an object means changing one of its properties, such as its X location, or the Red channel value of its material diffuse color, and so on, during a certain amount of time.
As mentioned, Blender's fundamental unit of time is the "frame", which usually lasts just a fraction of a second, depending on the frame rate of the scene.
As animation is composed of incremental changes spanning multiple frames, usually these properties ARE NOT manually modified frame by frame, because:
- it would take ages!
- it would be very difficult to get smooth variations of the property (unless you compute mathematical functions and type a precise value for each frame, which would be crazy).
This is why nearly all direct animation is done using interpolation.
The idea is simple: you define a few Key Frames, which are multiple frames apart. Between these keyframes, the properties' values are computed (interpolated) by Blender and filled in. Thus, the animators' workload is significantly reduced.
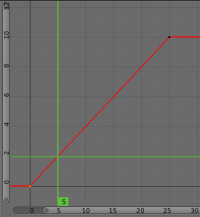
For example, if you have:
- a control point of value 0 at frame 0,
- another one of value 10 at frame 25,
- linear interpolation,
then, at frame 5 we get a value of 2.
The same goes for all intermediate frames: with just two points, you get a smooth growth from 0 to 10 along the 25 frames.
Obviously, if you’d like the frame 15 to have a value of 9, you’d have to add another control point (or keyframe)…
Settings
F-curves have three additional properties, which control the interpolation between points, extension behavior, and the type of handles.
Interpolation Mode
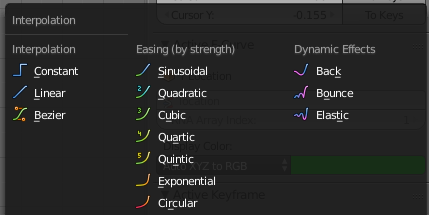
You have three choices (T, or Key » Interpolation Mode):
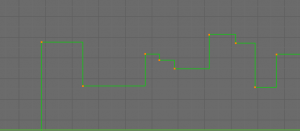
- Constant
- There is no interpolation at all. The curve holds the value of its last keyframe, giving a discrete (stairway) “curve”. Usually only used during the initial "blocking" stage in pose-to-pose animation workflows.
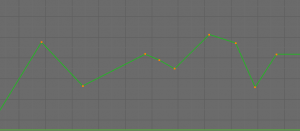
- Linear
- This simple interpolation creates a straight segment between each neighbor keyframes, giving a broken line. It can be useful when using only two keyframes and the Extrapolation extend mode, to easily get an infinite straight line (i.e. a linear curve).
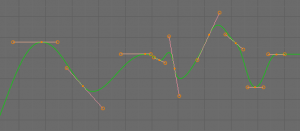
- Bezier
- The more powerful and useful interpolation, and the default one. It gives nicely smoothed curves, i.e. smooth animations!
Remember that some Fcurves can only take discrete values, in which case they are always shown as if constant interpolated, whatever option you chose.
Additional interpolation modes
Also now there are availabled additional interpolation modes:
- Easing (by strenght)
- The different methods of easing intrpolations for F-Curve segment.
- Sinosuidal
- Sinusoidal easing (weakest, almost linear but with a slight curvature).
- Quadratic
- Quadratic easing.
- Cubic
- Cubic easing.
- Quartic
- Quartic easing.
- Quintic
- Quintic easing.
- Exponential
- Exponential easing (dramatic)
- Circular
- Circular easing (strongest and most dynamic)
- Dynamic Effects
- Some dynamic interpolations between two keyframes on F-Curve.
- Back
- Cubic easing with overshoot and settle.
- Bounce
- Exponentially decaying parabolic bounce, like when objects collide.
- Elastic
- Exponentially decaying sine wave, like an elastic band.
- Easing
- The way in which ends of the segment between this and the next keyframe easing interpolation is applied to
- Automatic Easing
- Easing type is chosen automatically based on what the type of interpolation used (e.g. ‘Ease In’ for transitional types, and ‘Ease Out’ for dynamic effects).
- Ease In
- Only on the end closest to the next keyframe.
- Ease Out
- Only on the end closest to the first keyframe.
- Ease In and Out
- Segment between both keyframes.
Extrapolation
(⇧ ShiftE, or Channel » Extrapolation Mode)
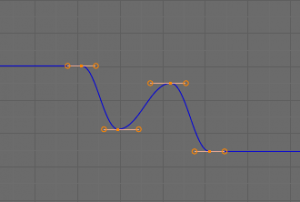
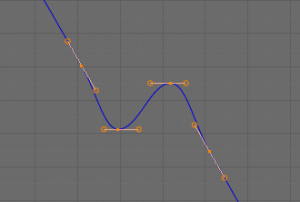
Extrapolation defines the behavior of a curve before the first and after the last keyframes.
There are two basic extrapolation modes:
- Constant
- The default one, curves before their first keyframe and after their last one have a constant value (the one of these first and last keyframes).
- Linear
- Curves ends are straight lines (linear), as defined by their first two keyframes (respectively their last two keyframes).
Additional extrapolation tools (e.g. the "Cycles" F-Modifier) are located in the F-Curve Modifiers
Handle Types
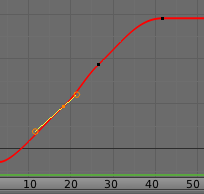
There is another curve option quite useful for Bézier-interpolated curves. You can set the type of handle to use for the curve points V
- Automatic
- Keyframes are automatically interpolated
- Vector
- Creates linear interpolation between keyframes. The linear segments remain if keyframe centers are moved. If handles are moved, the handle becomes Free.
- Aligned
- Handle maintain rotation when moved, and curve tangent is maintained
- Free
- Breaks handles tangents
- Auto Clamped
- Auto handles clamped to not overshoot
Direction of time
Although F-curves are very similar to Bézier curves, there are some important differences.
For obvious reasons, a property represented by a Curve cannot have more than one value at a given time, hence:
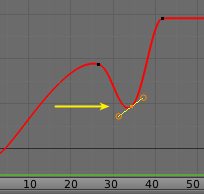
- when you move a control point ahead of a control point that was previously ahead of the point that you are moving, the two control points switch their order in the edited curve, to avoid that the curve goes back in time
- for the above reason, it's impossible to have a closed Ipo curve
