Doc:2.6/Manual/3D interaction/Transform Control/Proportional Edit
Proportional Edit
Proportional Edit is a way of transforming selected elements (such as vertices) while having that transformation affect other nearby elements. For example, having the movement of a single vertex cause the movement of unselected vertices within a given range. Unselected vertices that are closer to the selected vertex will move more than those farther from it (i.e. they will move proportionally relative to the location of the selected element). Since proportional editing affects the nearby geometry, it is very useful when you need to smoothly deform the surface of a dense mesh.
Sculpting
Blender also has Sculpt Mode that contains brushes and tools for proportionally editing a mesh without seeing the individual vertices.
|
Object mode
Mode: Object mode
Hotkey: O
Menu: Via the icon in the header indicated by the yellow square in the below image. ![]()
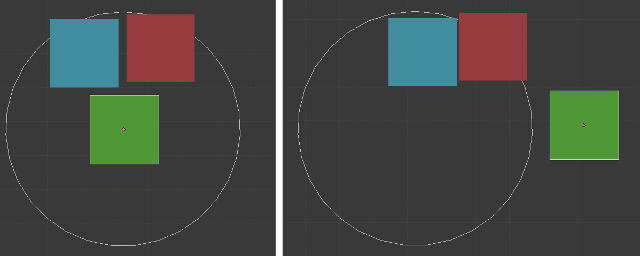
Proportional editing is typically used in Edit mode, however, it can also be used in Object mode. In Object mode the tool works on entire objects rather than individual mesh components. In the image below, the green cube is the active Object, while the red and blue cubes are located within the proportional edit tool's radius of influence. When the green cube is moved to the right, the other two cubes follow the movement.
Edit mode
Mode: Edit mode
Hotkey: O / AltO / ⇧ ShiftO
Menu: Mesh » Proportional Editing and via the highlighted icon in the below image
![]()
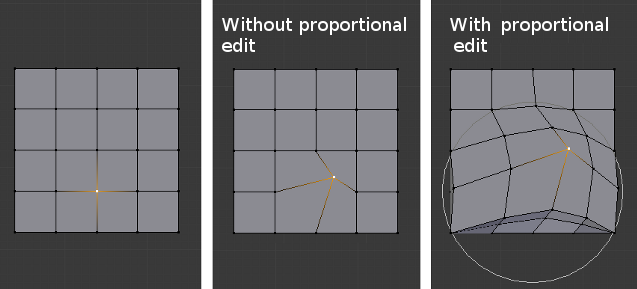
When working with dense geometry, it can become difficult to make subtle adjustments to the vertices without causing visible lumps and creases in the model’s surface. When you face situations like this the proportional editing tool can be used to smoothly deform the surface of the model. This is done by the tool's automatic modification of unselected vertices within a given range.
Influence
You can increase or decrease the radius of the proportional editing influence with the mouse wheel WheelUp ![]() /WheelDown
/WheelDown ![]() or PageUp/PageDown respectively. As you change the radius, the points surrounding your selection will adjust their positions accordingly.
or PageUp/PageDown respectively. As you change the radius, the points surrounding your selection will adjust their positions accordingly.
Options
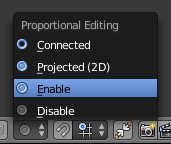
The Proportional Editing mode menu is on the 3D View header.
- Disable (O or AltO)
- Proportional Editing is Off, only selected vertices will be affected.
- Enable (O or AltO)
- Vertices other than the selected vertex are affected, within a defined radius.
- Projected (2D)
- Depth along the view is ignored when applying the radius.
- Connected (AltO)
- Rather than using a radius only, the proportional falloff spreads via connected geometry. This means that you can proportionally edit the vertices in a finger of a hand without affecting the other fingers. While the other vertices are physically close (in 3D space), they are far away following the topological edge connections of the mesh. The icon will have a grey center when Connected is active. This mode is only available in Edit mode.
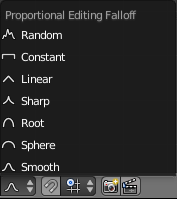
- Falloff
- While you are editing, you can change the curve profile used by either using the Mesh » Proportional Falloff submenu, using the toolbar icon (Falloff menu), or by pressing ⇧ ShiftO to toggle between the various options.
Examples
Switch to a front view (1 NumPad) and activate the grab tool with G. As you drag the point upwards, notice how nearby vertices are dragged along with it. When you are satisfied with the placement, click LMB ![]() to fix the position. If you are not satisfied, cancel the operation and revert your mesh to the way it looked before with RMB
to fix the position. If you are not satisfied, cancel the operation and revert your mesh to the way it looked before with RMB ![]() (or Esc).
(or Esc).
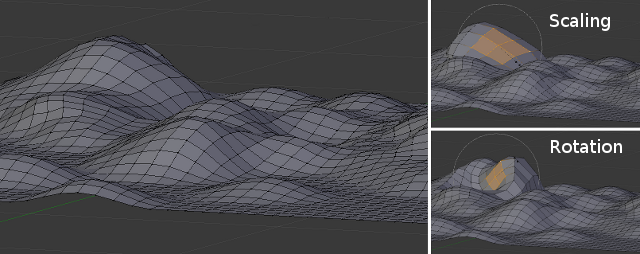
You can use the proportional editing tool to produce great effects with the scaling (S) and rotation (R) tools, as A landscape obtained via proportional editing shows.
Combine these techniques with vertex painting to create fantastic landscapes. The final rendered landscape image below shows the results of proportional editing after the application of textures and lighting.
