Doc:2.6/Manual/Animation/Techs/Shape/Shape Keys/Animating
目次
Animating Shape Keys
Mode: Object mode
Panel: Shape Keys panel > Object Data context > Properties window, Graph Editor window
Hotkey: I over F-curves edit area in Graph Editor, I over of any animable settings in Shape Keys panel > Insert Keyframe
Menu: Key » Insert Keyframes... in Graph Editor header
Even though the animation of relative and absolute shape keys is quite different, there are a few things worth to be noted, valid for both types:
- As nearly every animation in Blender, it is based on keyframing and F-curves.
- As the Shape Keys datablock can become an KeyAction, you can also use shape keyactions and the NLA editor to animate your shapes.
- And obviously, you can use all "indirect" techniques affecting/controlling F-curves, like e.g. drivers – for example, to animate the muscles of your character automatically from its armature’s bones…
Each shape key, except "Basis", creates an animation channel.
Note that:
- The first created shape key is special. As its name (
Basis) states it, it don't have own F-curve and channel. - You cannot add shape keys from the Graph Editor (only the keyframes on exist ones).
- A keyframes for the shape keys can be created at any frame.
- Consequently, shape keys are always added with Shape Keys panel in Object Data context of Properties window.
- You add relative or absolute shape keys exactly the same way – as said above, you can switch between both behaviors to your liking.
Animating Relative Shape Keys
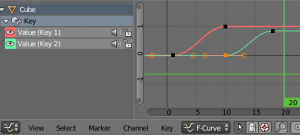
The basic key idea behind relative shape keys animation is animating Value setting which are the influence of each key and simply defines when and to what extent a key affects the resulting shape. This implies that several shape keys can affect an object at the same time (unlike with absolute keys).
The Basis key defines the (default) “rest” state, when all other keys have a null influence. This is the only key which is not animatable.
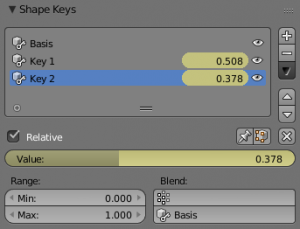
All other keys have an influence that are presented Value option in the Shape Keys panel — the standard range is [0.0, 1.0] (from null to full influence), but you can have higher or lower values, which sets Min and Max settings of Range option, giving “over-deformed” or “reversed-deformed” results. This influence is animatable by standart keyframing technique and through a F curve, one for each key (except the Basis one…).
For keyframing animating a shape key with Shape Keys panel:
- Go to the first frame "0" on Timeline.
- Select a need shape key in Shape Keys panel.
- Click RMB
 on its Value option and select Insert Keyframe from drop-down list.
 - Go to a need frame on Timeline where you want this shape is gained full or defined other influence.
- Define a need influence amount for this shape key (in range Min and Max settings of Range option).
- Click RMB
 on its Value option and select Insert Keyframe from drop-down list.
Then, you may to play this shape key animation with AltA.
Note that:
- It seems that Blender automatically detects vertices that do not change at all between a shape key and its basis, and always gives them a null influence (i.e. they will never affect the resulting shape). For simple cases, this avoid you the need of defining and using the “blending” vertex groups (see also examples).
- You can control which vertices are affected (and to what extent) by a given shape key, using vertex groups (see more about Vertex Group setting of Blend option in Shape Keys panel for relative shape keys).
- For a given key, you can chose a different basis shape than the default
Basisone (again, see about the Shape used a relative keysetting of Blend option in Shape Keys panel for relative shape keys). The vertex group influence control might be most useful in this case! - You can also to animate Min and Max settings of Range option for several purposes.
For editing the exists animation you can:
- Using similar way above with Timeline and Shape Keys panel for insert another keyframes on another frames on Timeline or remove/replace exists keyframed values for animated shape key.
- Editing already keyframed shape keys F-curves in Graph Editor.
- Editing timing shape keyframes in Shape Key Editor mode of Dope Sheet Editor. The Shape Key Editor mode is intended only for animating the relative shape keys.
- Combining, timing and synchronization KeyActions as any actions in NLA Editor.
Animating Absolute Shape Keys
Animating Absolute Shape Keys very similar with animation Relative ones, except:
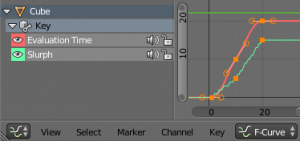
- There are keyframed only Evaluation Time and Slurph options. You can not change shape key influence values.
- The Shape Key Editor mode isn't using for for animating the absolute shape keys.
Using Pose markers with Shape Keys animating
Animated shape key can be signed as a pose with pose marker in Shape Key Editor mode of Dope Sheet Editor. This allows to work with shape keys as poses and gives some additional selection and navigation tools.
See more details about pose markers here.


