Doc:2.6/Manual/3D interaction/Transform Control/Pivot Point/3D Cursor
3D Cursor as Pivot
Mode: Object mode and Edit mode
Hotkey: .
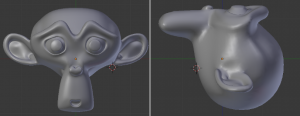
The 3D cursor is the most intuitive of the pivot points. With the 3D cursor selected as the active pivot point (from either the Window Header or via the . hotkey), simply position the 3D cursor and then do the required transformation. All rotation and scaling transformations will now be done relative to the location of the 3D cursor. The image below shows the difference when rotating an Object from its starting position (first panel) 90 degrees around the median point (second panel) and 90 degrees around the 3D cursor (third panel).
Read more about selecting different pivot points »
Positioning the 3D cursor
There are a few methods to position the 3D cursor.
Direct placement with the mouse
- Using LMB
 in the 3D area will place the 3D cursor directly under your mouse pointer. For accuracy you should use two perpendicular orthogonal 3D views, i.e. any combination of top (7 NumPad), front (1 NumPad) and side (3 NumPad). That way you can control the positioning along two axes in one view and determine depth in the second view.
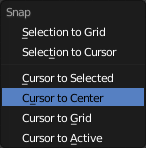
The Snap menu (⇧ ShiftS or Object/Mesh » Snap) will allow you to snap the cursor in the following ways:
- Cursor to Selected: snaps the cursor to the currently selected vertex, edge or face. In Object mode this option will snap the cursor to the center of the currently selected Object.
- Cursor to Center: snaps the cursor to the origin point of the grid (location 0,0).
- Cursor to Grid: snaps the cursor to the nearest visible part of the grid.
- Cursor to Active: snaps the cursor to the active (last selected) object, edge, face or vertex.
The Cursor to Selected option is also affected by the number of elements in the selection and the current pivot point. For example, with several elements selected and the Bounding Box Center pivot point active, the Cursor to Selected option will snap the 3D cursor to the:
- Center of the bounding box surrounding the objects' centers in Object mode or the center of the bounding box surrounding the selected vertices when in Edit mode.
When the Median Point pivot point is selected, Cursor to Selected will snap the 3D cursor to:
- The median of the object centers in Object mode and the median of the selected vertices in Edit mode.
Numeric input
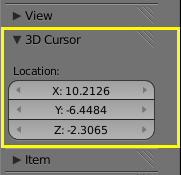
The 3D cursor can also be positioned by entering Numeric location values into the 3D cursor panel of the Properties shelf (N).


