利用者:Jaredr122/Doc:2.6/Manual/Animation/Editors/Graph/FCurves
Page status (reviewing guidelines)
Text
axis range
|
Working with F-Curves
Once you have created keyframes for something, you can edit their corresponding curves. In Blender 2.5, IPO Curves have been replaced by F-Curves, however, editing these curves is essentially still the same.
The concept of Interpolation
When something is "animated," it changes over time. In Blender, animating an object means changing one of its properties, such as its X location, or the Red channel value of its material diffuse color, and so on, during a certain amount of time.
As mentioned, Blender's fundamental unit of time is the "frame", which usually lasts just a fraction of a second, depending on the frame rate of the scene.
As animation is composed of incremental changes spanning multiple frames, usually these properties ARE NOT manually modified frame by frame, because:
- it would take ages!
- it would be very difficult to get smooth variations of the property (unless you compute mathematical functions and type a precise value for each frame, which would be crazy).
This is why nearly all direct animation is done using interpolation.
The idea is simple: you define a few Key Frames, which are multiple frames apart. Between these keyframes, the properties' values are computed (interpolated) by Blender and filled in. Thus, the animators' workload is significantly reduced.
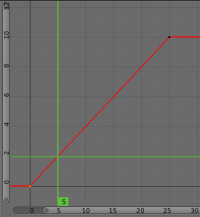
For example, if you have:
- a control point of value 0 at frame 0,
- another one of value 10 at frame 25,
- linear interpolation,
then, at frame 5 we get a value of 2.
The same goes for all intermediate frames: with just two points, you get a smooth growth from 0 to 10 along the 25 frames.
Obviously, if you’d like the frame 15 to have a value of 9, you’d have to add another control point (or keyframe)…
Interpolation and Extrapolation settings
F-curves have three additional properties, which control the interpolation between points, extension behavior, and the type of handles.
Interpolation Mode
You have three choices (T, or Curve » Interpolation Mode):
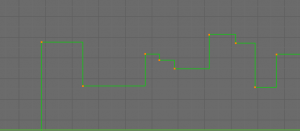
- Constant
- There is no interpolation at all. The curveconstantly have the value of its last keyframe, giving a discrete (stairway) “curve”. Very seldom useful.
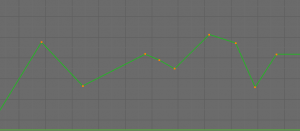
- Linear
- This simple interpolation creates a straight segment between each neighbor keyframes, giving a broken line. It can be useful when using only two keyframes and the Extrapolation extend mode, to easily get an infinite straight line (i.e. a linear curve).
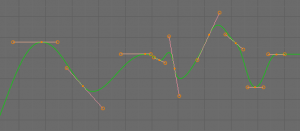
- Bezier
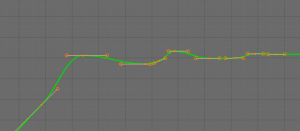
- The more powerful and useful interpolation, and the default one. It gives nicely smoothed curves, i.e. smooth animations!
Remember that some Fcurves can only take discrete values, in which case they are always shown as if constant interpolated, whatever option you chose.
Extrapolation
Extrapolation defines the behavior of a curve before the first and after the last keyframes.
There are two basic extrapolation modes, (⇧ ShiftE, or Channel » Extrapolation Mode):
- Constant
- The default one, curves before their first keyframe and after their last one have a constant value (the one of these first and last keyframes).
- Linear
- Curves ends are straight lines (linear), as defined by their first two keyframes (respectively their last two keyframes).
Additional extrapolation tools are located in the F-Curve Modifiers
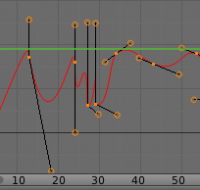
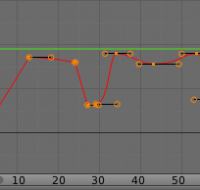
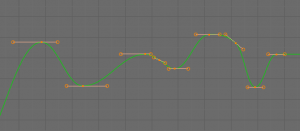
Handle Types
There is another curve option quite useful for Bézier-interpolated curves. You can set the type of handle to use for the curve points V
- Automatic
- Keyframes are automatically interpolated
- Vector
- Creates linear interpolation between keyframes. The linear segments remain if keyframe centers are moved. If handles are moved, the handle becomes Free.
- Aligned
- Handle maintain rotation when moved, and curve tangent is maintained
- Free
- Breaks handles tangents
- Auto Clamped
- Auto handles clamped to not overshoot
Direction of time
Although F-curves are very similar to Bézier curves, there are some important differences.
For obvious reasons, a property represented by a Curve cannot have more than one value at a given time, hence:
- when you move a control point ahead of a control point that was previously ahead of the point that you are moving, the two control points switch their order in the edited curve, to avoid that the curve goes back in time
- for the above reason, it's impossible to have a closed Ipo curve
Curve Selection
By default, when you add keyframes to a channel, the Graph Editor displays them in Edit Mode. Just like in the 3D View, you can toggle the editability of a channel by pressing ⇆ Tab. In the Channel Box, the lock icon also toggles between edit and "non-edit" mode.
Selection Tools
You can select curve handles clicking LMB ![]() (or ⇧ ShiftLMB
(or ⇧ ShiftLMB ![]() for multiple. You can select an entire key by selecting the center point, or just select one the handles
for multiple. You can select an entire key by selecting the center point, or just select one the handles
You can also (de)select all visible curves with A (or Select » Select/Deselect All), and do a border-selection with B (or Select » Border Select) – simple LMB ![]() click-and-drag to add to the selection, and RMB
click-and-drag to add to the selection, and RMB ![]() (or CtrlAltLMB
(or CtrlAltLMB ![]() ) to remove from the selection.
) to remove from the selection.
- Select All A
- In edit mode, select/deselect all keyframes
- In locked mode, select/deselect all visible channels
- Invert Selection CtrlI
- Inverts selected keys
- Border Select B
- Allows selection of keyframes within a region
- Border Axis Range AltB
- Axis Range...
- Border (include Handles CtrlB
- Include Handles, handles tested individually against the selection criteria
- Columns on Selected Keys K
- Select all keys on same frame as selected one(s)
- Column on current Frame CtrlK
- Select all keyframes on the current frame
- Columns on selected Markers ⇧ ShiftK
- Select all keyframes on the frame of selected marker(s)
- Between Selected Markers AltK
- Select all keyframes between selected markers
- Before Current Frame [
- Select all keys before the current frame
- After Current Frame ]
- Select all keys after the current frame
- Select More Ctrl+ NumPad
- Grow keyframe selection along Fcurve
- Select Less Ctrl- NumPad
- Shrink keyframe selection along Fcurve
- Select Linked L
- Selects all keyframes on Fcurve of selected keyframe
Editing Curves
Transformations
You can grab (G), rotate (R) and scale (S) the selected curves (those visible, with white control points/keyframes) – operations also available from the Curve » Transform sub-menu.
Additionally, for translation and scaling, you can lock the transformation along the X (time) or Y (value) axis, as usual by hitting X or Y during transformation.
Transform Properties
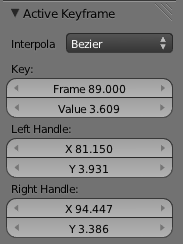
For precise control of keyframe position and value, you can enter values in the Active Keyframe section of the Properties Panel.
Snapping
You also have the classic “transform snapping” features: holding Ctrl while transforming will snap it to one-frame/one-value steps, while holding ⇧ Shift will slow down the movement, increasing its precision. Note however that using ⇧ ShiftCtrl just slows down the movement, without reducing the snapping steps.
(⇧ ShiftS or Key » Snap) You can snap keyframes in several ways:
- Current Frame
- This option will move all selected keyframes to the currently active frame.
- Cursor Value
- This option will move the selected keyframes to the current position of your 2d cursor in the graph editor.
- Nearest Frame
- This will horizontally (timely) move all keyframes of the selected curves to their nearest frame (e.g. a keyframe defined at frame 23.2 will be moved at frame 23).
- Nearest Second
- This will horizontally (timely) move all slected keyframes of the selected curves to their nearest full second (e.g. a keyframe between 00:02 and 00:03 seconds will move to either 00:02 or 00:03 depending on which is nearer).
- Nearest Marker
- This will horizontally (timely) move all keyframes of the selected curves to the marker nearest to them (see also Markers).
- Flatten Handles
- This is only useful with the default F-curves: it will rotate all control points of the selected curves to set them horizontal.
Auto-snap
Auto snap is another way of constraining keyframe position. The selection box in the header allows you to set how keyframes behave when you move them
- Nearest Marker
- Snap x-axis to marker positions
- Nearest Frame
- Snap to frames (default)
- Time Step
- Snap to 1.0 frame/second intervals
- No auto-snap
- Disable auto snapping
Copying
You can copy one or more keyframes into a buffer, and then paste them into the same curves. This is done through two header buttons:
- The “copy” CtrlC button (down arrow) copies the selected and visible curves into the buffer.
- The “paste” CtrlV button (up arrow) pastes the buffer content into the corresponding visible curves of the current channel.
Note that this tool is not working (even though available) in “keyframe” mode. And in edit mode, only the selected points are copied/pasted (not the whole curve…).
You can also Duplicate keys through the Key menu.
Deleting
To delete a keyframe, select it (in “default” mode), and hit X (or use Curve » Delete).
Mirror
You can mirror the selected curves (⇧ ShiftM or Curve » Mirror), either Over Current Frame (i.e. the green cursor), Over Vertical Axis (i.e. frame 0), or Over Horizontal Axis (i.e. value 0.0).
Cleaning
O (or Curve » Clean Keyframes menu entry) Cleaning keyframes resets keyframe tangents to theier auto-clamped shape, if they have been modified.
Smoothing
(AltO or Curve » Smooth Keys)
There is also an option to smooth the selected curves , but beware: its algorithm seems to be to divide by two the distance between each keyframe and the average linear value of the curve, without any setting, which gives quite a strong smoothing! Note that the first and last keys seem to be never modified by this tool.
Sampling and Baking Keyframes
- Sample Keyframes ⇧ ShiftO
- Sampling a set a keyframes replaces interpolated values with a new keyframe for each frame.
- Bake Curves AltC
- Baking a curve replaces it with a set of sampled points, and removes the ability to edit the curve.
