「Doc:2.6/Manual/Modeling/Curves/Editing」の版間の差分
(→Curve Editing) |
細 (1版 をインポートしました) |
(相違点なし)
| |
2018年6月29日 (金) 04:43時点における最新版
Curve Editing
This page covers the basics of curve editing. Curve basics, selecting and advanced editing are covered in the following pages:
Curve Display
Display Options
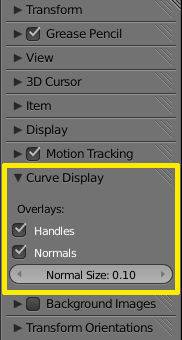
When in Edit mode, the Properties Shelf (N) contains options in the Curve Display panel for how curves are displayed in the 3D viewport.
- Handles
- Toggles the display of Bezier handles while in edit mode. This does not affect the appearance of the curve itself.
- Normals
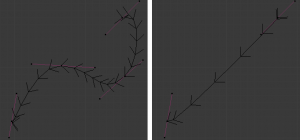
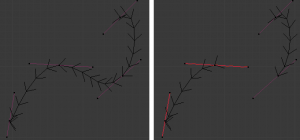
- Toggles the display of Curve Normals.
- Normal Size
- Sets the display scale of curve normals.
Hiding Elements
When in Edit mode, you can hide and reveal elements from the display. This can be useful in complex models with many elements on the Screen.
- Hide Selected elements
- Use H, or the Curve » Show/Hide » Hide Selected menu option from the 3D window header.
- Show Hidden elements
- Use AltH, or the Curve » Show/Hide » Show Hidden menu option from the 3D window header.
- Hide Unselected elements
- Use ⇧ ShiftH, or the Curve » Show/Hide » Hide Unselected menu option from the 3D window header.
Basic Curve Editing (translation, rotation, scale)
Mode: Edit mode
Hotkey: G/R/S
Menu: Curve » Transform » Grab/Move, Rotate, Scale, …
Like other elements in Blender, Curve control points can be grabbed/moved (G), rotated (R) or scaled (S) as described in the Basic Transformations section. When in Edit mode, proportional editing is also available for transformation actions.
Snapping
Mode: Edit mode
Panel: Curve Tools (Editing context)
Mesh snapping also works with curve components. Both control points and their handles will be affected by snapping, except for within itself (other components of the active curve). Snapping works with 2D curves but points will be constrained to the local XY axes.
Deforming Tools
Mode: Edit mode
Menu: Curve » Transform
The To Sphere, Shear, Wrap and Push/Pull transform tools are described in the Transformations sections. The two other tools, Tilt and Shrink/Fatten Radius are related to Curve Extrusion.
Smoothing
Mode: Edit mode
Hotkey: W » smooth
Curve smoothing is available through the specials menu. For Bézier curves, this smoothing operation currently only smooths the positions of control points and not their tangents. End points are also constrained when smoothing.
Mirror
Mode: Edit mode
Hotkey: CtrlM
Menu: Curve » Mirror
The Mirror tool is also available, behaving exactly as with mesh vertices,
Set Bézier Handle Type
Mode: Edit mode
Panel: Curve Tools » Handles
Hotkey: V
Menu: Curve » Control Points » Set Handle Type
Handle types are a property of Bézier curves. and can be used to alter features of the curve. For example, switching to Vector handles can be used to create curves with sharp corners. Read the Bézier curves page for more details.
Extending Curves
Once a curve is created you can add new segments (in fact, new control points defining new segments), either by extruding, or placing new handles with CtrlLMB ![]() clicks. Each new segment is added to one end of the curve. A new segment will only be added if a single vertex, or handle, at one end of the curve is selected. If two or more control points are selected, a new Bézier closed curve is started.
clicks. Each new segment is added to one end of the curve. A new segment will only be added if a single vertex, or handle, at one end of the curve is selected. If two or more control points are selected, a new Bézier closed curve is started.
Unlike mesh editing, you cannot create a new curve inside the edited object by CtrlLMB ![]() -clicking without any control points selected. to do so, you can cut an existing curve in two parts (by deleting a segment), copying an existing one (⇧ ShiftD), or add a new one through the menu.
-clicking without any control points selected. to do so, you can cut an existing curve in two parts (by deleting a segment), copying an existing one (⇧ ShiftD), or add a new one through the menu.
Subdivision
Mode: Edit mode
Panel: Curve Tools (Editing context)
Hotkey: W
Menu: Curve » Segments » Subdivide
Curve subdivision simply subdivides all selected segments by adding one or more control points between the selected segments. To control the number of cuts, press W to make a single subdivision. Then press F6 to bring up the Number of Cuts menu.
Duplication
Mode: Edit mode
Hotkey: ⇧ ShiftD
Menu: Curve » Duplicate
This command duplicates the selected control points, along with the curve segments implicitly selected (if any). The copy is selected and placed in Grab mode, so you can move it to another place.
Joining Curve Segments
Mode: Edit mode
Hotkey: F
Menu: Curve » Make Segment
Two open curves can be combined into one by creating a segment between the two curves. To join two separated curves, select one end control point from each curve then press F. The two curves are joined by a segment to become a single curve.
Additionally, you can close a curve by joining the endpoints but note that you can only join curves of the same type (i.e. Bézier with Bézier, NURBS with NURBS)
Separating Curves
Mode: Edit mode
Hotkey: P
Menu: Curve » Separate
Curve objects that are made of multiple distinct curves can be separated into their own objects by selecting the desired segments and pressing P. Note, if there is only one curve in a Curve object, pressing P will create a new Curve object with no control points.
Deleting Elements
Mode: Edit mode
Hotkey: X or Del
Menu: Curve » Delete...
The Erase pop-up menu of curves offers you three options:
- Selected
- This will delete the selected control points, without breaking the curve (i.e. the adjacent points will be directly linked, joined, once the intermediary ones are deleted). Remember that NURBS order cannot be higher than its number of control points, so it might decrease when you delete some control point. Of course, when only one point remains, there is no more visible curve, and when all points are deleted, the curve itself is deleted.
- Segment
- This option is somewhat the opposite to the preceding one, as it will cut the curve, without removing any control points, by erasing one selected segment.
- This option always removes only one segment (the last “selected” one), even when several are in the selection. So to delete all segments in your selection, you’ll have to repetitively use the same erase option…
- All
- As with meshes, this deletes everything in the object!
Opening and Closing a Curve
Mode: Edit mode
Hotkey: AltC
Menu: Curve » Toggle Cyclic
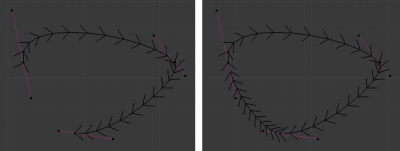
This toggles between an open curve and closed curve (Cyclic). Only curves with at least one selected control point will be closed/open. The shape of the closing segment is based on the start and end handles for Bézier curves, and as usual on adjacent control points for NURBS. The only time a handle is adjusted after closing is if the handle is an Auto one. (Open curve) and (Closed curve) is the same Bézier curve open and closed.
This action only works on the original starting control-point or the last control-point added. Deleting a segment(s) doesn’t change how the action applies; it still operates only on the starting and last control-points. This means that AltC may actually join two curves instead of closing a single curve! Remember that when a 2D curve is closed, it creates a renderable flat face.
Switch Direction
Mode: Edit mode
Hotkey: W » 2 NumPad
Menu: Curve » Segments » Switch Direction, Specials » Switch Direction
This command will “reverse” the direction of any curve with at least one selected element (i.e. the start point will become the end one, and vice versa). This is mainly useful when using a curve as path, or using the bevel and taper options.
Converting Tools
Converting Curve Type
Mode: Edit mode
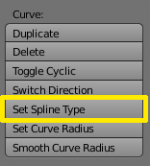
Panel: Curve Tools»Set Spline type
You can convert splines in a curve object between Bézier, NURBS, and Poly curves. Press T to bring up the Toolshelf. Clicking on the Set Spline Type button will allow you to select the Spline type (Poly, Bézier or NURBS).
Note, this is not a “smart” conversion, i.e. Blender does not try to keep the same shape, nor the same number of control points. For example, when converting a NURBS to a Bézier, each group of three NURBS control points become a unique Bézier one (center point and two handles).
Convert Curve to Mesh
Mode: Object mode
Hotkey: AltC
Menu: Object » Convert to
There is also an “external” conversion, from curve to mesh, that only works in Object mode. It transforms a Curve object in a Mesh one, using the curve resolution to create edges and vertices. Note that it also keeps the faces and volumes created by closed and extruded curves.
Convert Mesh to Curve
Mode: Object mode
Hotkey: AltC
Menu: Object » Convert to
Mesh objects that consist of a series of connected vertices can be converted into curve objects. The resulting curve will be a Poly curve type, but can be converted to have smooth segments as described above.
Curve Parenting
Mode: Edit mode
Hotkey: CtrlP
You can make other selected objects children of one or three control points CtrlP, as with mesh objects.
Select either 1 or 3 control points, then CtrlRMB ![]() another object and use CtrlP to make a vertex parent.
another object and use CtrlP to make a vertex parent.
Hooks
Mode: Edit mode
Hotkey: CtrlH
Menu: Curve » control points » hooks
Hooks can be added to control one or more points with other objects.
Set Goal Weight
Mode: Edit mode
Menu: W » Set Goal Weight
- Set Goal Weight
- This sets the “goal weight” of selected control points, which is used when a curve has Soft Body physics, forcing the curve to "stick" to their original positions, based on the weight.
目次
- 1 Curve Editing
- 1.1 Curve Display
- 1.2 Basic Curve Editing (translation, rotation, scale)
- 1.3 Snapping
- 1.4 Deforming Tools
- 1.5 Mirror
- 1.6 Set Bézier Handle Type
- 1.7 Extending Curves
- 1.8 Subdivision
- 1.9 Duplication
- 1.10 Joining Curve Segments
- 1.11 Separating Curves
- 1.12 Deleting Elements
- 1.13 Opening and Closing a Curve
- 1.14 Switch Direction
- 1.15 Converting Tools
- 1.16 Curve Parenting
- 1.17 Hooks
- 1.18 Set Goal Weight
